How to use the Trello Add Card feature from your desktop system tray
When you want to work as efficiently as possible with Trello on macOS, the Quick Card feature is the way to go.

I’m all about working smarter, not harder. This should always apply to project management because, otherwise, things can get out of hand. When you have a project with many moving parts, numerous teams and a never-ending stream of tasks, even the act of opening Trello, navigating to the project board and adding a new card can become cumbersome.
SEE: Hiring kit: Project manager (TechRepublic Premium)
That’s one area where the Trello desktop app comes in handy. I’ll preface this by saying it’s not perfect and really only removes a couple of steps from the process. But, those missing steps can add up. Besides, anything you can do to simplify your workflow should be considered a must.
One feature included with the Trello desktop app is the ability to add a new card from the Quick Card feature. This feature is found in the system tray on Linux and Windows and the menubar on macOS.
If you’re using macOS, you must first enable the feature. But once you have this working, it does make using Trello on your desktop significantly more efficient. Let me show you how to configure and use the Trello desktop app on macOS, so you can use the Quick Card feature.
Jump to:
What you’ll need to work with the Trello desktop app system tray
The only thing you’ll need is the Trello desktop app installed on a macOS device and connected to your Trello account. You can use either a free or paid Trello plan, as the feature is available to both.
If you haven’t already installed the free Trello desktop app, you can find it in the Mac App Store. Open the App Store, search for Trello, click Get and then click Install. That’s all there is to the installation.
How to enable Quick Card on macOS
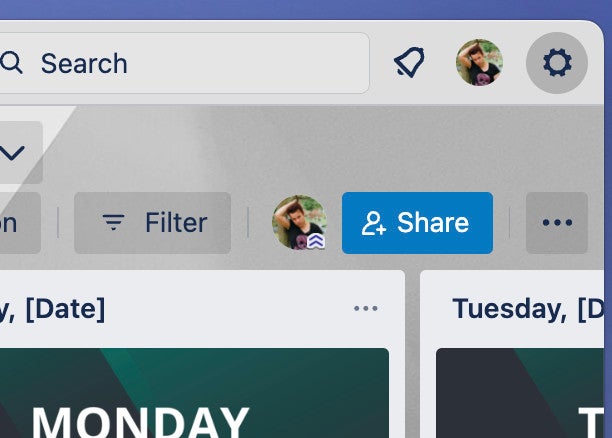
The first thing to do is open the Trello desktop application and make sure you’re signed into your Trello account. From the top right of the Trello desktop app window, click the gear icon (Figure A).
Figure A
In the resulting window (Figure B), look for the Window Style section, and click the associated dropdown. From that dropdown, select Dock & Menubar extra.
Figure B
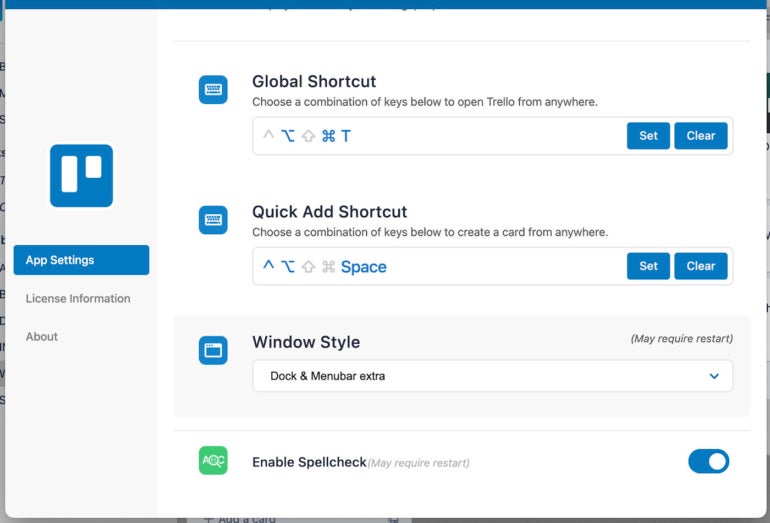
With Dock & Menubar extra selected, close out the Settings window.
How to use the menubar feature
There should now be a Trello icon in your menubar. If you right-click — or two-finger tap — that icon, a menu will appear that includes Quick Card (Figure C).
Figure C
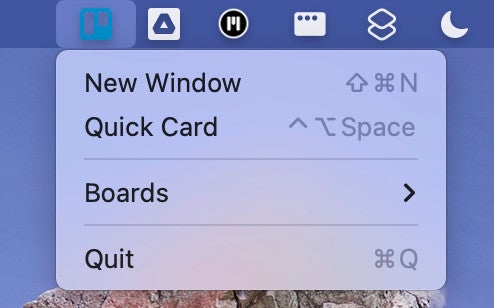
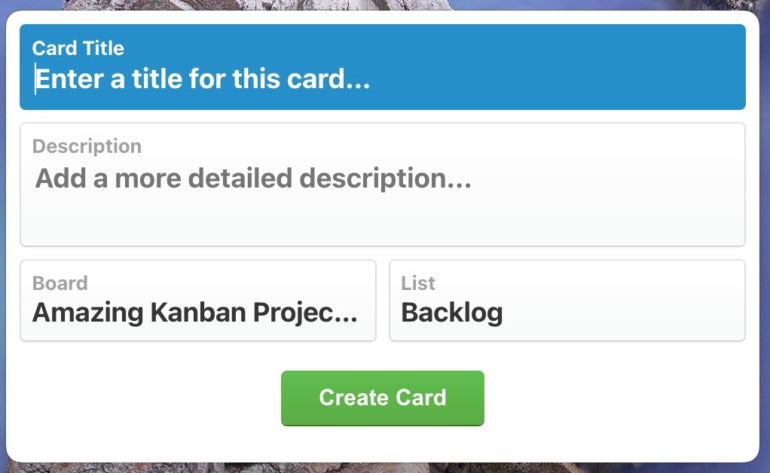
Click Quick Card, and a pop-up window will appear, where you can fill out and select the details for your new card (Figure D).
Figure D
A simplified Trello workflow
If you’re looking to simplify your Trello workflow, using the desktop application on macOS is a great way to go. By using the Quick Card feature, you don’t even have to bother calling up the Trello application to add a card, so you should be able to work more efficiently.
To make this even more efficient, you can always call the Quick Card with the Quick Add Shortcut, which is configured in the Trello Settings app. By default, the keyboard shortcut to call the Quick Add window is [Control]+[Option]+[Space]. Hit that keyboard combination, and the Quick Add window will open, ready for you to add a new task.
Subscribe to TechRepublic’s How To Make Tech Work on YouTube for all the latest tech advice for business pros from Jack Wallen.
For all the latest Technology News Click Here
For the latest news and updates, follow us on Google News.
