How to synchronize two Microsoft SharePoint lists using one Microsoft Power Automate flow
SharePoint lists don’t always store all the information about an entity. For instance, you might be tracking sales and commissions but keep the commission rates in a tightly-secured second list. Remembering to update both lists as data changes over time can be a cumbersome task.
SEE: Hiring kit: Microsoft Power BI developer (TechRepublic Premium)
To simplify this process and increase data quality and integrity, this tutorial shows you how to synchronize two Microsoft SharePoint lists using a Microsoft Power Automate flow. We’ll work with two simple lists: One stores individual sales amounts and the second stores each employee’s commission rate. That way, many people can update the Sales list but only a few key people will have access to update the Commissions list.
For this tutorial, I’m using Microsoft SharePoint lists and Microsoft Power Automate, which is free with most Microsoft 365 licenses on a Windows 10 64-bit system.
Jump to:
How the two SharePoint lists work together
You can work with SharePoint lists or Microsoft Lists, but for this tutorial, we’re using SharePoint lists. Figure A shows two SharePoint lists. Sales can have multiple records for each Employee ID value. The second list, Commissions, lists employees and their rates. Each employee will have only one record in Commissions.
Figure A
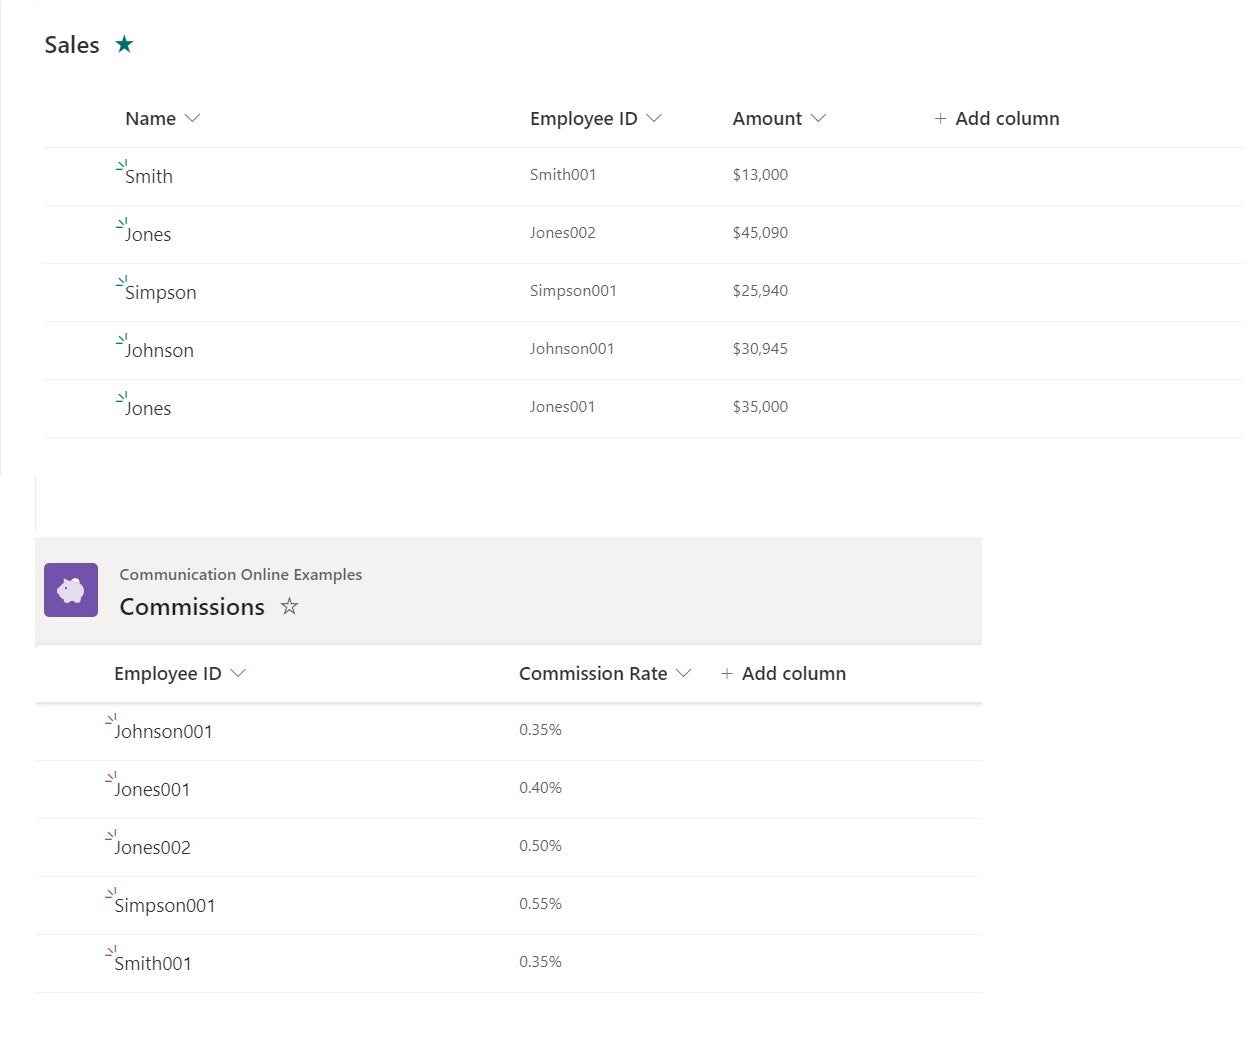
Now here’s the situation we’re addressing: The Sales list is updated regularly. As the list is updated, Power Automate will check the Commissions list for a matching Employee ID. If none exists, Power Automate creates a new record, copying the Employee ID value and using a default commission percentage of .345.
SEE: Microsoft Power Platform: What you need to know about it (free PDF) (TechRepublic)
This is our simple scenario. At no point will the flow calculate a commission or delete any records in either list, but both of those tasks are extensions of this situation. Right now, the Commissions list has five records. Notice that you have two employees with the last name Jones: Jones001 and Jones002. Currently, every Employee ID value is in both lists.
How to update records using Power Automate
We want to update the Commissions list when a new Employee ID value shows up in the Sales list. To do this, we can use Power Automate and save someone the manual task of adding a new Commissions record for the new employee.
At this point, we should define the term “new.” Within the context of what we’re doing, new doesn’t mean the employee is new to the company. Rather, new means that the Employee ID value isn’t in Commissions.
To get started, we’ll create a Power Automate flow that creates a new record in Commissions when a new Employee ID value is added to the Sales list. The only prerequisite for our task is that both lists share the Employee ID column. You’ll want to know the SharePoint site and the list names.
We’ll use only one flow, which is triggered when you add a new record to the Sales list. Now, let’s add this flow with the following steps:
- Sign in to your Microsoft account and choose Power Automate from the Apps launcher.
- Click Create in the left pane.
- Browse to the bottom and click the SharePoint connector.
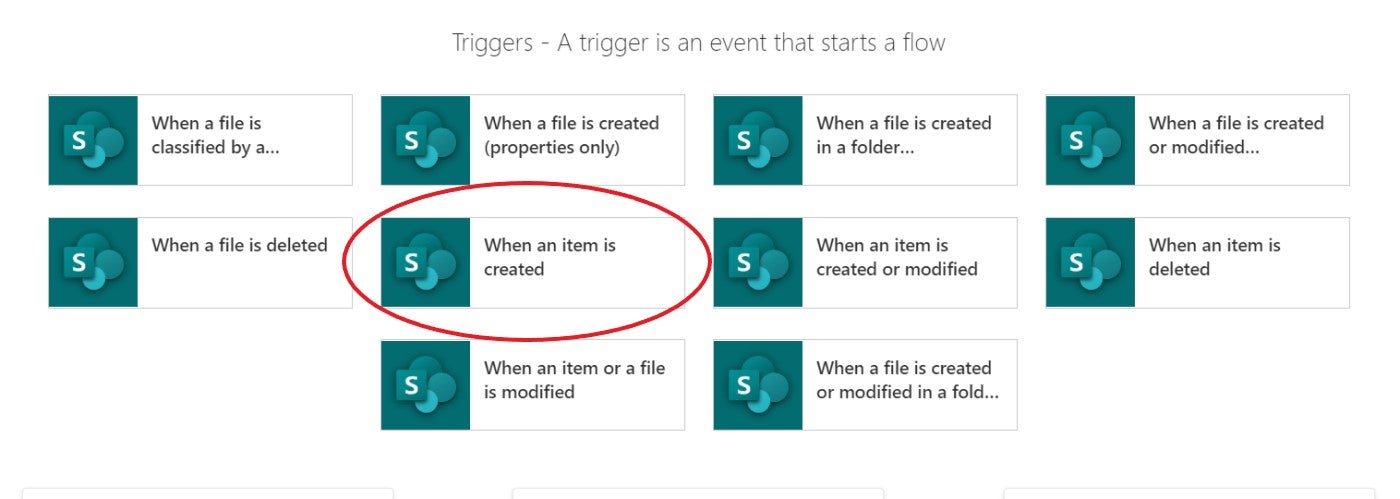
- In the resulting list, click the When An Item Is Created option (Figure B).
Figure B
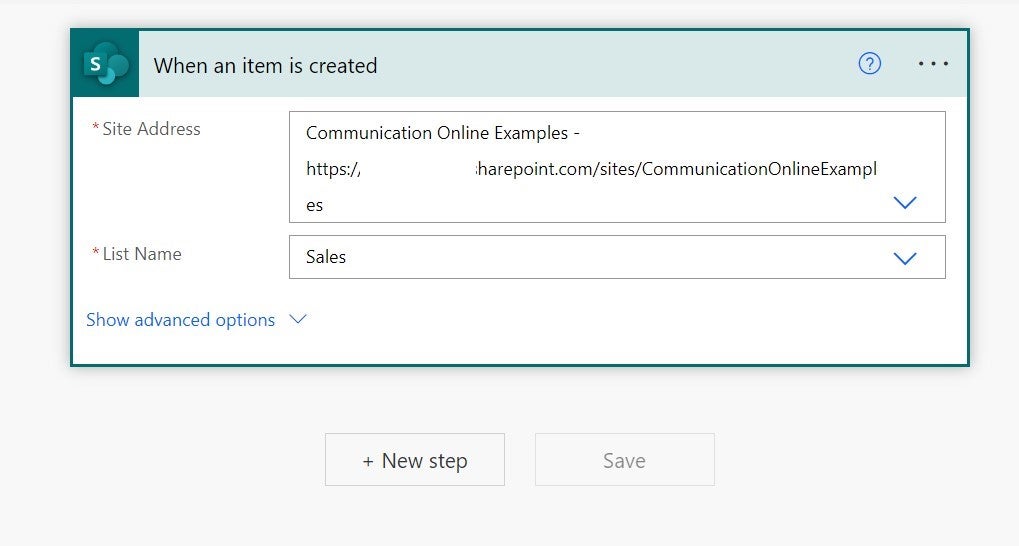
- From the dropdowns in the first flow card, choose the SharePoint site and the Sales list (Figure C).
Figure C
- Click New Step to display the next card.
- If SharePoint isn’t in the top list, click the Expand List of Connectors down arrow in the thin gray line.
- In the resulting list, click SharePoint to update the bottom list of available triggers and actions.
- In the bottom pane, click Actions.
- Specify the SharePoint site and the name of the second list, Commissions.
- Click the Show Advanced Options link.
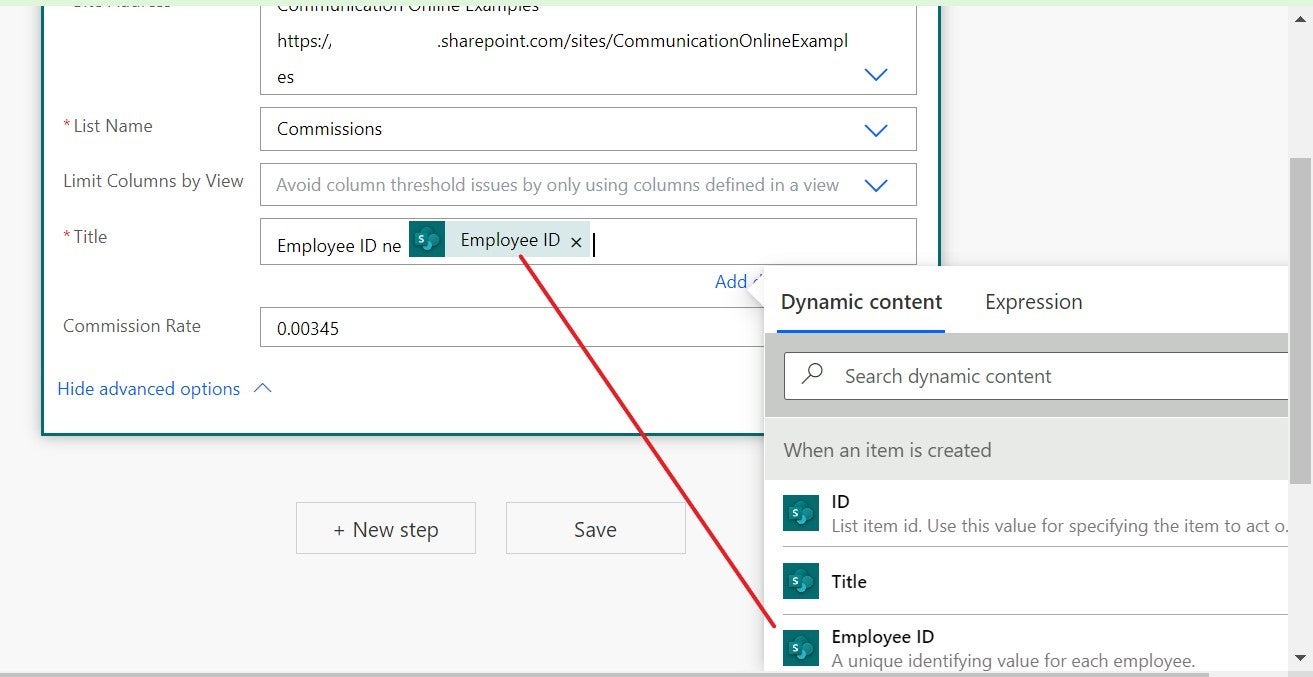
- Click inside the Title control and enter Employee ID ne, where ne is short for “not equal.”
- Click the Add Dynamic Content link if necessary.
- From the Dynamic Content list, choose Employee ID to add it to the Title control (Figure D).
Figure D
In a nutshell, the first card identifies the action that triggers the action in the second card. That trigger is adding a new item to the Sales list. If you change an existing record, you won’t trigger this flow. You trigger it only when you add a new record.
The second card specifies the list that the flow updates, passing the Employee ID value. If the Employee ID value isn’t in the Commissions list, Power Automate adds the record.
Now, let’s add a few records to the Sales list to see how the flow reacts.
How to use the Power Automate flow
You don’t have to do a thing to trigger the Power Automate flow other than update the Sales list. Simply move to your SharePoint interface and open Sales. Now, enter the following record: Edington, Edington001 and 14000, as shown in Figure E.
Figure E
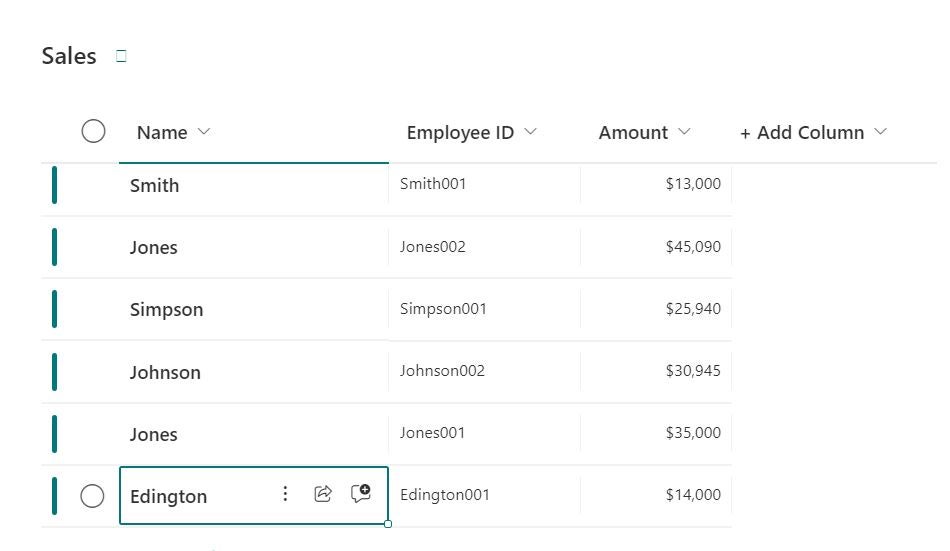
The Employee ID value isn’t in the Commissions list yet, so the expression
Employee ID ne Employee ID
that you entered in steps 11 and 12 is true. The new Employee ID value, Edington001, doesn’t equal any value in Commissions. Consequently, the flow copies the new Employee ID to the Commissions list.
As you can see in Figure F, the flow added a record for the new Employee ID, Edington001. The rate is a default value, which the list uses for all new records. Key personnel can change that rate, but the default guarantees that a rate exists for each record.
Figure F
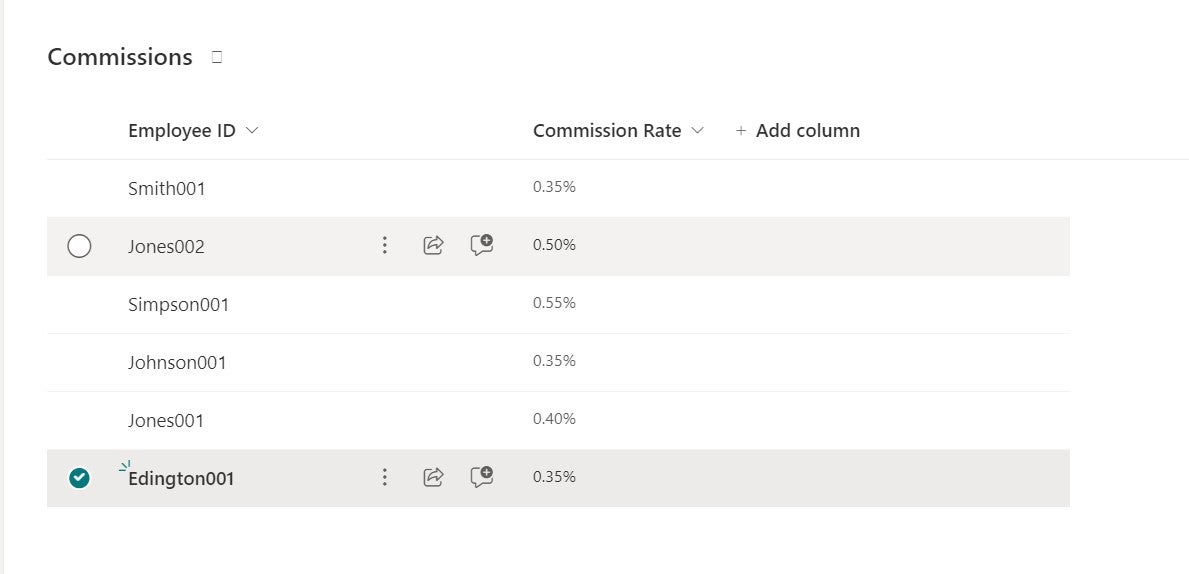
Depending on your environment, it might take SharePoint a few seconds to update the Commissions list. If you check that list and you don’t see the new record, wait a few seconds for SharePoint to catch up.
Now, add another record for Edington001, as shown in Figure G. Then, check the Commissions list.
Figure G

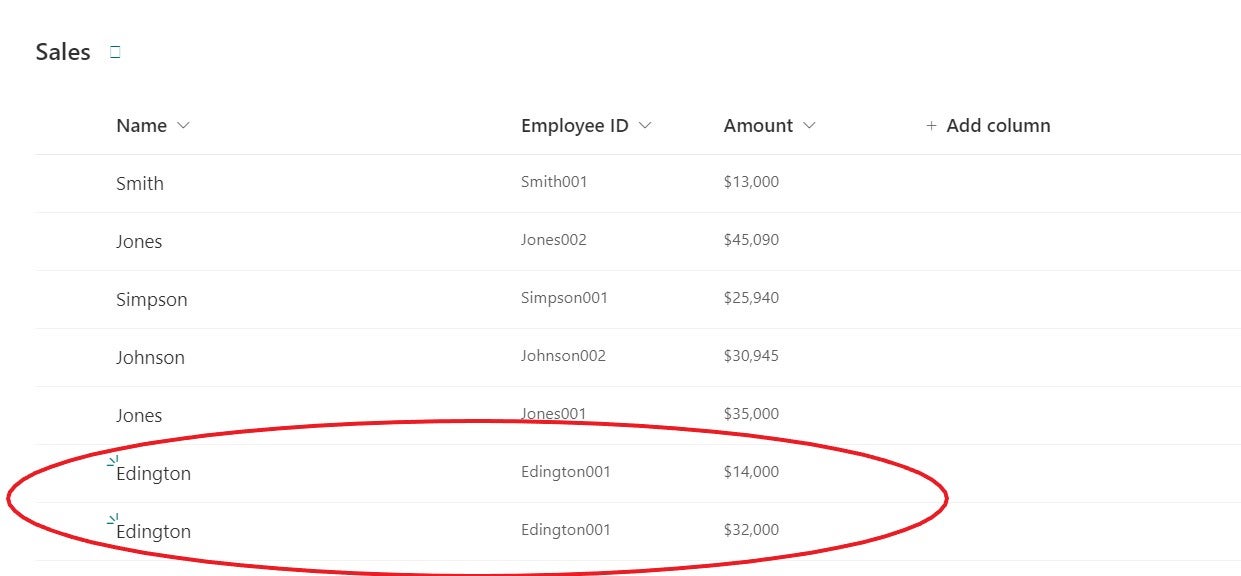
This record triggers the flow because it’s a new record, but it doesn’t add a record to Commission because the list already has a record for Edington001; thus, the Employee ID expression is false.
SEE: Hiring Kit: Database engineer (TechRepublic Premium)
There’s a lot more you might want to do with this kind of Power Automate flow. For instance, if you change the Employee ID for an existing record, nothing happens. You can add more conditions and actions, or you can create a new flow to add that check.
Read next: Best business intelligence tools (TechRepublic)
For all the latest Technology News Click Here
For the latest news and updates, follow us on Google News.
