
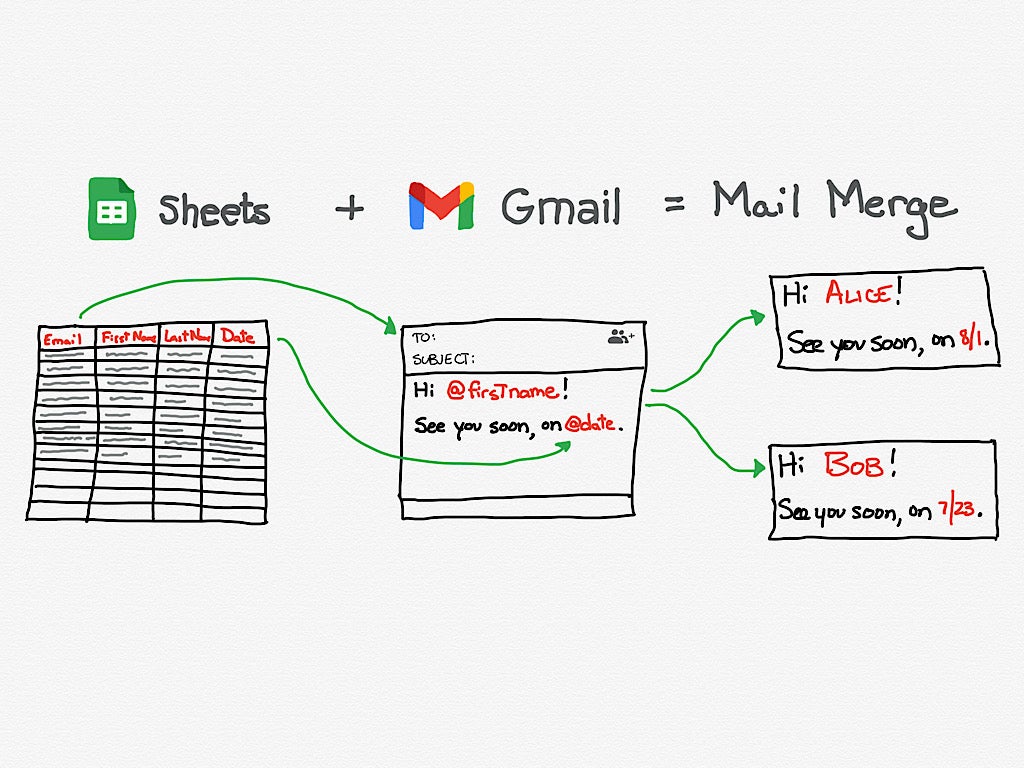

If your Workspace edition supports it, you may mail merge from Gmail using a Google Sheet as your data source. This means you can create an email that takes custom fields from a spreadsheet and insert them into individual emails to personalize your message. Mail merge works well for customized recommendations, reminders or renewal messages.
Create a mail merge
To create a mail merge, you need a Google account with a supported edition of Workspace: Individual, Business Standard or Plus, Enterprise Standard or Plus, Education Plus and Nonprofits.
You should check with your Google Workspace administrator to learn how mail merge has been configured for your account. An administrator may allow or prevent access to mail merge via a setting in the Admin Console: Apps | Google Workspace | Gmail | User Settings | Mail Merge. In some cases, this setting may still show as Multi-send. The administrator may adjust this setting either for the entire organization or for specific organizational units.
Additionally, by default, some Workspace editions restrict mail merge to internal recipients only; a Workspace administrator may choose to allow sending a mail merge to external email addresses. In all cases, the quantity of Gmail messages you send must remain within the sending limits of your edition.
Once you know you have access to mail merge and know to whom you may send (i.e., internal only or external addresses), open Chrome on a desktop-class computer, sign in to your Workspace account and follow the sequence below.
Configure your Google Sheet
First, you’ll need to have a Google Sheet that contains your recipient email addresses, along with any other custom data you wish to include in your merge. One way to obtain your source sheet could be to export a set of records from a database such as Salesforce and then import your file (e.g., .csv or .xlsx format) into Google Sheets.
As with most merge data sources, Row 1 of your sheet should contain the field name headers such as First Name, Last Name, Dollar Amount, Date and Date Format Example (Figure A). Make sure your field names use standard characters and numbers rather than special symbols.
Figure A
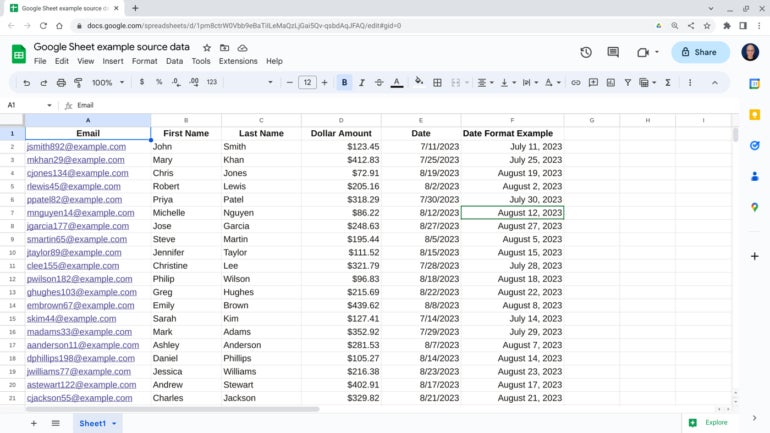
Review your source data to ensure that every field you intend to merge has accurate information; in particular, check that all names are correct. Sending an email where you merge the wrong name may prompt people to either delete your email or report it as spam.
If your Google Sheet has multiple tabs of sheets displayed along the bottom, make sure to move the sheet with the source data to the first tab. One way to make this move is to click on a tabbed sheet name and then drag to reposition it. When merging, the system draws field names and data only from the sheet on the first tab.
Initiate the merge in Gmail
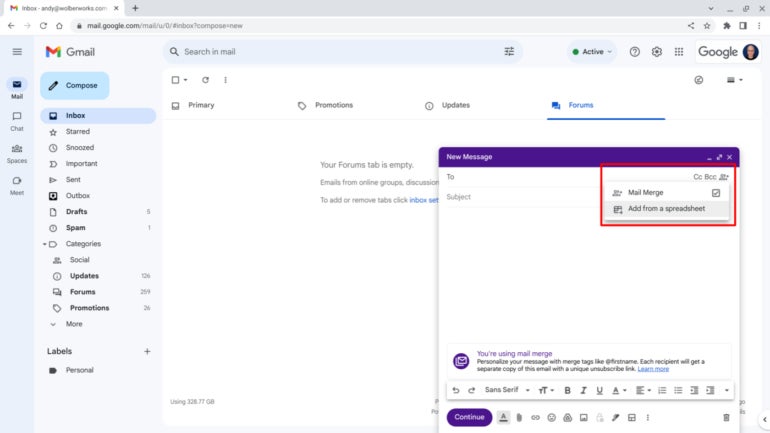
Open Gmail and select Compose to create a new email. Then, whenever the cursor is in any of the address fields (e.g., To, Cc or Bcc), you may select the mail merge icon, which is an image of two people with a + symbol (Figure B). Once selected, check the box to enable Mail Merge mode. When active, the accent colors change and the message “You’re Using Mail Merge” displays.
Figure B
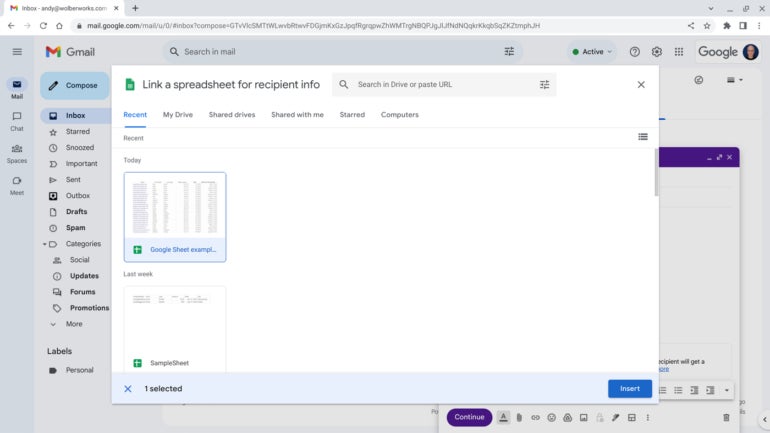
Next, choose the Add From A Spreadsheet option from the mail merge menu; this will bring up a Google Drive interface that allows you to navigate to the Google Sheet you wish to use as your mail merge recipient list data source. Select the sheet you prepared earlier, and then choose the Insert button (Figure C).
Figure C
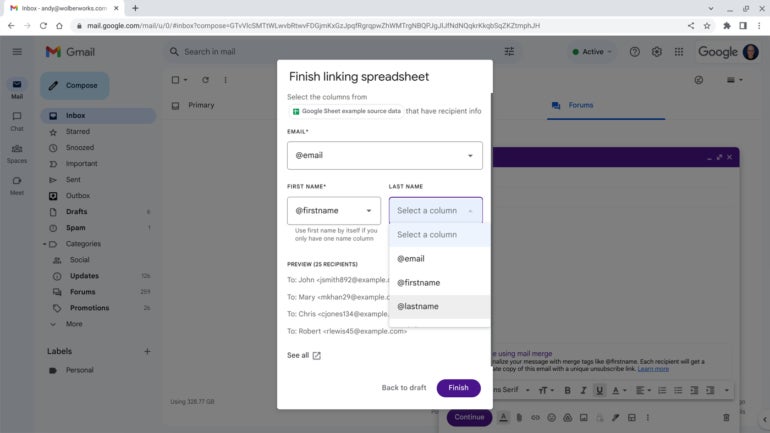
The system will ask you to specify the correct data to use for each recipient’s email address and first and last name fields (the last name field is optional) (Figure D). Select the corresponding columns from your Google Sheet and select Finish. A small icon of your spreadsheet will display as the recipient in the To: field in your mail merge email.
Figure D
Fill in the subject line of your email as you would normally with any email you send.
Personalize communication with custom fields
Enter the body text of your email. You may choose a layout, add links, modify formatting and insert emoji, as in any email. If you intend to provide a file, such as a PDF with a mail merge, the best practice would be to include a link to the file on Google Drive rather than inserting the item as an attachment.
Type @ to display available mail merge tags from your Google Sheet (Figure E) and then select any item from the list to insert it into the email. The system consolidates names into a single lowercase string, which turns a column titled Dollar Amount into a mail merge tag of @dollaramount, for example.
Figure E
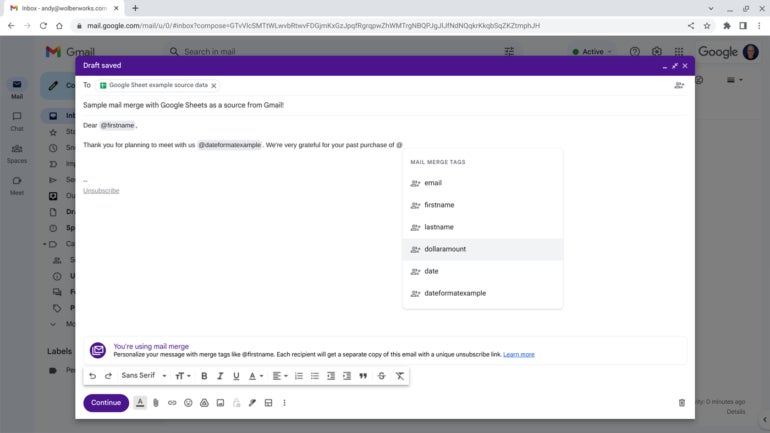
The inserted data retains the formatting in your Google Sheet, as shown by the @date and @dateformatexample fields in the sample sheet in Figure A. In the first case, the / separator divides the month, day and year, while in the latter, the spreadsheet data was formatted to display with a full month in text, followed by a numerical date, a comma and then the year. So make sure to modify the format of the content in your Google Sheet to reflect the presentation you want in your mail merge.
Check before you send
When you have carefully reviewed your content for errors, select the Continue button. A prompt with three options displays: Cancel, Send Preview and Send All (Figure F).
Figure F
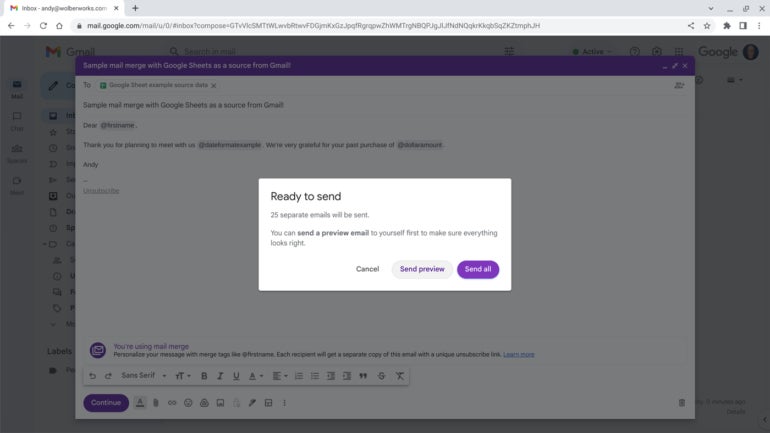
Each of these options does pretty much what you would expect.
If you want to return to editing your email, select Cancel. Send All triggers the merge and completes the process. In most cases, you should first select Send Preview, which sends a sample merged email to your Gmail inbox (Figure G). Check this preview for errors; once you are certain all information is as you wish, repeat the process and select Send All to merge and send your mass email.
Figure G
![If you select Send Preview, the system provides a [Test message] email that allows you to review your message as it will appear when merged.](https://www.techrepublic.com/wp-content/uploads/2023/07/tr72123-g-MergedTest-770x433.jpg)
Message or mention me on Mastodon (@awolber) to let me know how you use Google Sheets and Gmail mail merge capabilities in your organization.
For all the latest Technology News Click Here
For the latest news and updates, follow us on Google News.
Denial of responsibility! NewsBit.us is an automatic aggregator around the global media. All the content are available free on Internet. We have just arranged it in one platform for educational purpose only. In each content, the hyperlink to the primary source is specified. All trademarks belong to their rightful owners, all materials to their authors. If you are the owner of the content and do not want us to publish your materials on our website, please contact us by email – [email protected]. The content will be deleted within 24 hours.