How to Adjust Text to Fit in Excel Cells With 3 Methods
Trying to make all of the text or words fit properly in your Excel spreadsheet? Learn how to make text fit in Excel with our tutorial.
| Duration | Tools needed | Tutorial difficulty |
|---|---|---|
| A few seconds; all three methods require only a few clicks or key presses. | A Microsoft 365 account | Easy for beginners and experts alike. |
Microsoft Excel’s AutoFit feature is great when you need to resize a cell to display more text than the cell currently allows. But when you can’t change the size of a cell to fit the text, this tip shows how you can resize the text to fit within the cell.
SEE: Explore these Excel tips every user should master.
When text is too long to display in a cell, that text is visible until you enter content in the adjacent cell. If this happens, Excel offers several options that allow you to see the contents in both cells. Let’s take a look at these options and how each changes the view.
Jump to:
Method 1: Use AutoFit
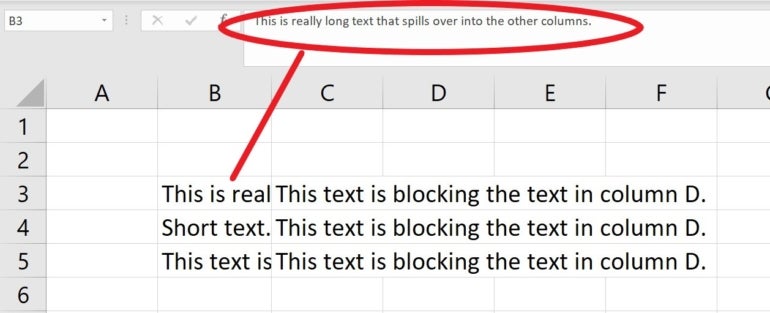
You can use Microsoft Excel’s AutoFit feature to enlarge a cell enough to display the full contents of a cell. But first, let’s review the problem. As you can see in Figure A, the content in column C obscures the content in column B.
Figure A

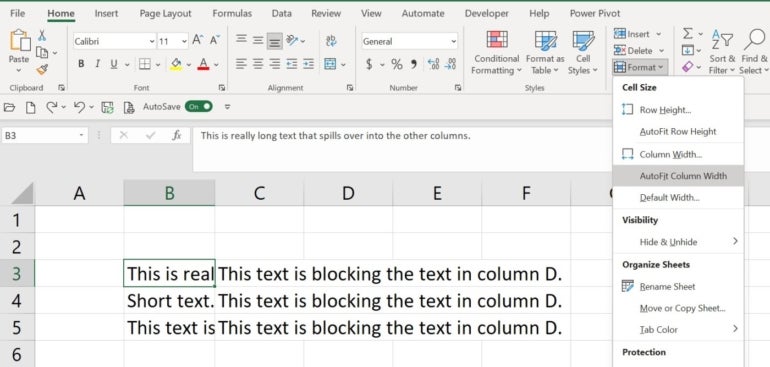
To apply AutoFit, hover over the right border of the column B header cell and double-click, or click the Format dropdown (in the Cells group on the Home tab) and choose AutoFit Column Width (Figure B).
Figure B

Either way, Excel expands the width to accommodate the longest entry in the column, as shown in Figure C.
Figure C

For better or worse, this option results in too much white space in some cells in column B.
To bypass the interface, or if the double-click method doesn’t work, you can select the cell or column you want to resize and press Alt, H, O and I. However, you can also use this method to reduce the size of a column that is much too wide.
Method 2: Resize the content
Rather than fitting the cell to the content, Excel also lets you resize the content to fit the cell. Follow these steps to resize your content:
1. Select the cell with text that’s too long to fully display, and press [Ctrl]1. Alternatively, you can click the Number group’s dialog launcher.
2. In the Format Cells dialog box, click the Alignment tab.
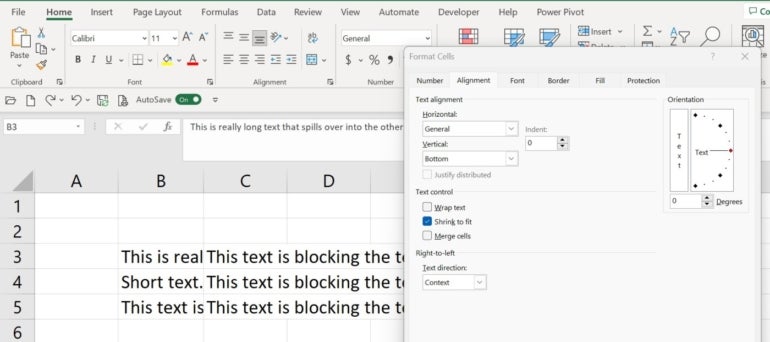
3. Check the Shrink to fit option on the Alignment tab (Figure D).
Figure D

4. Click OK.
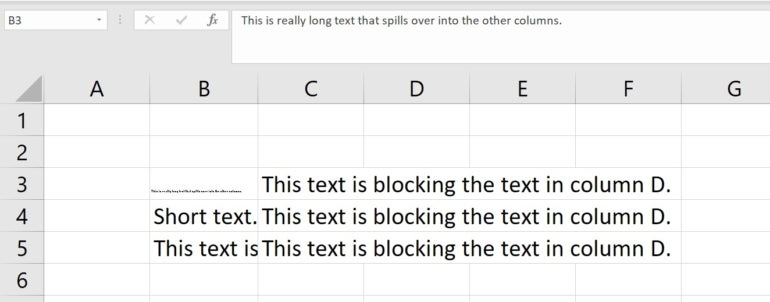
Sometimes the Shrink to fit method shrinks text to the point of sacrificing legibility, as shown in Figure E. It’s worth noting this option only applies to the selected cell(s), whereas the AutoFit option applies to the entire column.
Figure E

To bypass the ribbon interface to apply Shrink to fit, press Alt, H, F and A. Doing so will open the Format Cells dialog shown in Figure D.
Method 3: Wrap text
An alternate method to AutoFit and Shrink to fit is to wrap text within the selected cell by selecting the Wrap Text option on the Alignment tab of the Format Cells dialog box (Figure F).
Figure F

Keep in mind that this method will increase the height of the cell, as shown in Figure F. In this case, wrapping makes a bit of a mess, but it comes in handy in the right circumstances.
The option you use to display text will depend on your needs at the time. Fortunately, Excel is flexible enough to handle long text in several ways.To bypass the ribbon interface to apply Shrink to fit, press Alt, H, F and A. Doing so will open the Format Cells dialog shown in Figure D.
For all the latest Technology News Click Here
For the latest news and updates, follow us on Google News.
