How to add Airtable’s Gallery View to your bases
Airtable has a number of features for managing smaller projects. One such feature is the Gallery View. What is it, and how do you add it?

When you think of Airtable, project management probably doesn’t come to mind. I’ve already discussed how to turn this user-friendly tool into a project management platform. That tutorial deals with the Project Tracker and Kanban views. But as any project manager will attest, project management doesn’t begin and end with the likes of kanban. Just about every project management tool has more views to help manage different types of projects with different needs.
SEE: Hiring kit: Project manager (TechRepublic Premium)
Jump to:
What is Airtable’s Gallery View?
Airtable is no stranger to multiple view types. One particular view Airtable has is called the Gallery View. This view is similar to kanban in that it displays records as visual cards. However, while kanban boards are displayed in columns, where tasks can be dragged from one state to another, the Gallery View simply displays cards in a freeform collection that can be sorted by fields within the cards. The beauty of the Gallery View is that it’s similar to kanban but without the constraints of columns.
Gallery Views can be personal or collaborative, so you can use them on individual projects or those that are team efforts. I’ve made use of the Gallery View when a workflow requires less structure. And although you can customize the sorting and filtering of the cards, you can also drag and drop them into any order you need on the grid. In other words, think of the Gallery View as a freeform kanban grid of cards.
Let me show you how to add a Gallery View to Airtable.
What you’ll need to add a Gallery View to Airtable
The only thing you’ll need for this is a valid Airtable account. You can use either the free or paid plan, as the Gallery View is available to both. I’ll demonstrate using the macOS app, but you can use this view on the web or mobile version of the service.
How to add the Gallery View to Airtable
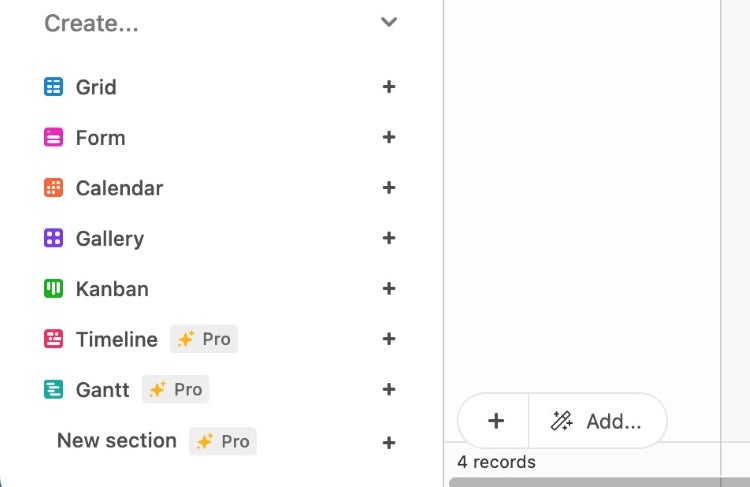
The first thing to do is open the Airtable app, and make sure you’re logged into your account. After logging in, open the Base to which you want to add the Gallery View. In the bottom left pane under Create, you’ll see a number of different views you can select, one of which is Gallery View. Click + directly to the right of Gallery View (Figure A).
Figure A
A pop-up will appear where you must give the new view a name and select the editorial permissions (Figure B).
Figure B
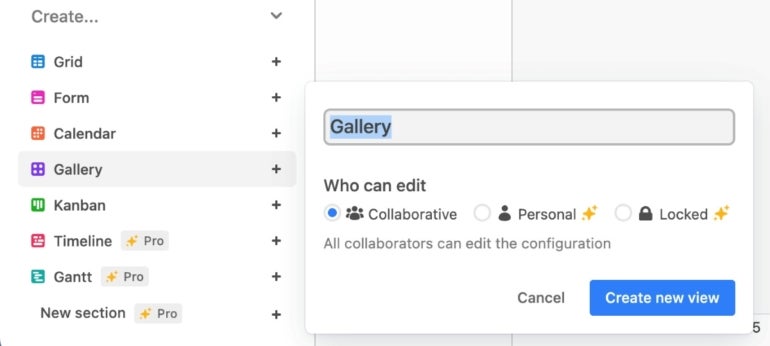
If you are collaborating with this view, make sure to select Collaborative. If this view is only for your eyes, click Personal. The Locked view means no one can make changes unless you give them permission. Name the view, select the editorial permissions and click Create New View.
When the Gallery View appears (Figure C), you can begin to interact with your cards, moving them anywhere they need to live on the board.
Figure C
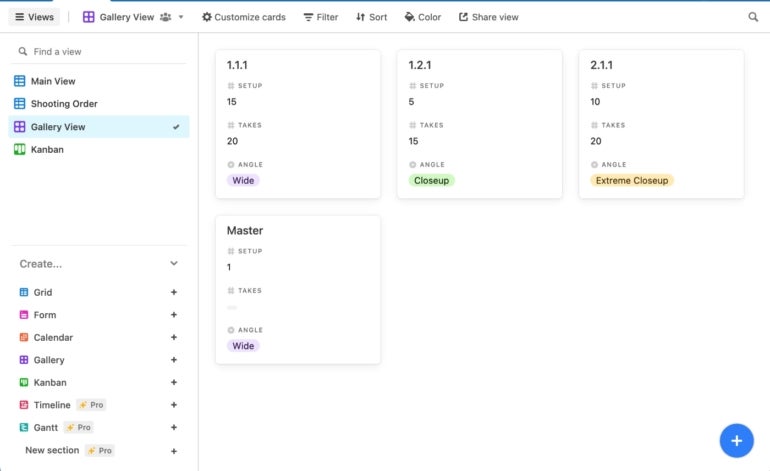
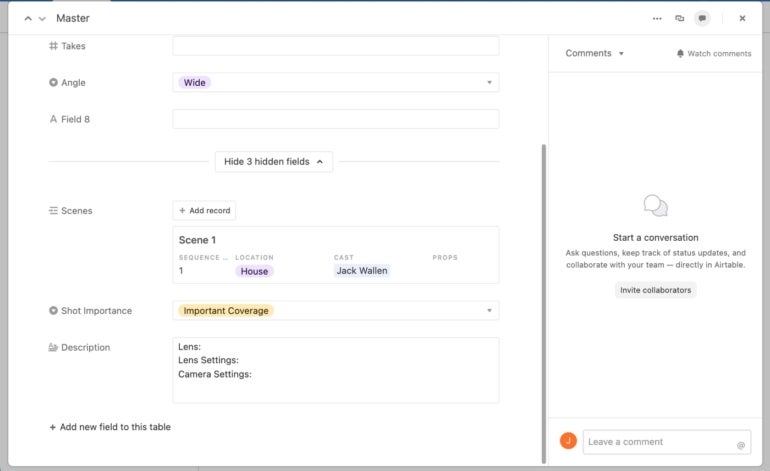
Like with any view, you can interact with the cards, add comments, edit the content and more. What exactly you can do with the individual cards will depend on how you’ve customized the Base for the project. Even then, you can always add any number of custom fields to the cards by clicking Add New Field To This Table (Figure D).
Figure D
A simple view for simple projects
The Airtable Gallery View is about as simple a view as you can get while still having some of the features of kanban. I wouldn’t suggest using the Gallery View for more complicated projects, but for projects that don’t have a vast array of moving pieces, this view is an outstanding way of viewing cards without the regular kanban constraints.
Subscribe to TechRepublic’s How To Make Tech Work on YouTube for all the latest tech advice for business pros from Jack Wallen.
For all the latest Technology News Click Here
For the latest news and updates, follow us on Google News.
