Switch off this Spotify setting to get the most out of Taylor Swift’s new album
Earlier this week I managed to snag tickets for Taylor Swift’s Era Tour (yes, that is a flex), so naturally I’ve spent every day since blasting out the freshly re-recorded version of the popstar’s 2010 album Speak Now. But, after streaming the album front-to-back on Spotify several times, I noticed that some of the record’s most punchy songs such as “Haunted” and “Sparks Fly” seems to lack a certain aural oomph.
A quick Google search told me that I was far from alone in feeling this way. In fact, I found a whole community of Swifties expressing their disappointment in the album’s seemingly muted soundscapes. But a potential resolution came in the form of a very helpful Reddit thread that suggested disabling Spotify’s automatic Audio Normalization feature could be a solution to this problem.
And I’m pleased to report that switching the setting off has made a subtle but noticeable difference, and now I feel like I’m hearing the album the way that Tay Tay wanted. So, if you want to hear music the way your favorite artist intended, here’s an quick guide on how to disable Audio Normalization on Spotify.
What is Audio Normalization on Spotify?
Before explaining how to disable Audio Normalization, you’re probably wondering what the automatically enabled setting actually does. Well, in a nutshell, the feature aims to play all music tracks at a consistent volume by balancing out soft and loud sounds, which according to Spotify creates “a more uniform listening experience.”
However, while this feature aims to prevent audio whiplash when you switch between tracks or different records, it’s worth remembering that individual songs are often set to a very specific volume by their artists. For example, a rock band may want a particularly anthemic track to hit harder than a ballad or slower acoustic tune.
In an effort to make a consistent listening experience, Spotify’s Audio Normalization feature can strip a song of its intended sound, as Taylor Swift fans have discovered.
How to disable Audio Normalization on Spotify
- Open Settings
- Select Playback
- Disable Audio Normalization
Read on to see detailed instructions for each step.
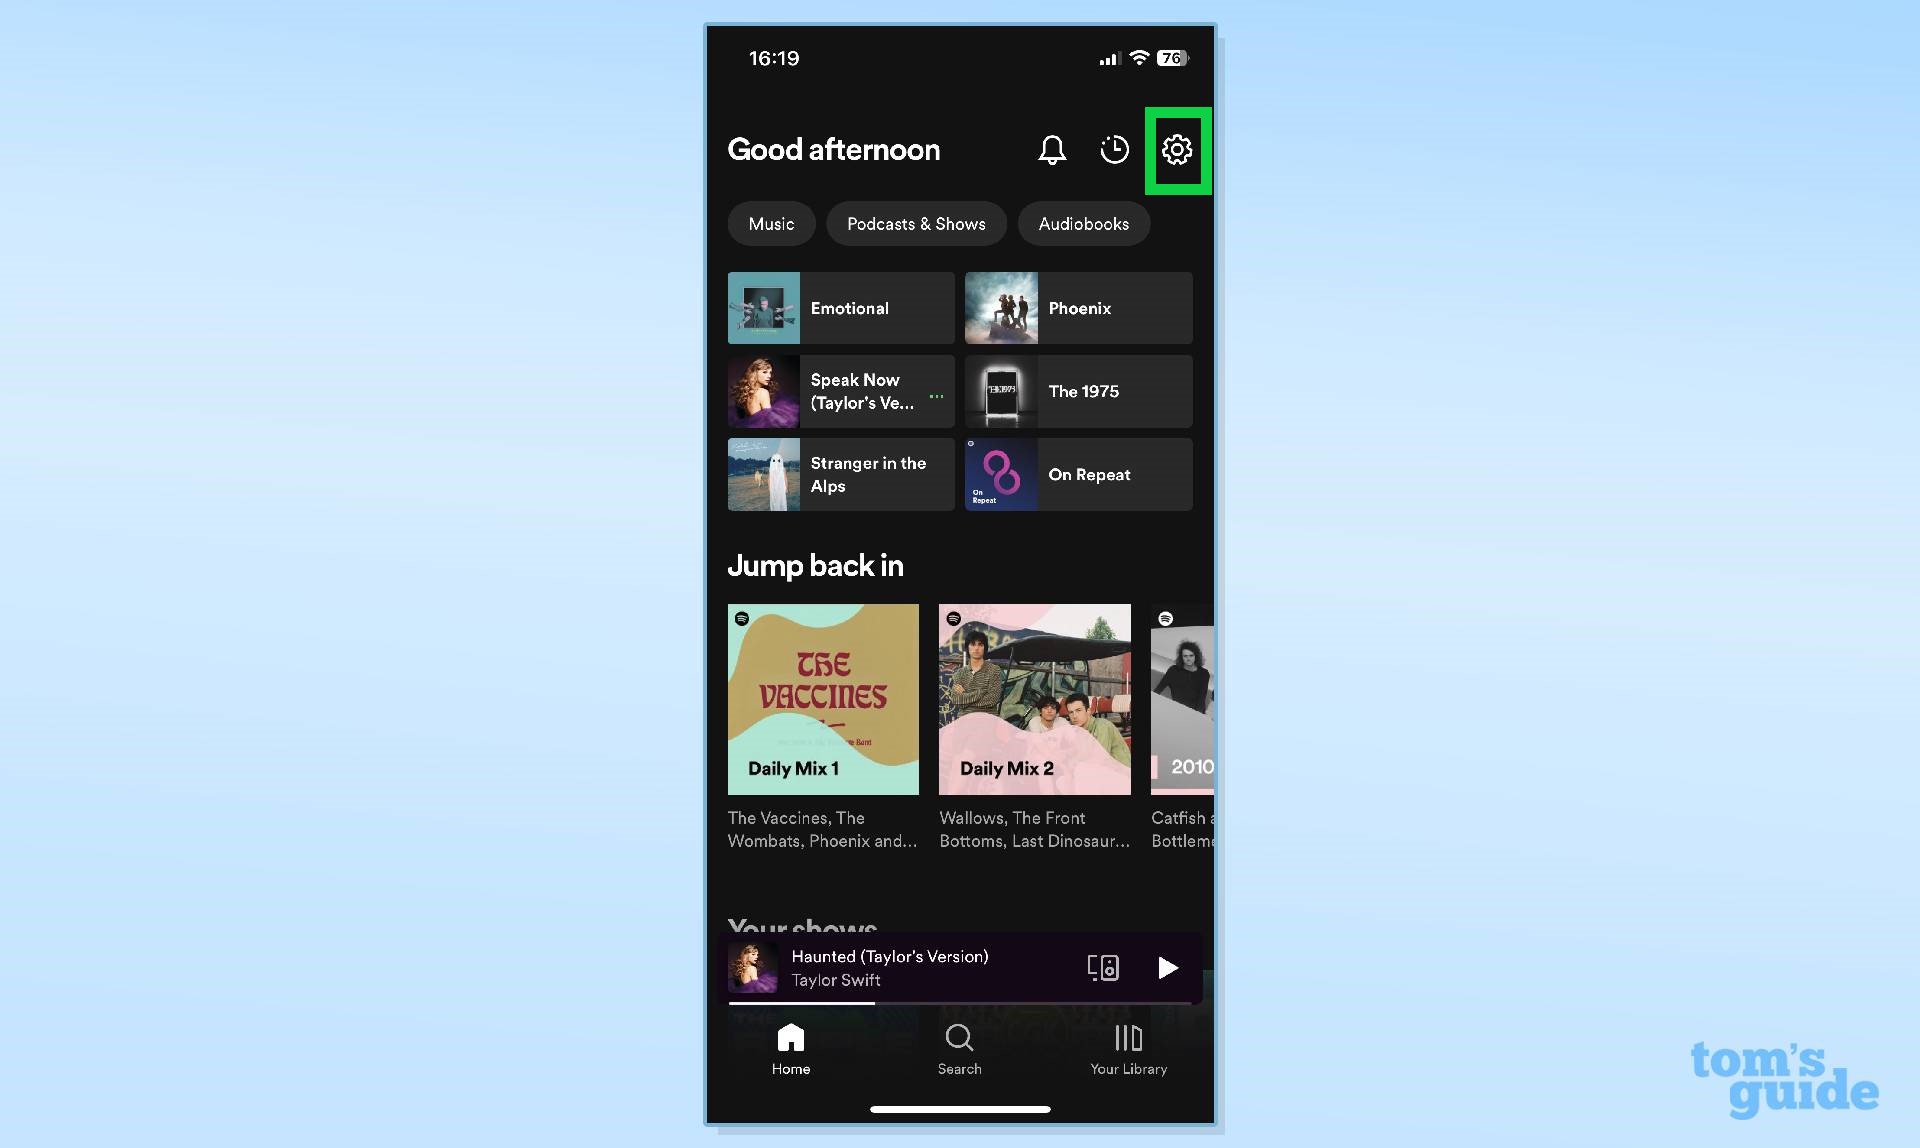
1. Open Settings

(Image: © Spotify)
From the Spotify homepage, open Settings by selecting the icon that looks like a small cog.
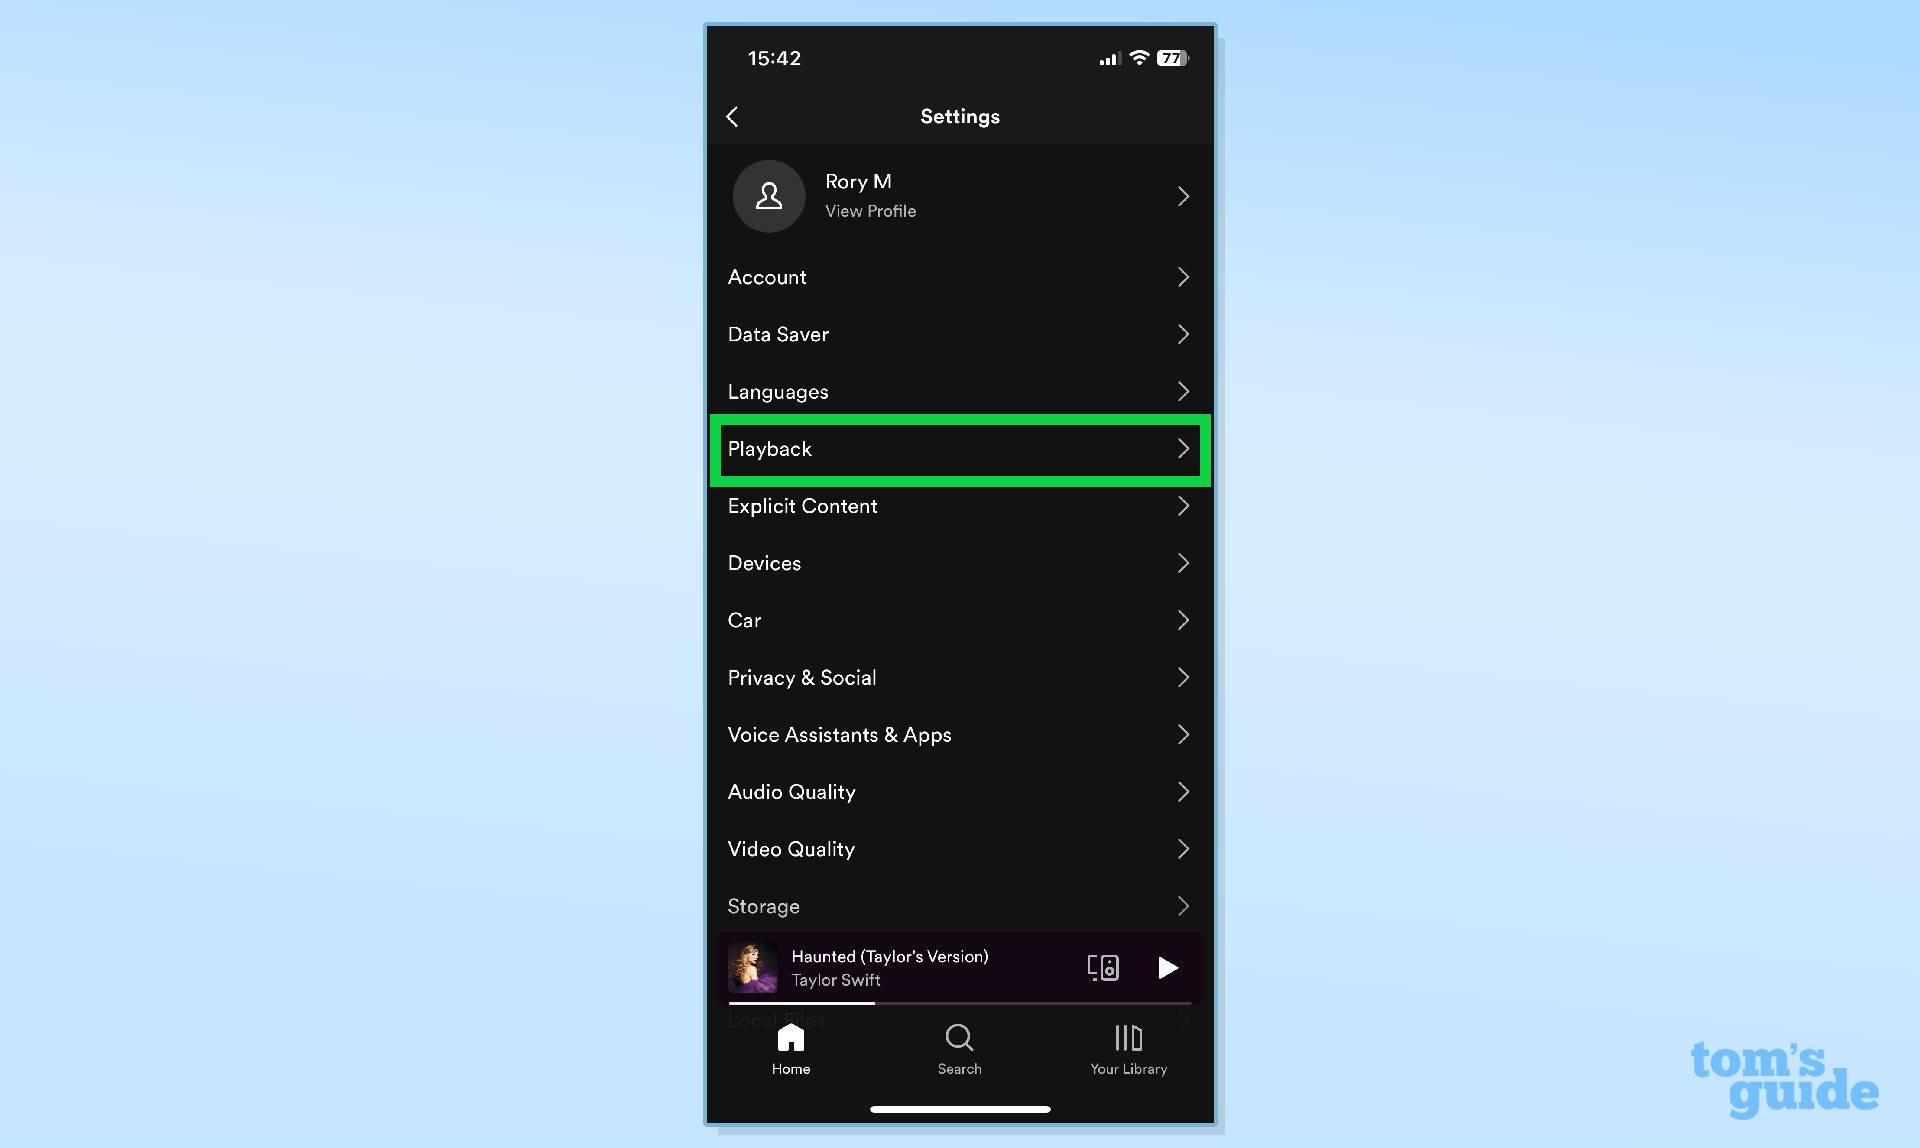
2. Select Playback

(Image: © Spotify)
Within the Settings menu, select Playback.
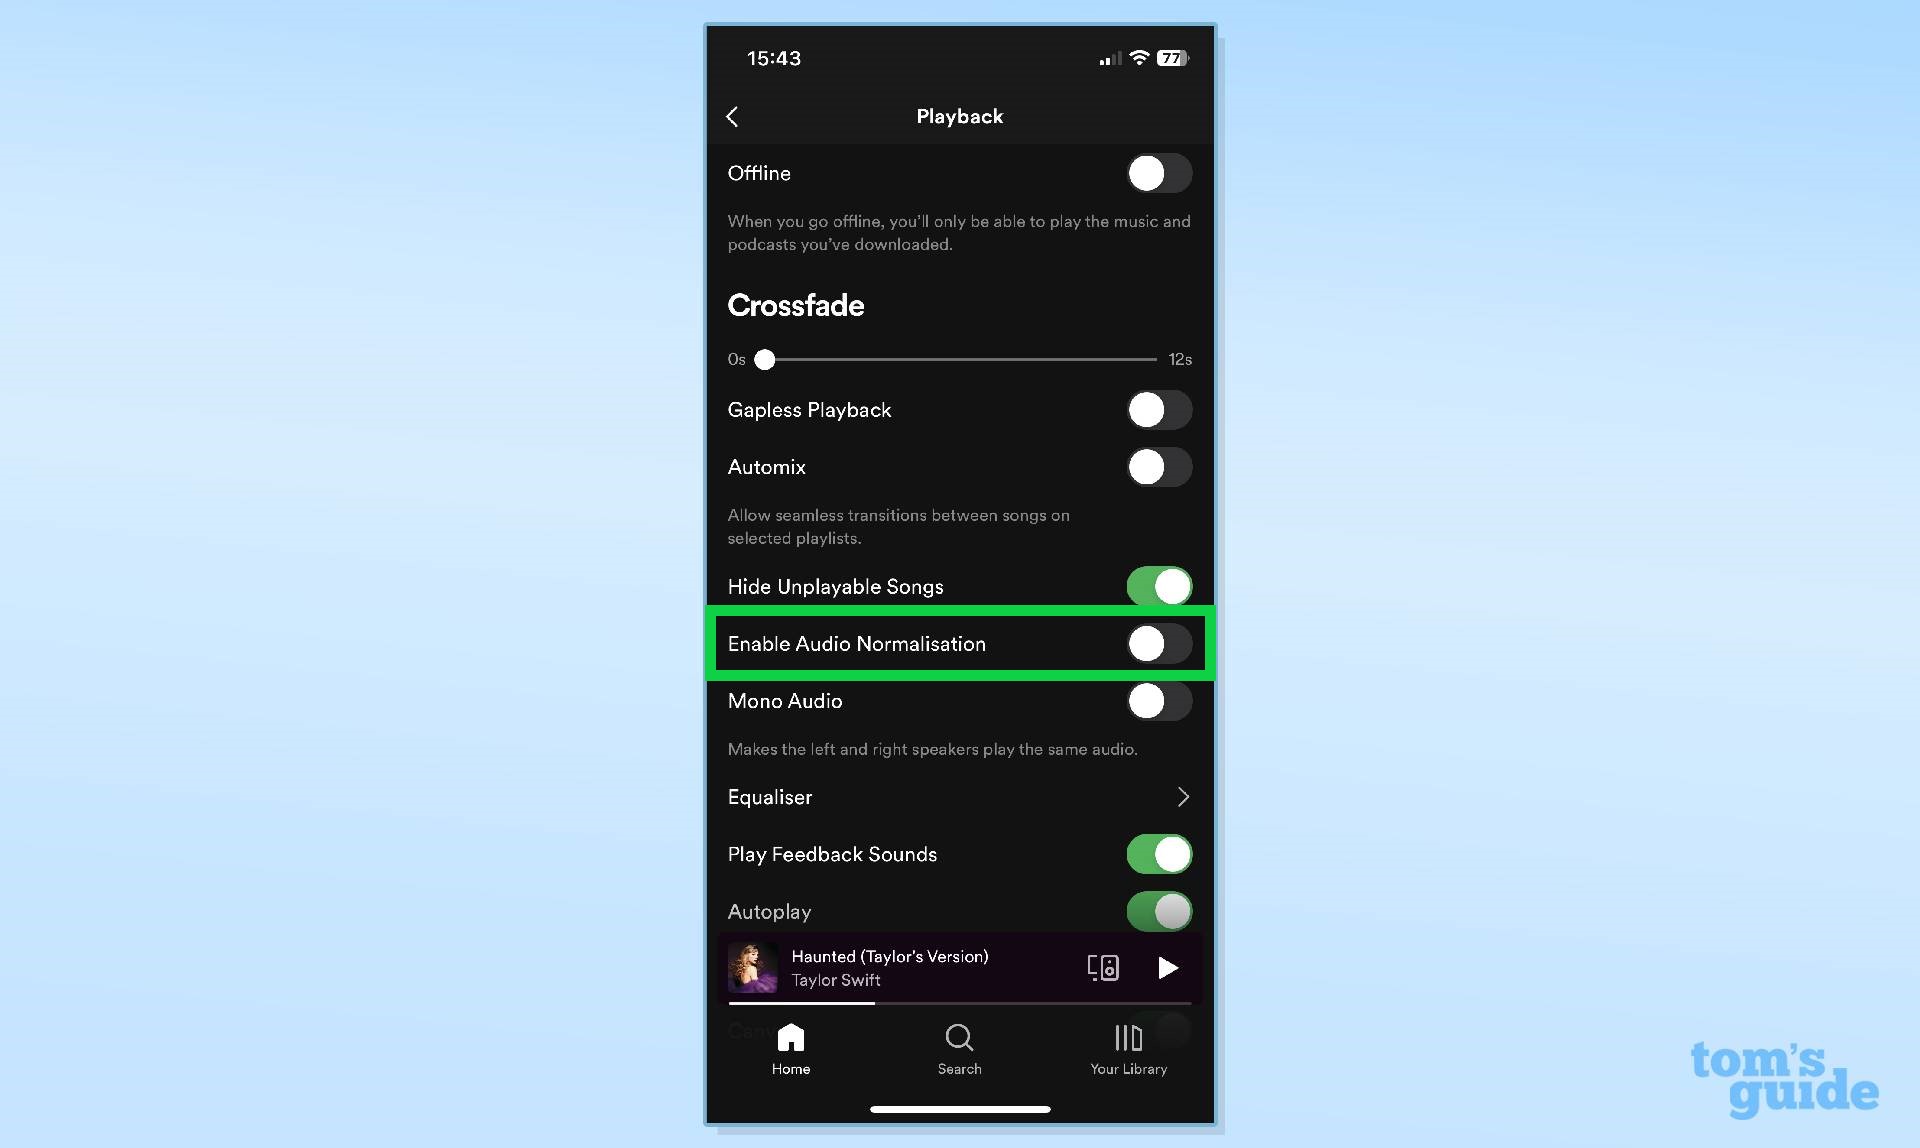
3. Disable Audio Normalization

(Image: © Spotify)
In the Playback submenu, you will see a toggle for Enable Audio Normalization. Click the toggle in order to disable Audio Normalization.
And that’s all you need to know in order to disable Audio Normalization on Spotify. Remember you can always enable the feature once again if you find disabling it detracts from your overall listening experience. You might find that when you’re enjoying music at home you prefer it disabled, but the more consistent audio experience is preferable when you’re listening to Spotify while doing other things. Be sure to experiment and find out what works best for you.
More from Tom’s Guide
If you’re after the best possible listening experience be sure to check out our roundup of the 5 ways to get better Spotify sound. Plus, we’ve also got easy-to-follow guides on how to make Spotify louder and how to download songs on Spotify. And if you’re the type that loves singing along to your favorite tunes, you’ll definitely want to know how to use Spotify karaoke.
For all the latest Technology News Click Here
For the latest news and updates, follow us on Google News.
