How to set up Screen Distance in iOS 17
The iOS 17 beta comes with a feature designed to enforce one of the rules your parents likely set out all those years ago — by making sure you’re not sitting too close to the screen. Screen Distance is an opt-in feature designed to alleviate eye strain, and help reduce the risk of near-sightedness in children that spend a little too much time with their screens.
Because it’s far too easy to accidentally slip closer to that screen when you’re engrossed in something, so Apple is using iOS 17 to do something about it. Screen Distance uses Face ID to detect when you’re sitting too close to the screen for an extended period, stopping you from continuing until you back off a bit.
Screen Distance is an opt-in feature, though. So if you’re worried about how screens might impact the eyes of you or your family, you’ll have to go into the settings to get everything set up. Here’s how to set up Screen Distance in iOS 17.
How to set up screen distance in iOS 17
- Make sure you’re running the iOS 17 beta or iPadOS 17 beta
- Go into the Settings app and select Screen Time
- Tap Screen Distance
- Tap Continue on the following two information screens
- Ensure Screen Distance is toggled on
- Test Screen Distance for yourself
Read on for full instructions and illustrations
1. Make sure you’re running the iOS 17 beta or iPadOS 17 beta
(Image: © Future)
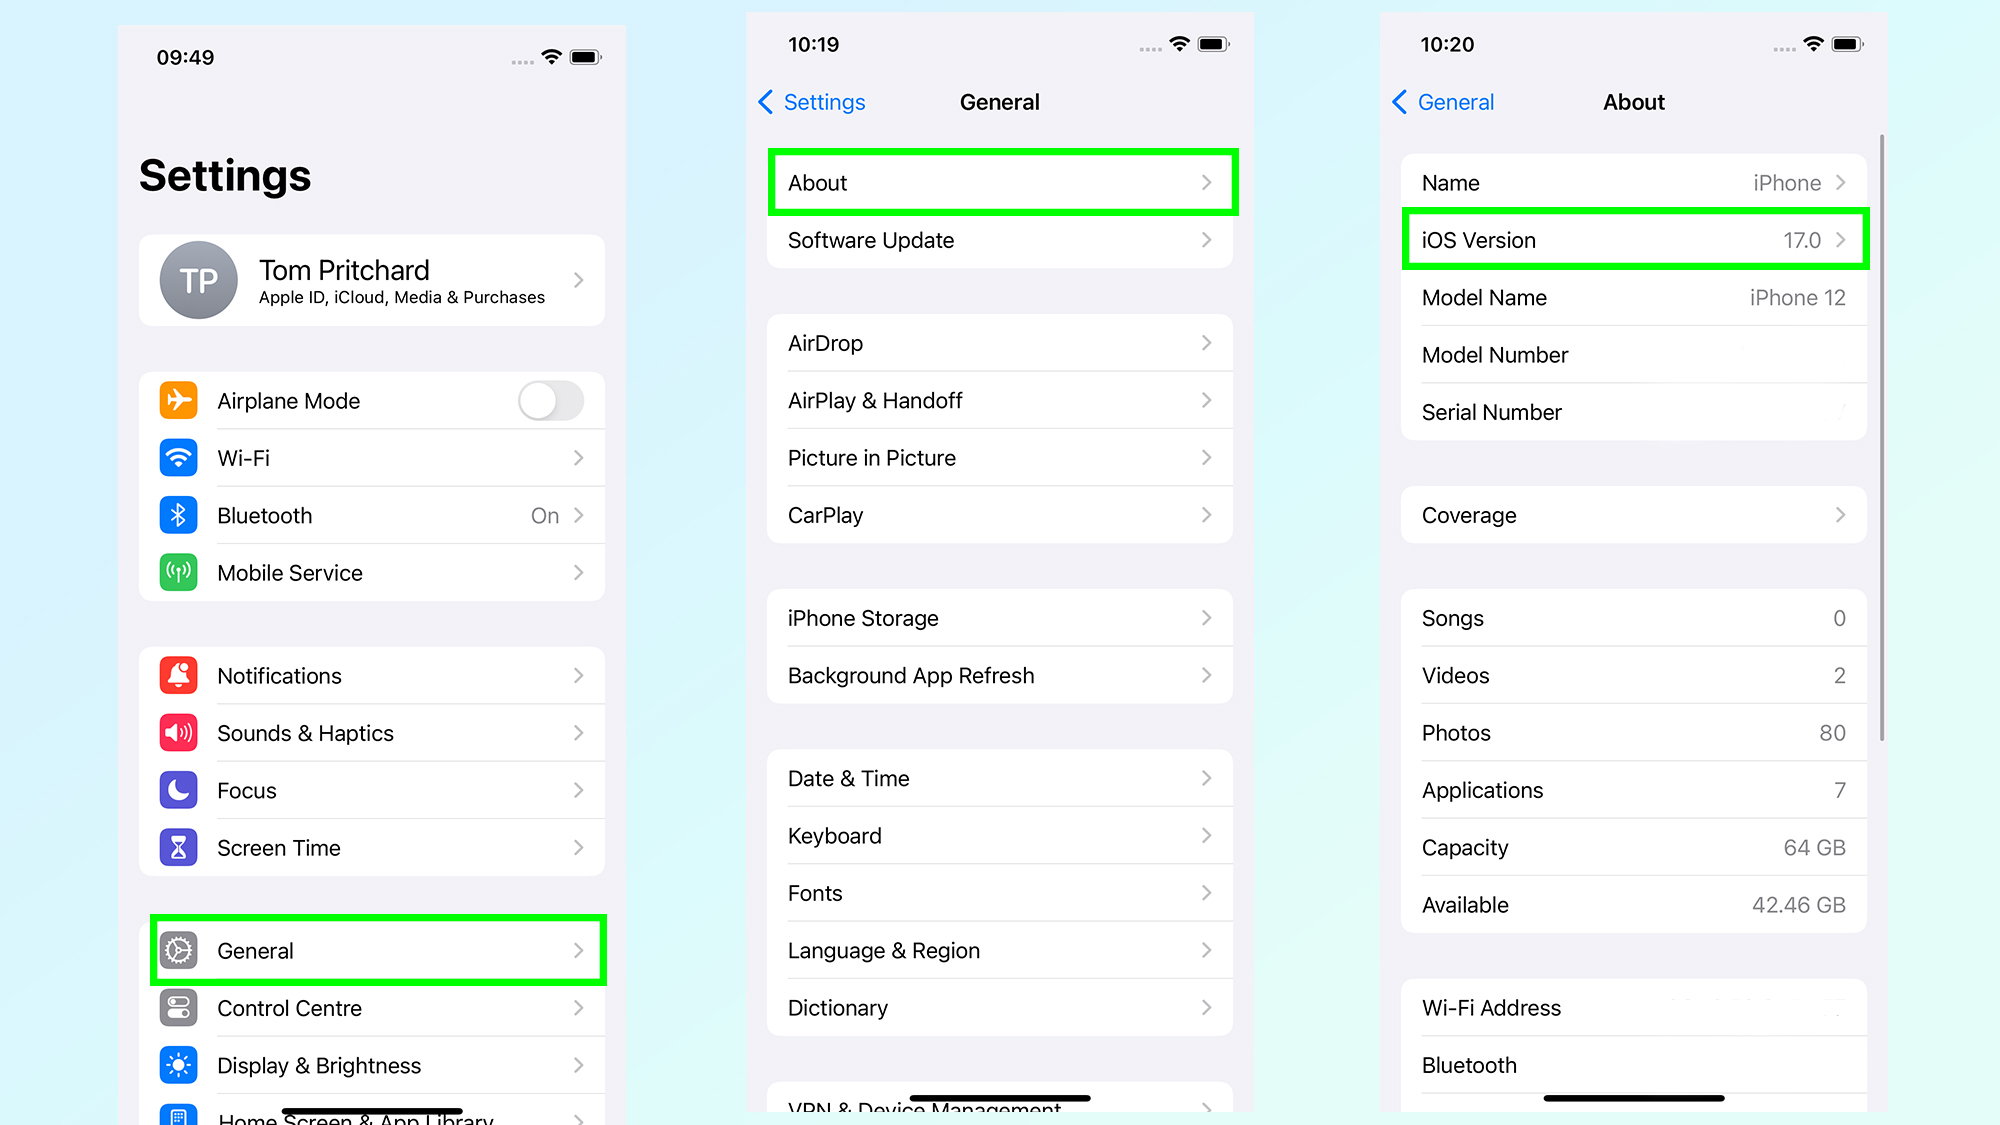
If you’re still running iOS 16, be sure to read our guide on how to install the iOS 17 beta, Screen Distance is exclusive to the latest version for Apple’s operating system. If you’re using an iPad with Face ID, you’ll want to read our guide on how to install the iPadOS 17 beta.
You can check which software your device is running by heading to Settings > General > About > iOS version
2. Go into the Settings app and select Screen Time
(Image: © Future)
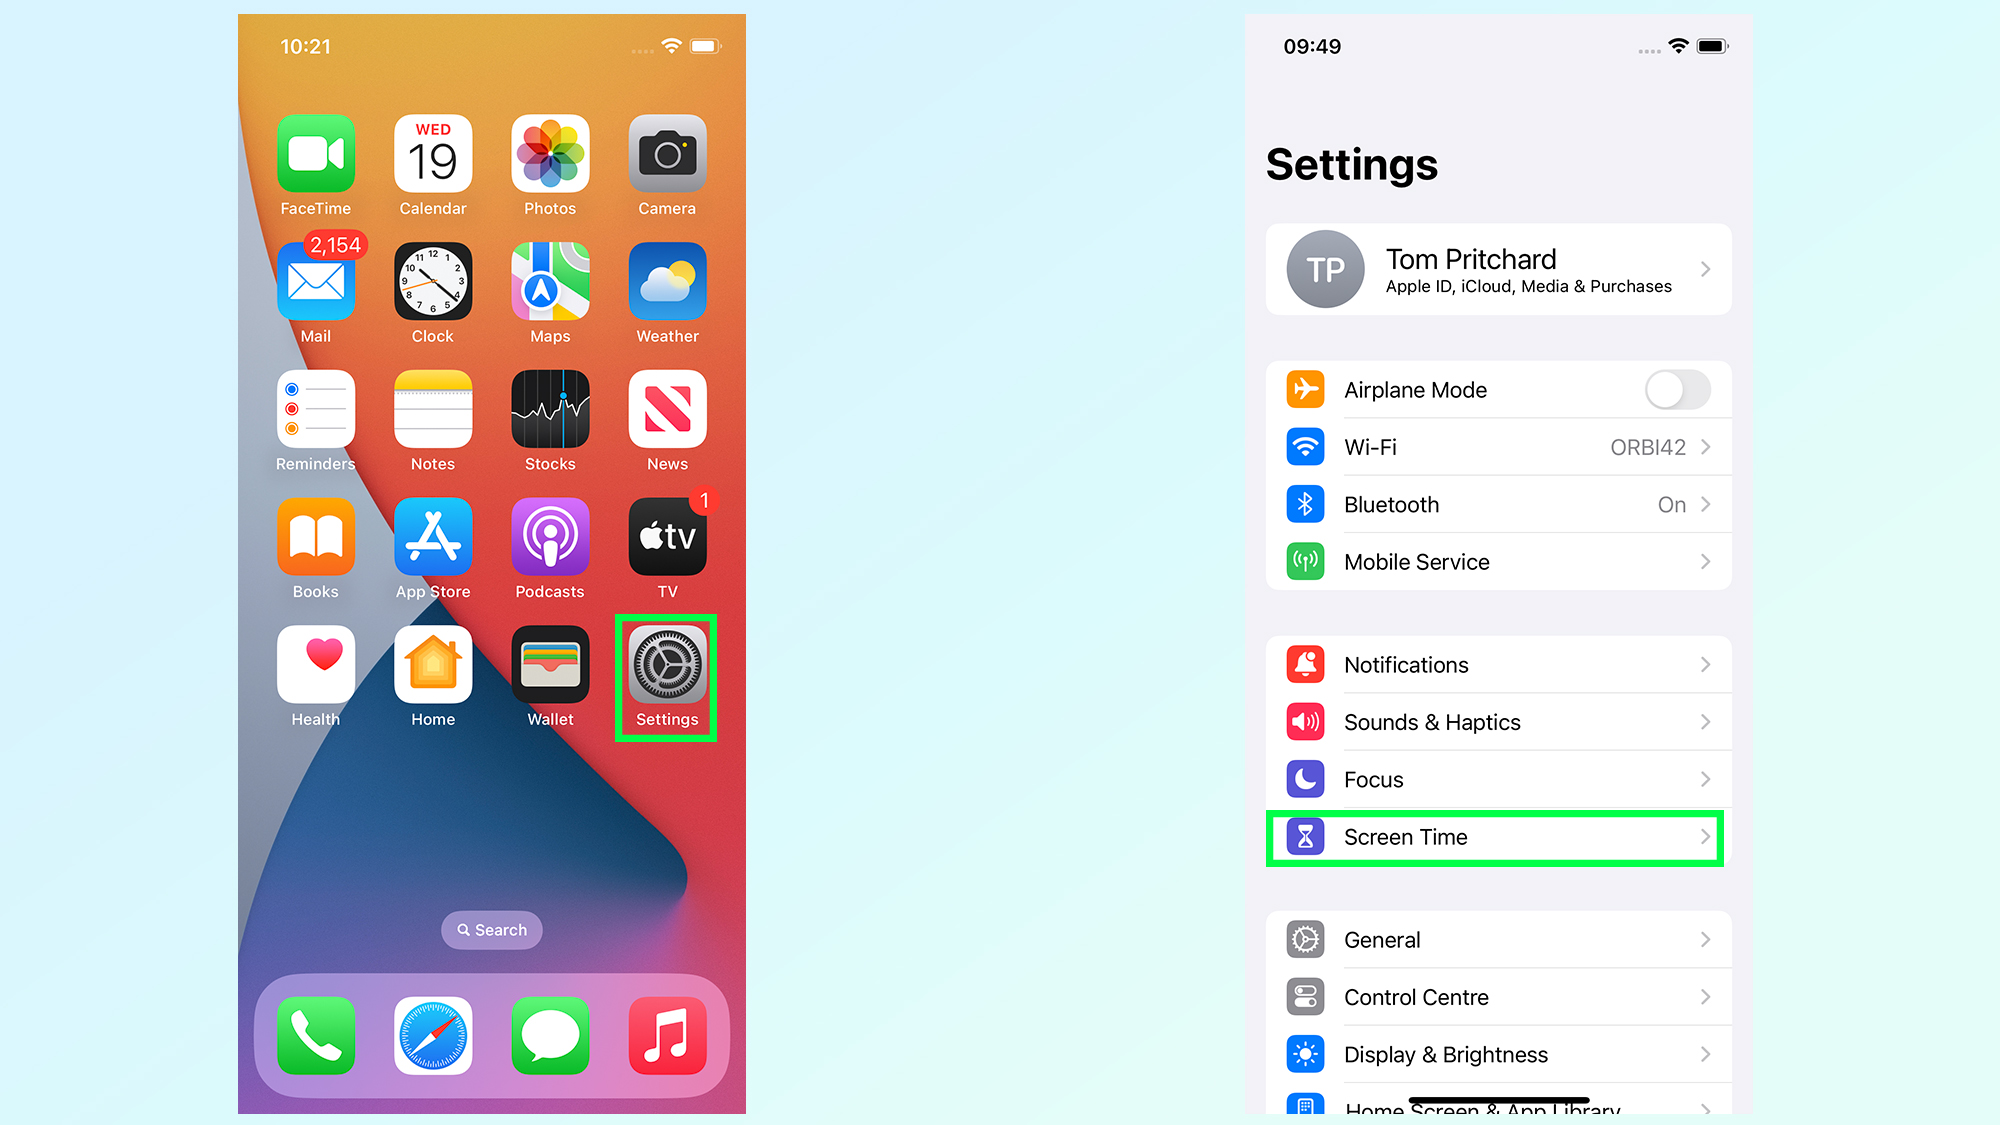
From your device’s home screen, or App Library, find the Settings app and tap the Screen Time option. You’ll find it in the second block of options, below Focus but above General.
3. Tap Screen Distance
(Image: © Future)
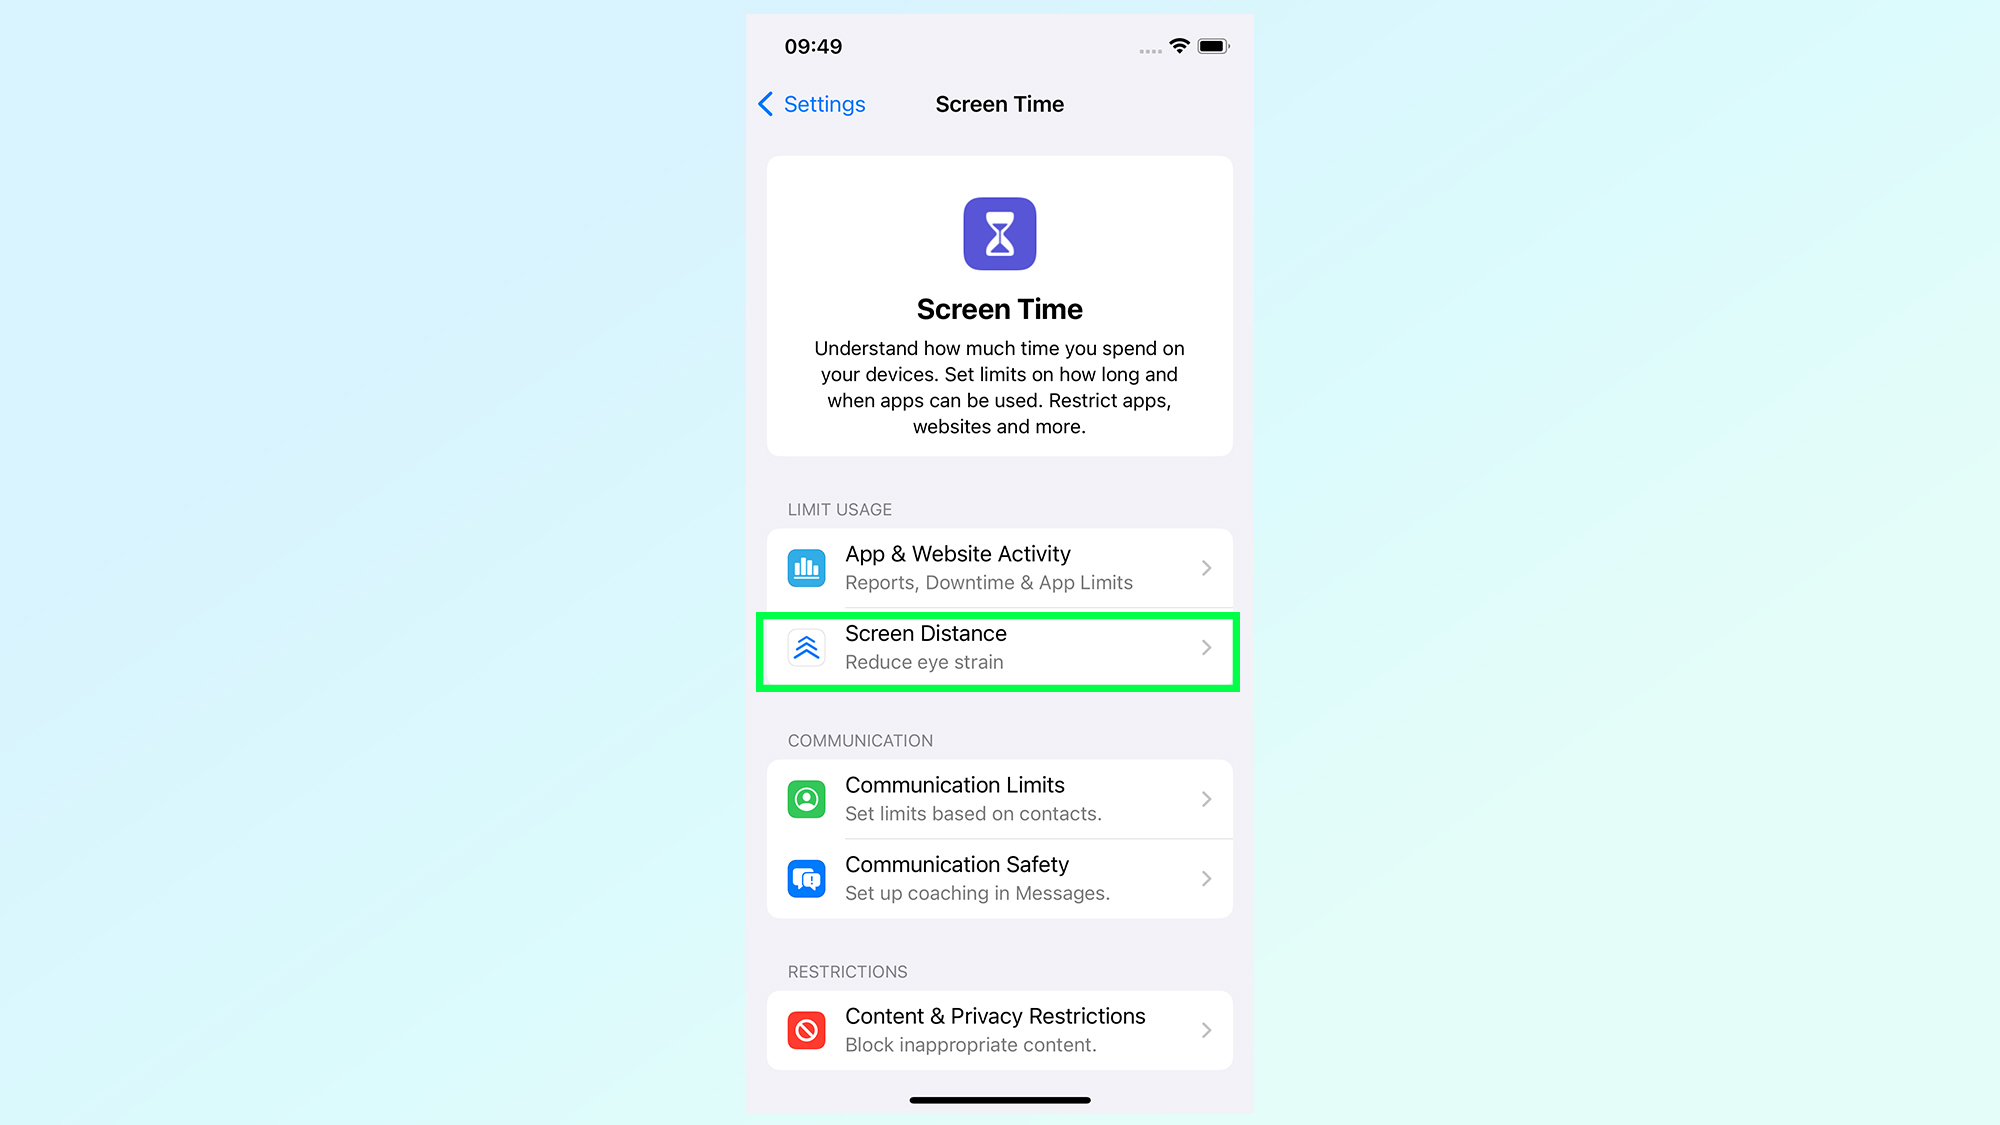
Once in the Screen Time menu, tap the Screen Distance option. It’s the second one down, directly below App & Website Activity.
4. Tap Continue on the following two information screens
(Image: © Future)
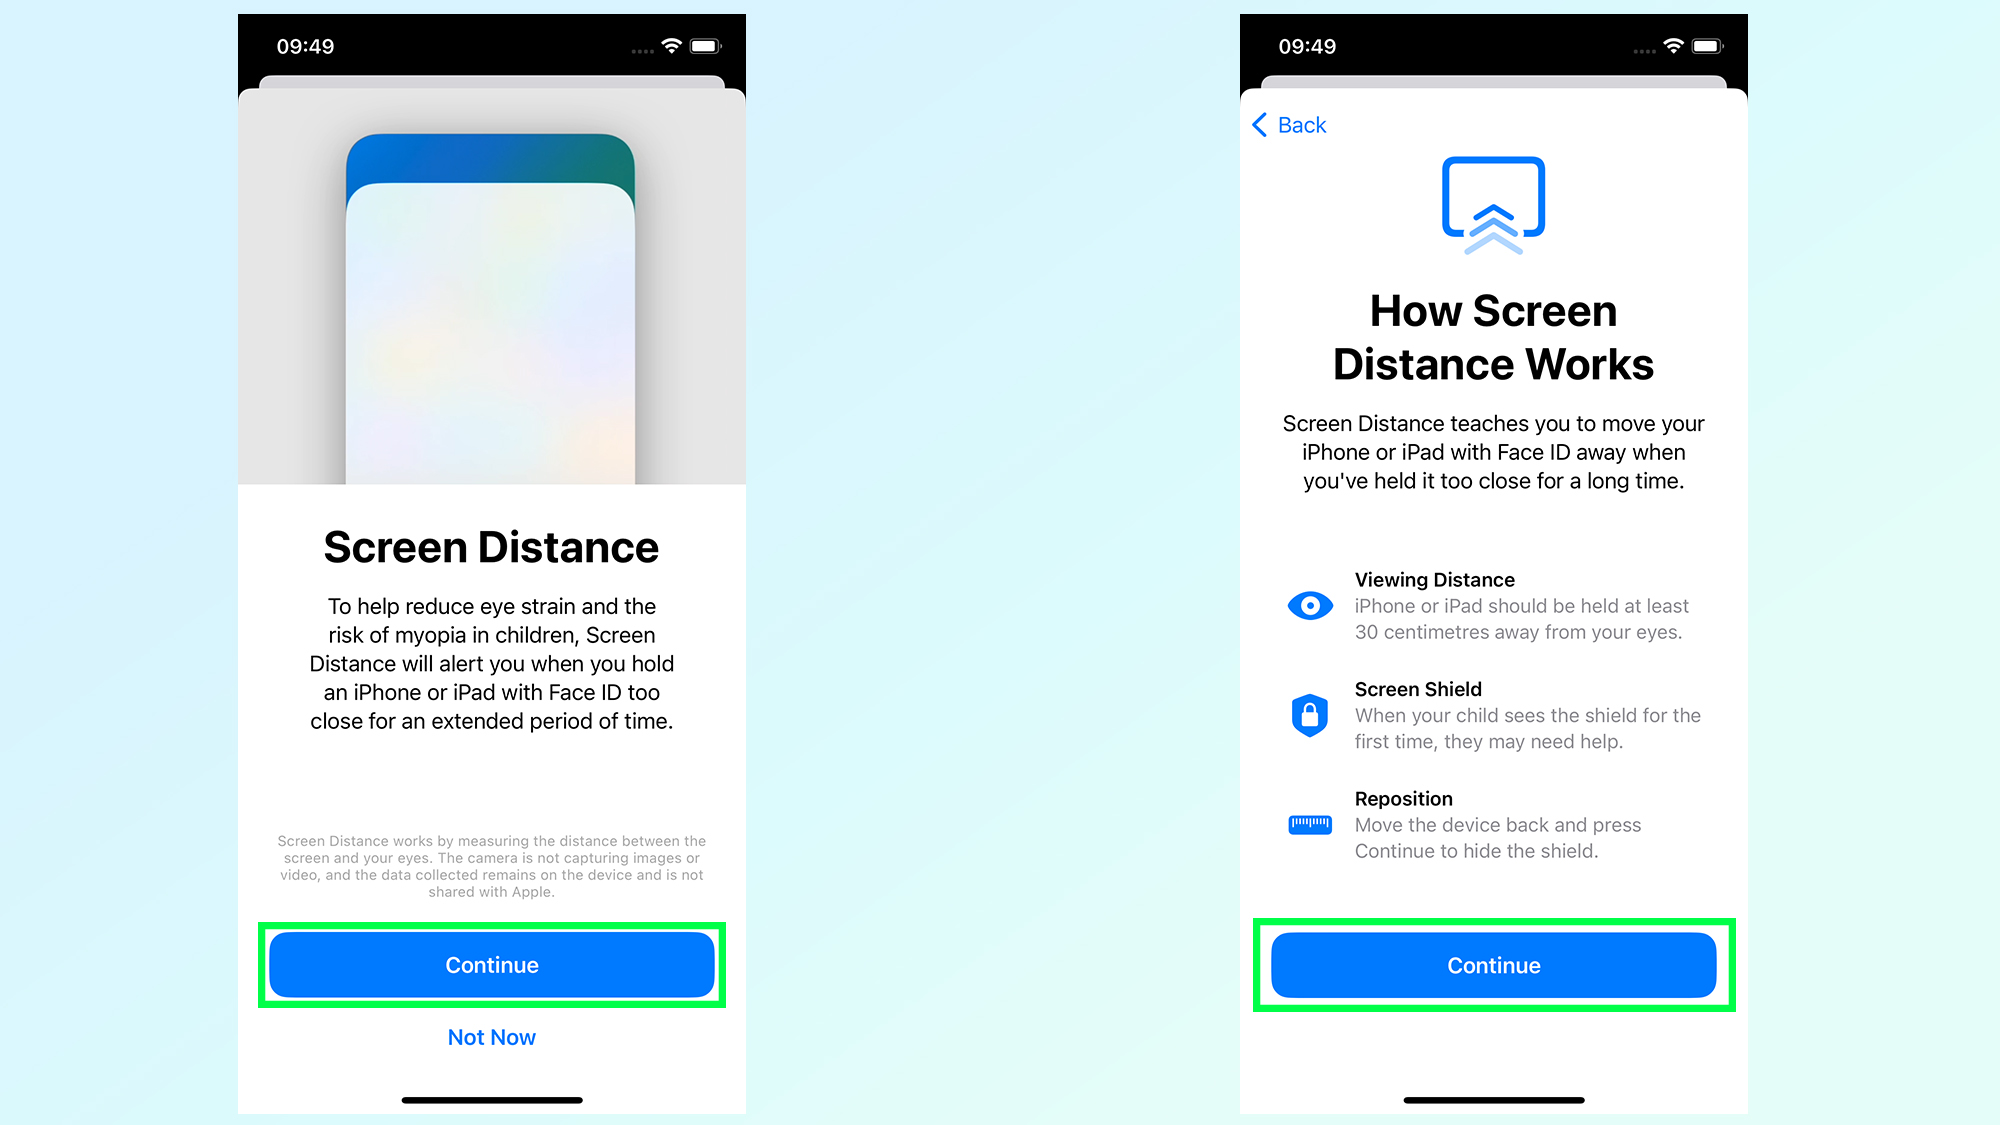
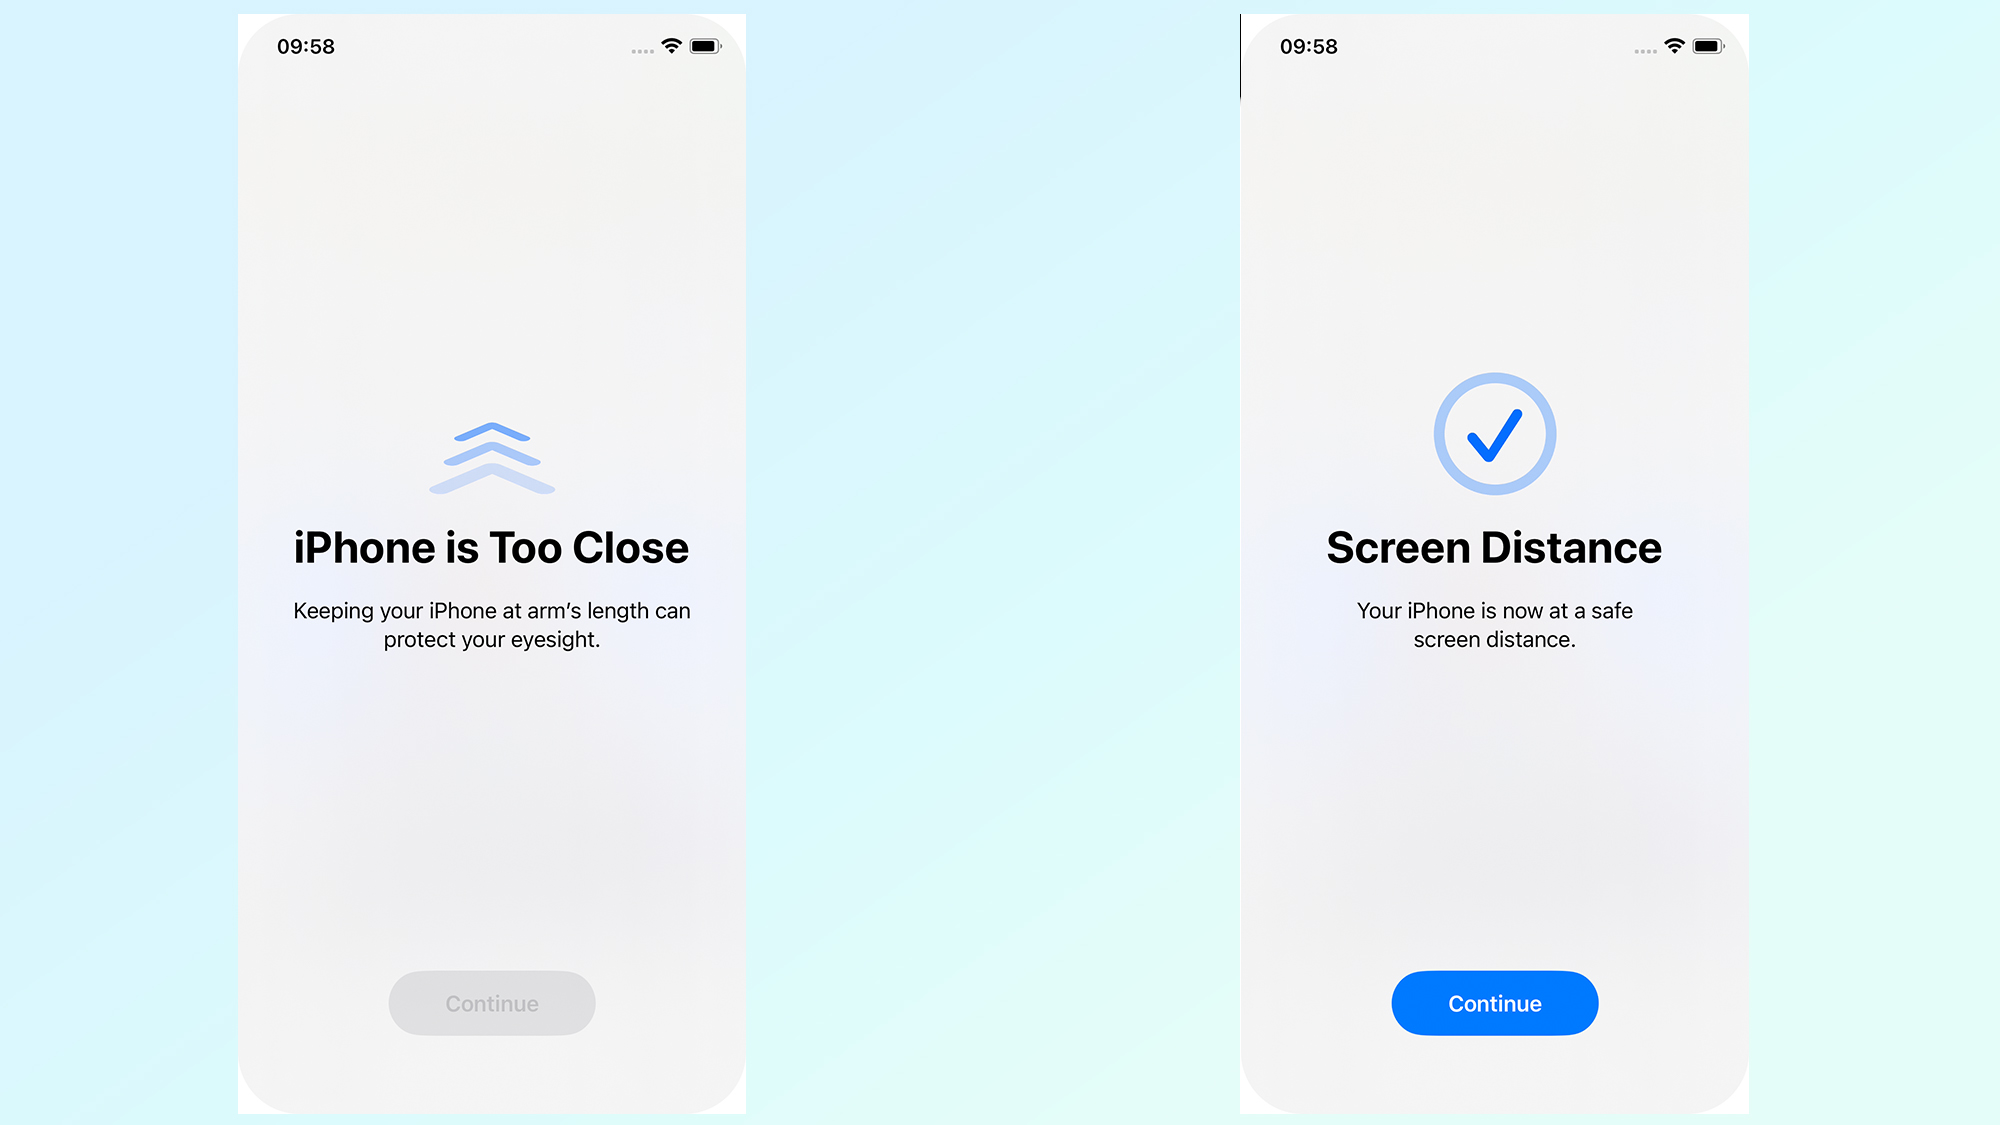
The next two screens will explain what Screen Distance is, how it’ll be of benefit to users, and what to do if the Screen Shield warning flashes up.
The feature itself is designed to reduce eye strain and the increased risks of myopia associated with up-close screen usage. And should a warning flash up, you’ll need to move the screen at least 12 inches (or 30cm) away from your face before you’re given the option to continue.
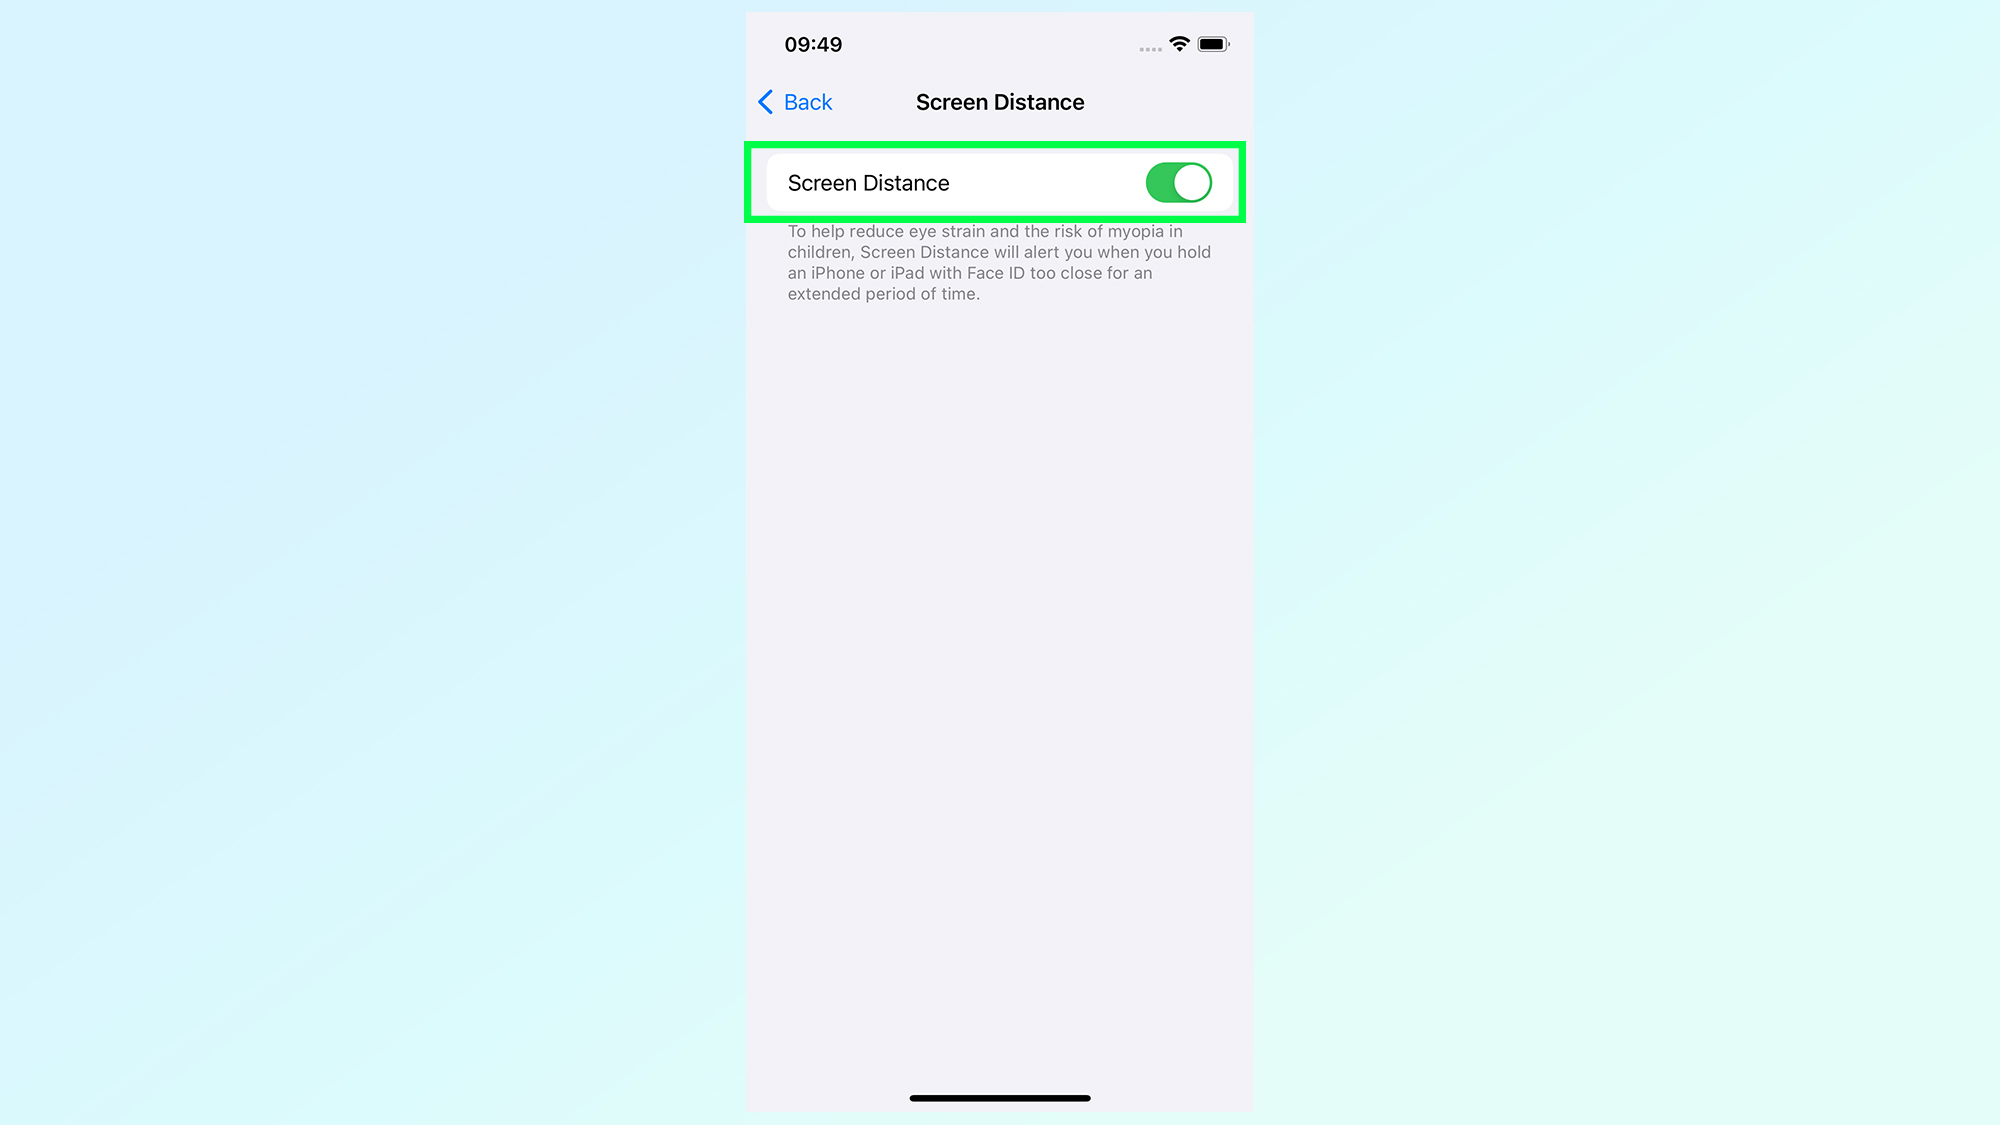
5. Ensure Screen Distance is toggled on
(Image: © Future)
The final screen has a single toggle, which lets you switch Screen Distance on and off at your leisure. It should be switched on once you get through the previous confirmation screens, but just be sure that the switch is green if you want Screen Distance turned on.
6. Test Screen Distance for yourself
(Image: © Future)
From here Screen Distance will work in the background, only ever activating if Face ID detects that you’re sitting too close to the screen for an extended period. It doesn’t happen instantly, though, and in our brief testing we found that it takes around 5 minutes before the Screen Shield appears on screen — at which point my eyes were already hurting.
If you’re looking for more details on what iOS 17 will have to offer be sure to check out our iOS 17 beta hands-on — or alternatively read up on how to install the iOS 17 beta to try them out for yourself right now.
And if you’re looking for more tips on what you can do with the iOS 17 beta be sure to check out our guides on how to set up Standby Mode, how to use Visual Look up on videos, how to create Contact Posters and how to use the iPhone camera level.
For all the latest Technology News Click Here
For the latest news and updates, follow us on Google News.
