How to move the taskbar in Windows 11
If you want to move the taskbar in Windows 11, you wouldn’t be alone. Microsoft made a bold call with Windows 11 by moving the taskbar and Start menu from the traditional left side of the screen to the center.
While some were happy with the change, many found it a little jarring. Microsoft didn’t help matters by initially making the change irreversible.
What prompted the move was a number of factors, like making it easier for those on a tablet or with a large monitor to interact with the OS. It also brought the Windows experience more in line with that of macOS, with its central dock.
The good news is Redmond saw the error of its ways and made it possible to shift the taskbar back to the left, should you wish.
If you’ve always lived with a left-sided taskbar, and want to make it so again, here’s the step-by-step process to get it done.
How to move the taskbar in Windows 11
Before we begin, we’ll just point out that while Windows 11 does let you move the taskbar to the right or the top of the screen, it requires altering the registry. Registry hacks can render the taskbar unreliable or unusable, so we’d recommend steering clear. This guide will only show you how to shift the taskbar to the left.
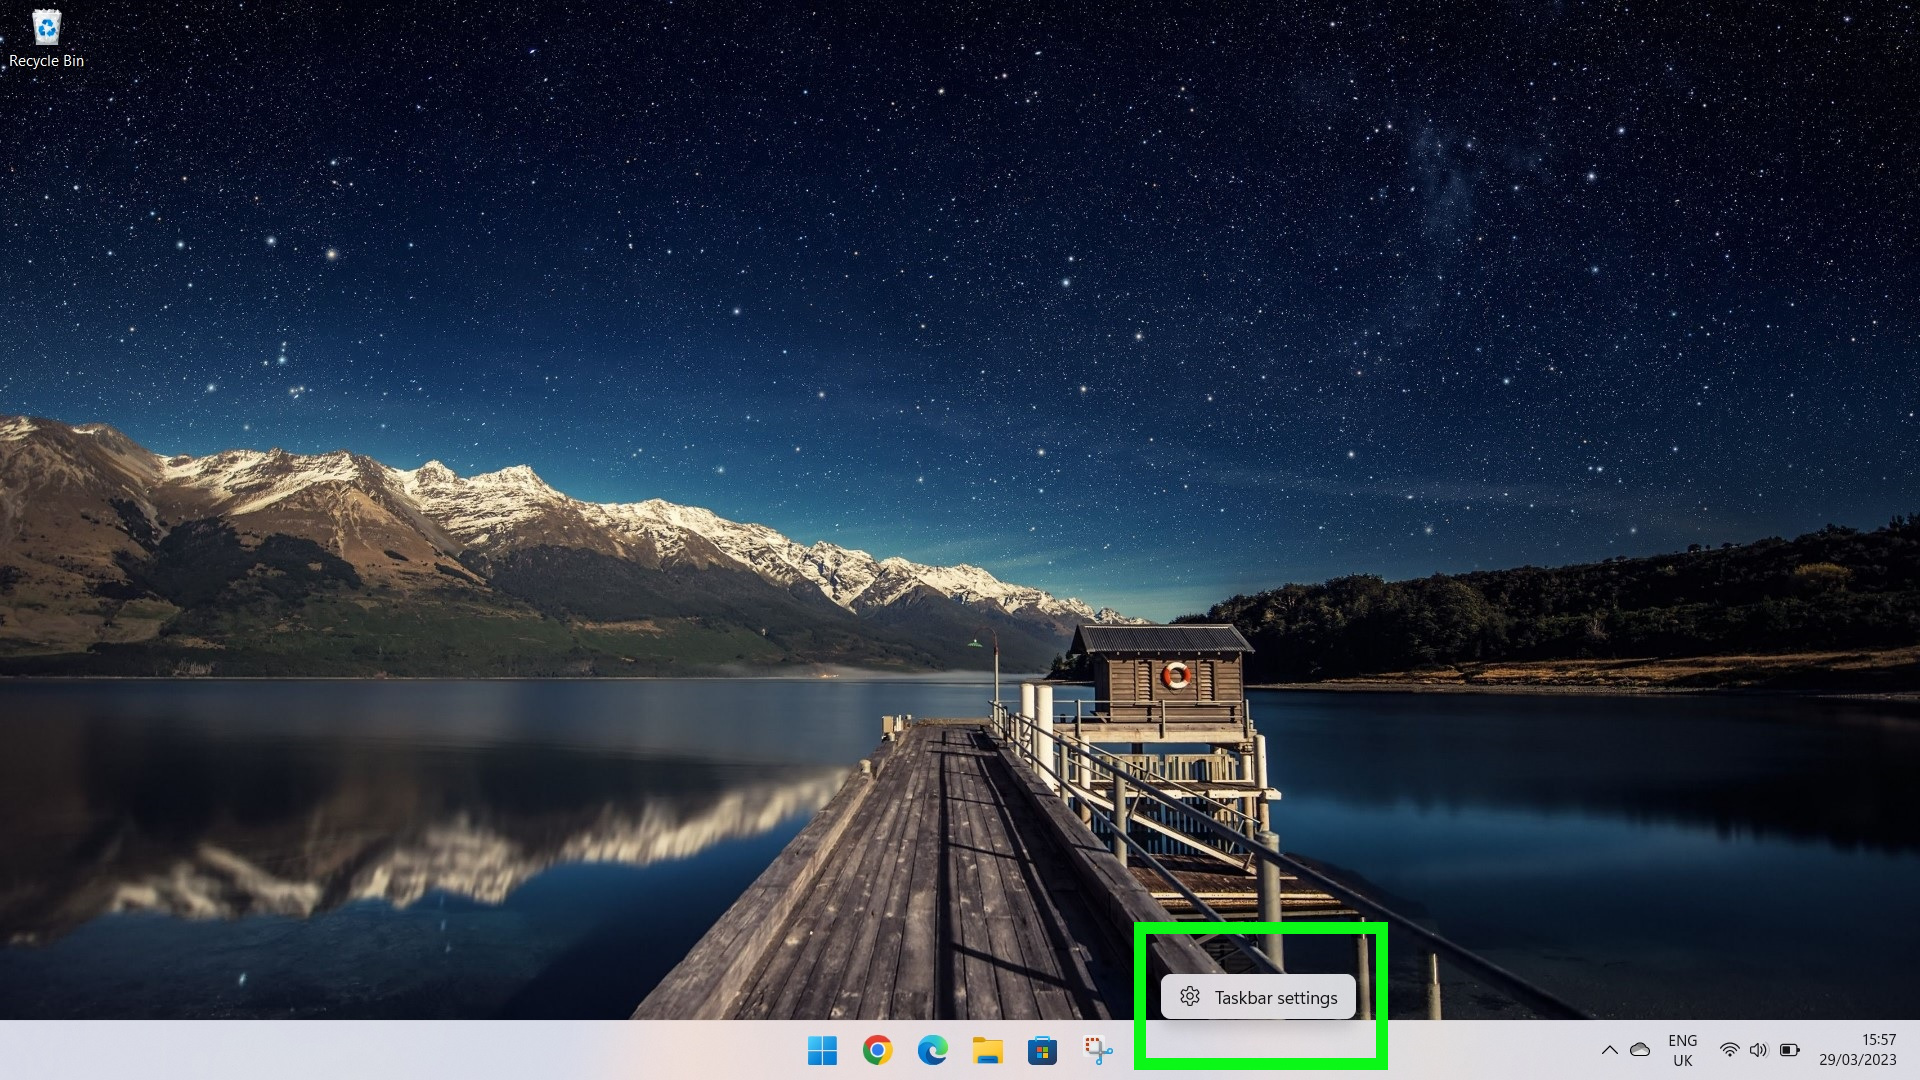
1. Open Taskbar Settings

(Image: © Future)
Right-click anywhere on your taskbar and click Taskbar Settings. This is where you’ll find the Taskbar behavior subsection where you can change the alignment.
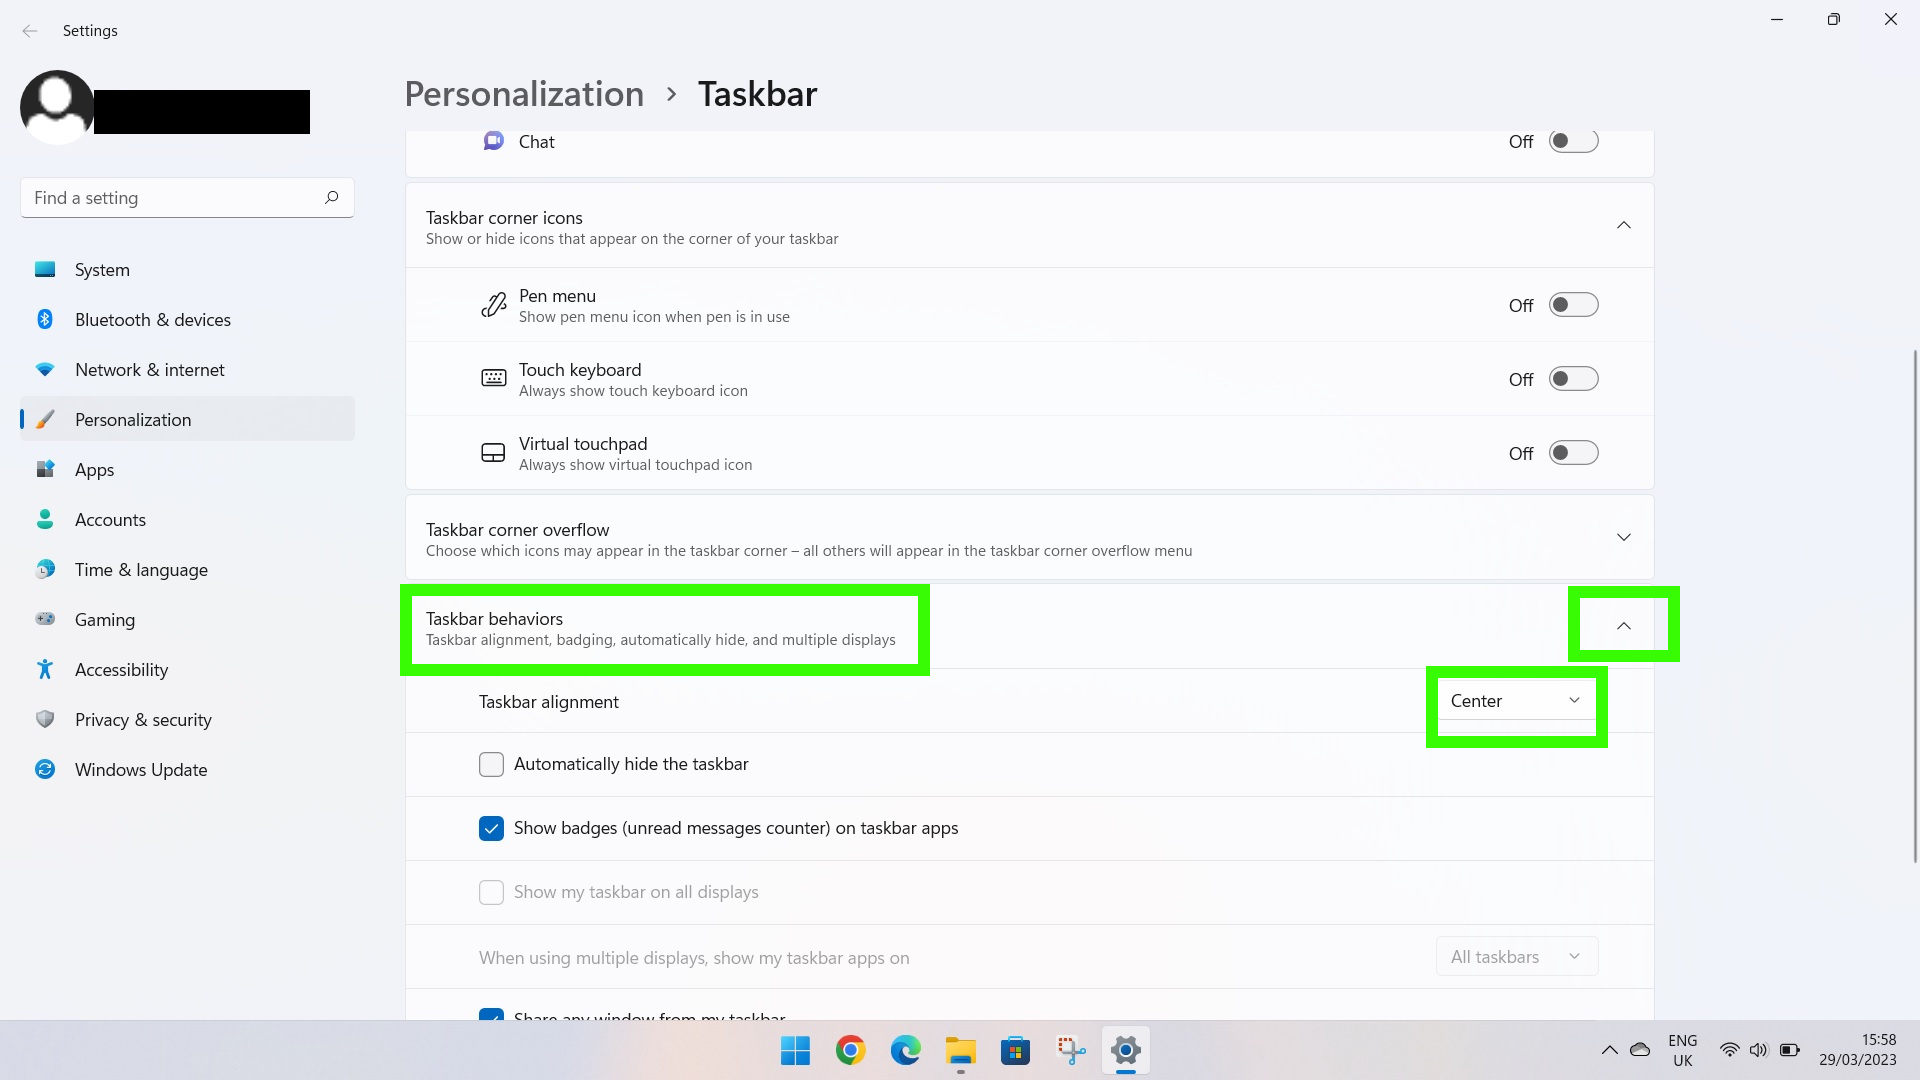
2. Open Taskbar behaviors

(Image: © Future)
Click the Taskbar behaviors dropdown on the right hand side. This will reveal the Taskbar alignment setting which will be on center by default.
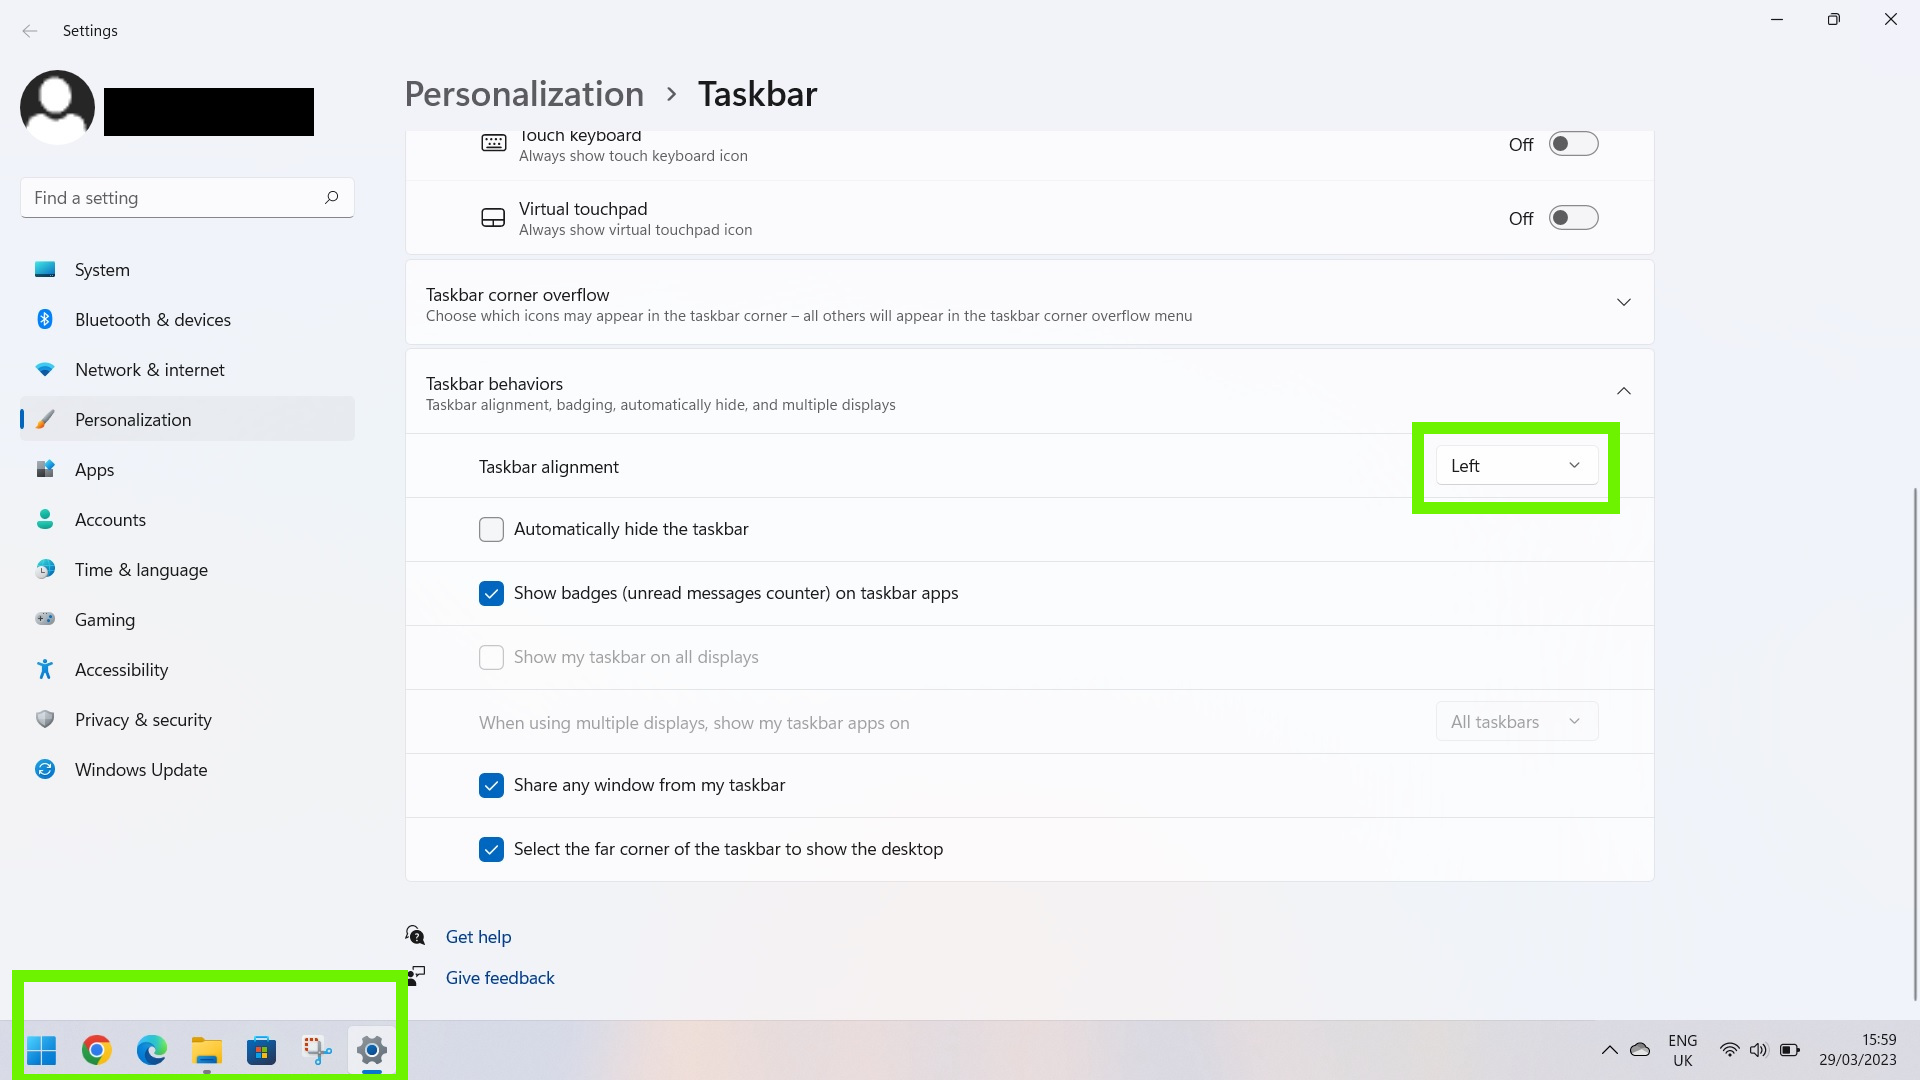
3. Change the Taskbar alignment

(Image: © Future)
Click on the Taskbar alignment dropdown and choose an alignment, e.g. Left. Once you’ve toggled the taskbar to the left, you’ll see your Start menu and all the apps, files and websites you’ve pinned there will shift instantly to the left-hand side of the screen.
And that’s all there is to it. With only a few quick clicks, you can move your Start menu and the rest of your taskbar over to the left. Where, some would say, it’s always belonged.
For more Windows 11 tips, be sure to read our article on how to use Windows 11’s new screen recorder. Also, check out how to get iMessages on Windows 11 via Phone Link for iPhone, and how to enable Windows 11’s built-in camera privacy warning.
More from Tom’s Guide
For all the latest Technology News Click Here
For the latest news and updates, follow us on Google News.
