How to get PowerToys in Windows 11
If you’ve made the switch to Windows 11 and mastered the ins and outs of Microsoft’s operating system, you may be ready to take the plunge and install a set of advanced tools for Microsoft power users.
I’m talking about PowerToys, the free Windows app Microsoft initially launched alongside Windows 95 to give power users more tools to control Windows.
While none of these tools are likely to be critical to your day-to-day work, they can do a lot to streamline your workflow and eliminate minor annoyances. In this guide, I’ll show you how easy it is to get PowerTools and start using it to improve your Windows 11 experience.
Below, I’ll walk you through how to get PowerToys up and running on your PC and give you some examples of what you can do with it.
How to get PowerToys in Windows 11
- Access the Microsoft Store
- Find and download Microsoft PowerToys
- Launch PowerToys and get up to speed
- Exert your newfound Windows powers
Read on to get detailed instructions for each step.
1. Access the Microsoft Store

(Image: © Future)
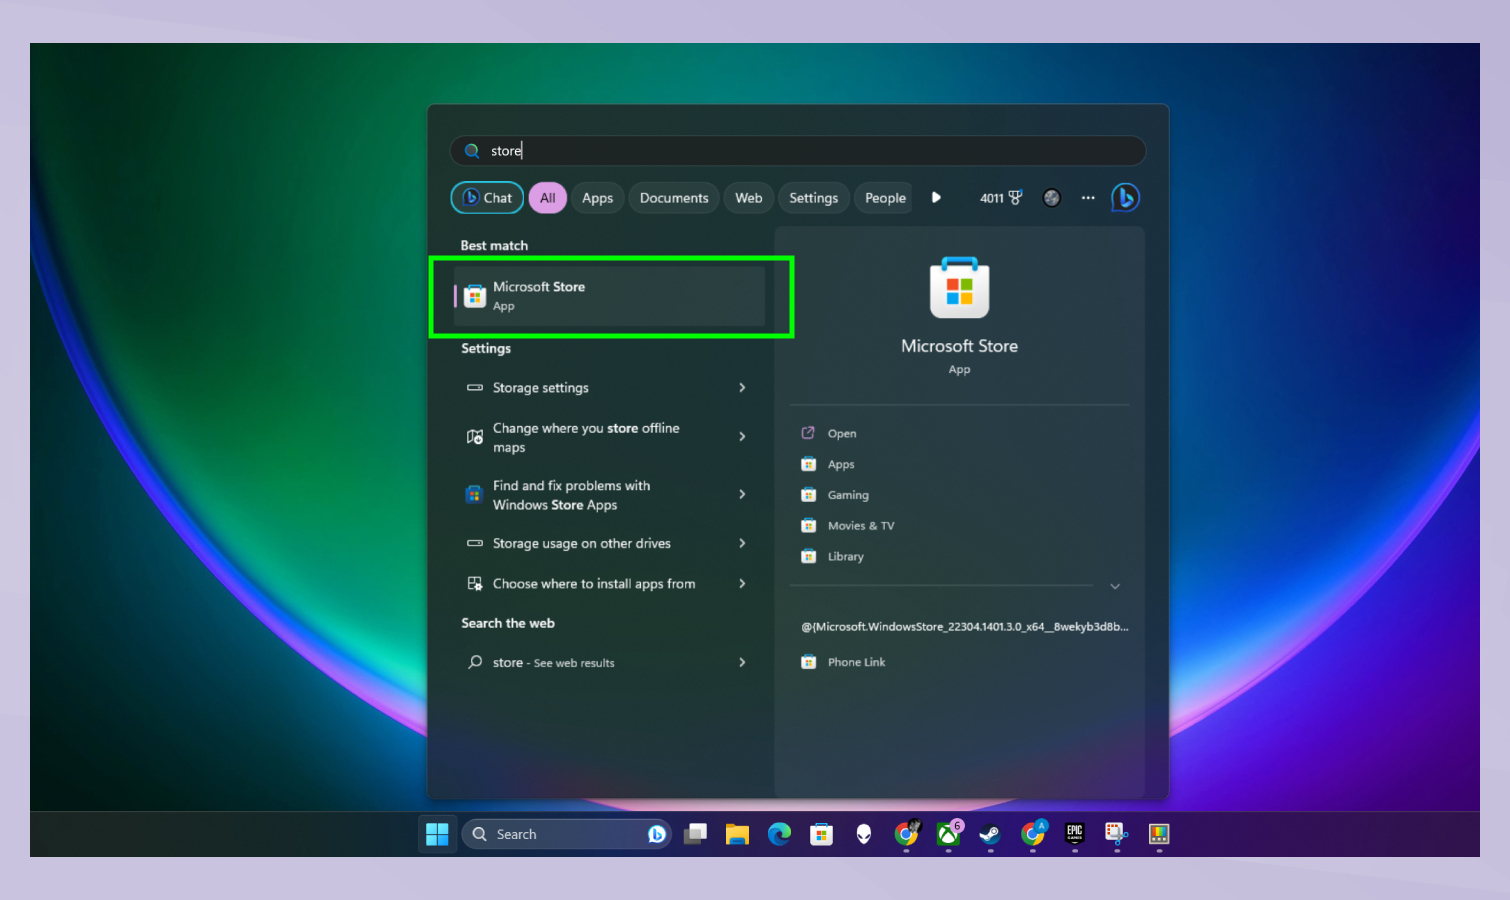
You can get Microsoft PowerToys a few different ways, but with the advent of the Windows Store, you’ve now got the fastest option at your fingertips. Simply open the Microsoft Store by either clicking the Store icon on your Windows taskbar or hitting Start and typing Store — you then launch the Windows Store when it appears in search results.
2. Find and download Microsoft PowerToys

(Image: © Future)
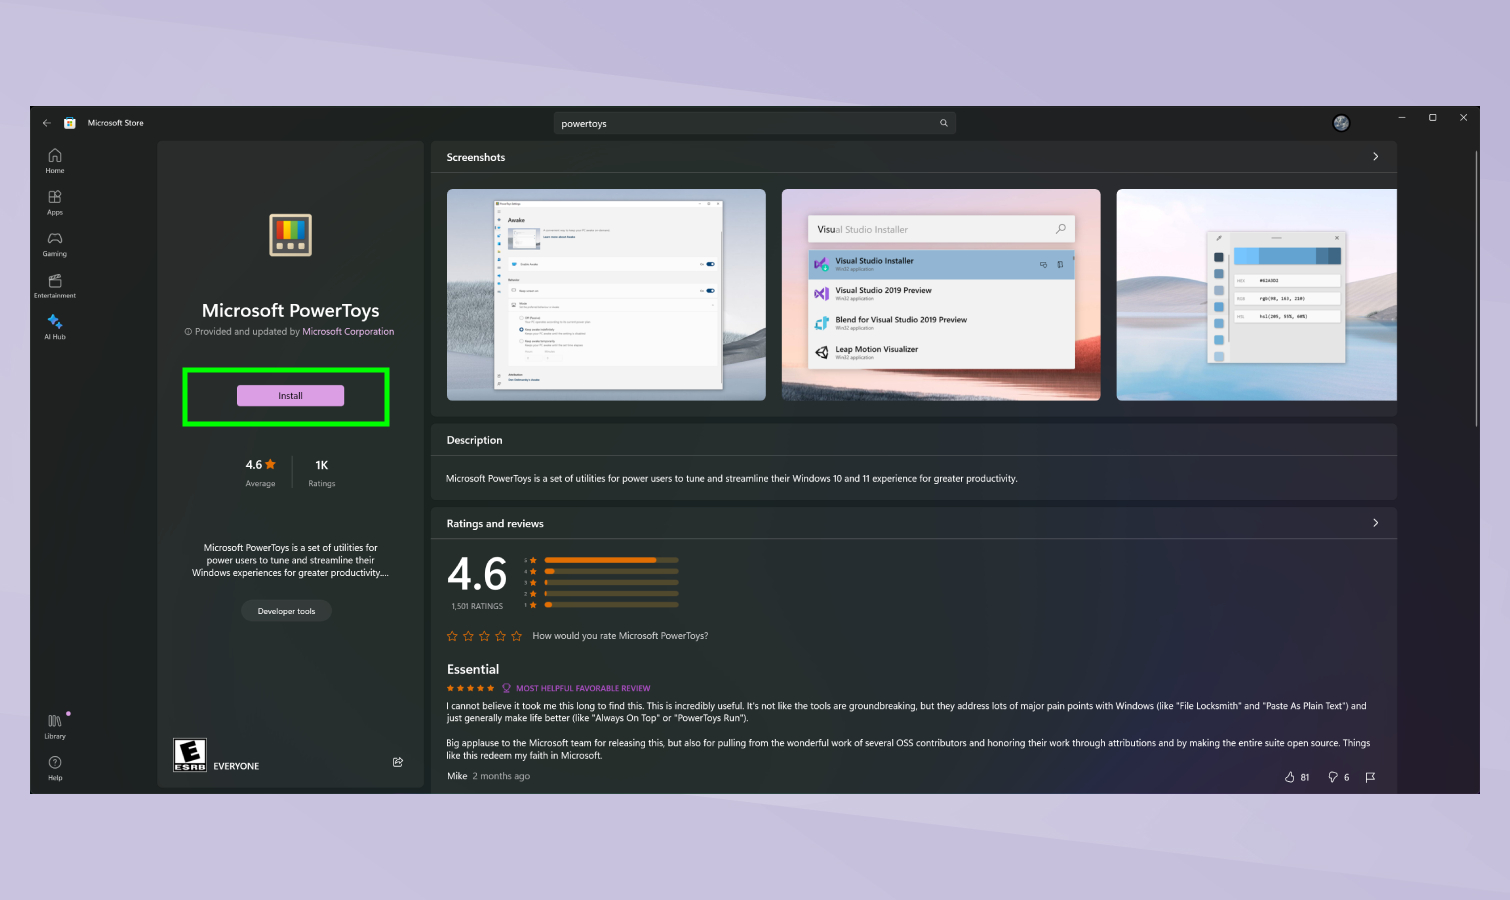
Once you’re in the Windows Store, simply search for PowerToys and click on Microsoft PowerToys in the search results. Then, hit the big Install button.
3. Launch PowerToys and get up to speed

(Image: © Future)
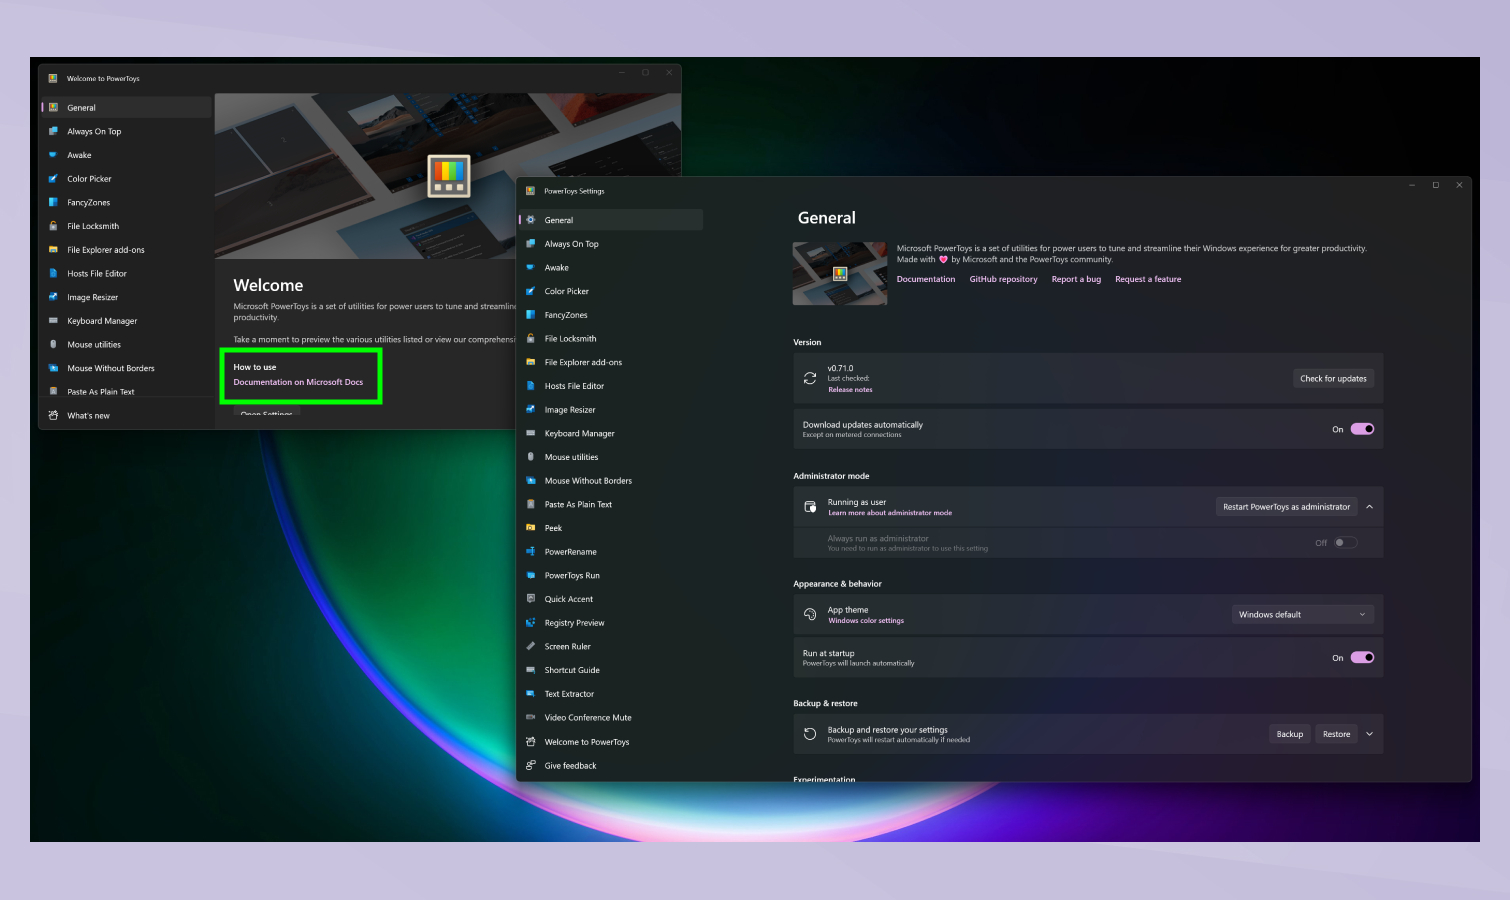
Once PowerToys has finished installing, it should immediately launch itself. If it doesn’t (or if you want to find it later), you can launch it on your own. Simply hit Start and type PowerToys, then click the PowerToys app in the search results.
When PowerToys opens, you will see a welcome message with a link to documentation on how to use PowerToys, because it includes more than 20 utilities that help you fine-tune control over your PC.
That’s too many to go over here, but Microsoft does a decent job of explaining how they all work in its documentation, which is why I recommend you read Microsoft’s documentation on how to use PowerToys before diving in deep.
4. Exert your newfound Windows powers

(Image: © Future)
Congratulations, you’re a PowerToys user! Now all that remains is to explore your newfound powers and decide how to use them.
You can use Always On Top (shortcut: Windows key+Ctrl+T) to pin a window so it’s always visible above anything else on your desktop, or you can use Quick Accent to make typing accented characters as easy as pressing and holding a key, just like on your smartphone.
Alternatively, you could enable Find My Mouse to make Windows 11 highlight your mouse pointer’s location whenever you shake the mouse, or you could turn on Mouse Without Borders to use the same keyboard and mouse to drag and drop files across multiple Windows PCs in the same local network, much like how Apple’s Universal Control tech allows you to use the same mouse across a Mac and an iPad.
If you’ve followed the steps above you’re now equipped with a set of Windows 11 tools that give you rare control over how your PC functions.
Take some time to play around with the utilities in PowerToys and see what they can do for you — I think you’ll be pleasantly surprised at how much use you can get out of Microsoft’s free app.
For more Windows 11 help, learn how to restart Windows 11, how to take screenshots in Windows 11 and how to move the taskbar in Windows 11.
For all the latest Technology News Click Here
For the latest news and updates, follow us on Google News.
