How to connect Oculus Quest 2 to a PC
The Oculus Quest 2 is at the top of our list for the best VR headsets for its great design, ease of use, and large library of games that you can get right on the headset itself. However, you can get even more out of it if you connect your Oculus Quest 2 to a PC; that way, you can use it to play games on your PC and more.
There are two ways to connect your Oculus Quest 2 to a PC; we’ll show you how to do both.
How to connect Oculus Quest 2 to a PC: System requirements
Before you start either method, you’ll have to download the Oculus app to your PC. Go to oculus.com/setup and click on the link that says “Download Quest 2 PC app.”
There are separate links below for the Rift S and the Oculus Link; note that if you have either of those sets, Meta advises that you use a PC with Windows 10, as the software is not yet compatible with Windows 11.
To use Oculus Link, Meta recommends you have a PC with an Intel i5-4590 / AMD Ryzen 5 1500X or greater and at least 8GB of RAM. Most Nvidia GPUs from the 970-series and higher are compatible, as are AMD 400-series and higher GPUS. For a complete list, you can check the Oculus Link compatibility requirements.
How to connect your Oculus Quest 2 to a PC via Link
This is perhaps the easiest way to connect your Oculus Quest 2 to a PC, but it means you’ll be tethered to your computer and won’t be able to move around as freely. For this, you’ll need a USB-C cable. If your PC has a USB-C port, you can use a USB-C to USB-C cable; otherwise, you’ll need a USB-C to USB-A cable. Meta sells a 16-foot Oculus Link cable for $79, but any USB-C cable should work; you’ll want one that’s plenty long, though. You can find plenty on Amazon for around $20.
1. Make sure your Oculus Quest 2 is turned on. In the Oculus app, select Devices, and then Add Headset.
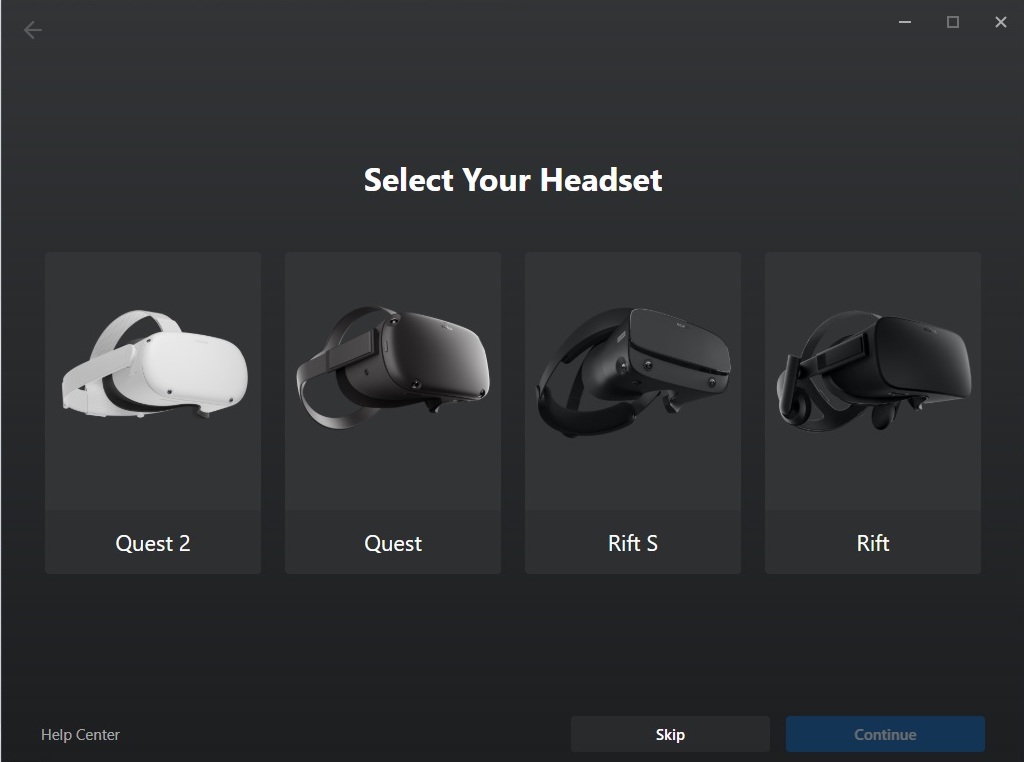
2. Select Quest 2.
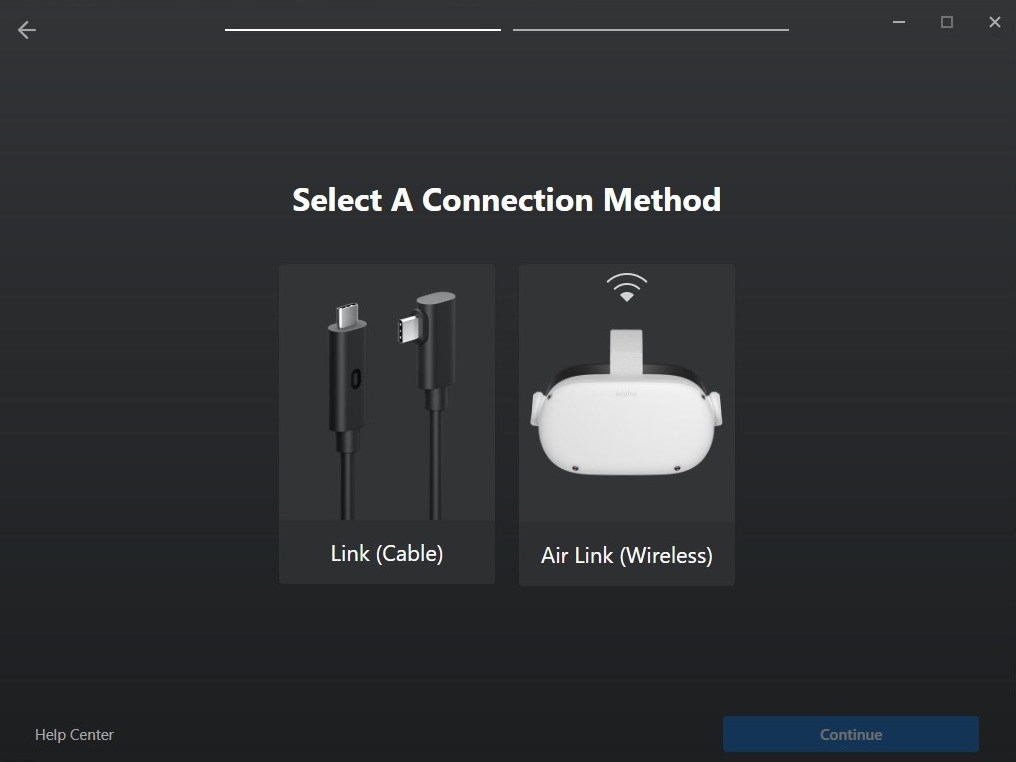
3. Select Link (Cable) as the connection method.
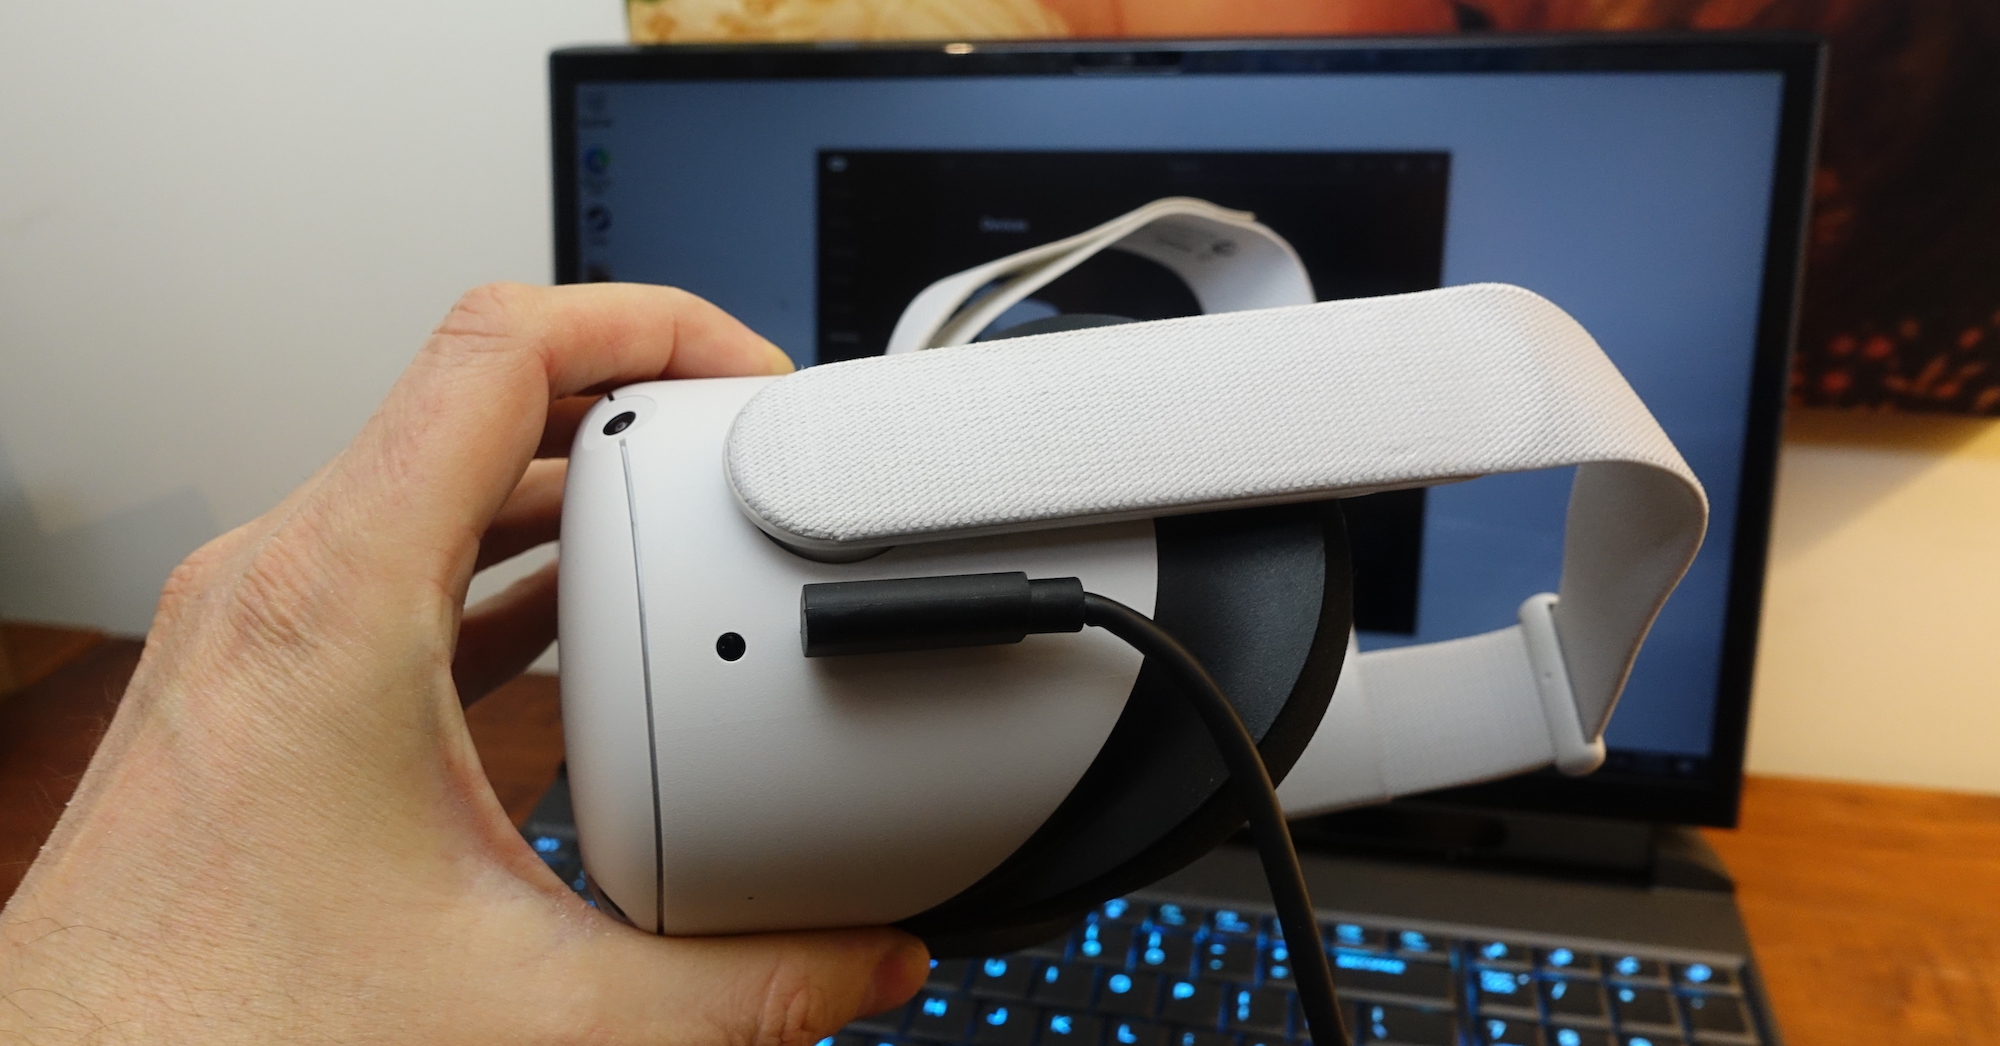
4. Plug one end of the cable into your Oculus 2 headset, and the other end of the cable into your PC.
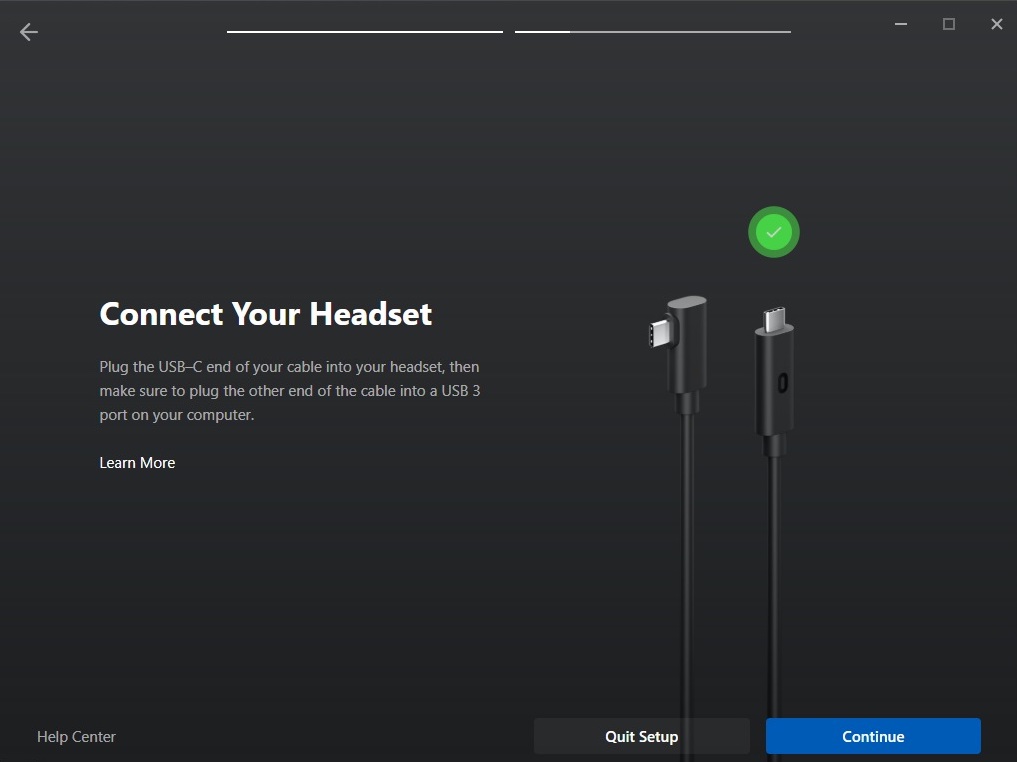
5. In the Oculus app, press Continue. On the screen that appears next, you can choose to test your cable connection, or press Continue.
Your Oculus Quest 2 is now connected to your PC.
How to connect your Oculus Quest 2 to a PC via Air Link
This process involves a few more steps, but it also allows you to use your Oculus Quest 2 untethered from your PC.
1. Make sure that both your Quest 2 and your PC are on the same Wi-Fi network; Meta advises that they should be connected to a 5GHz network.
2. In the Oculus app on your PC, select Devices, then Add Headset.

3. Select Oculus Quest 2, and then select Air Link (Wireless) as your connection method.
4. Put on your headset. Open Quick Settings by hovering over and selecting the clock on the left side of the navigation bar.
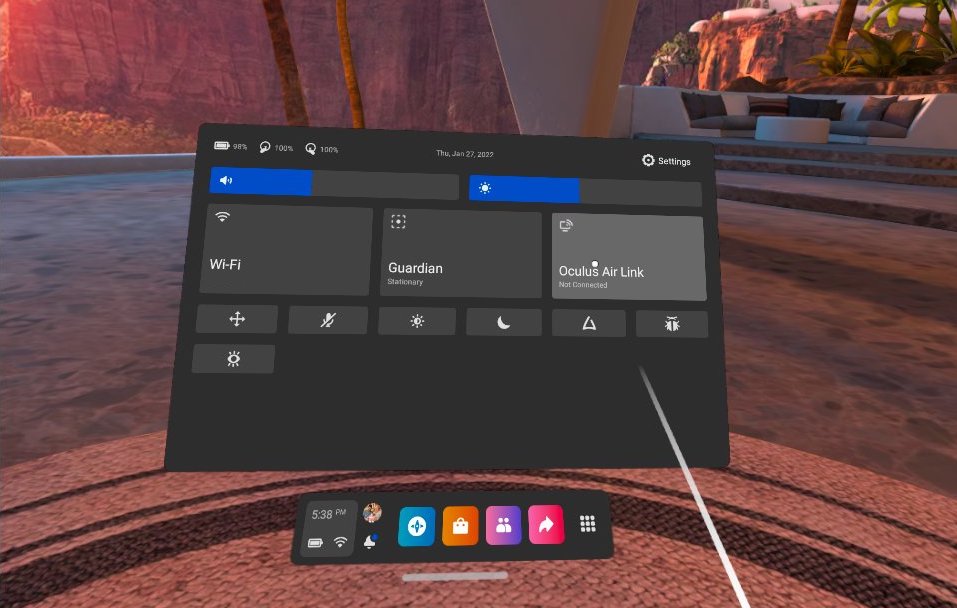
5. Press the gear icon in the upper right corner of the window that appears to open the full Settings menu.
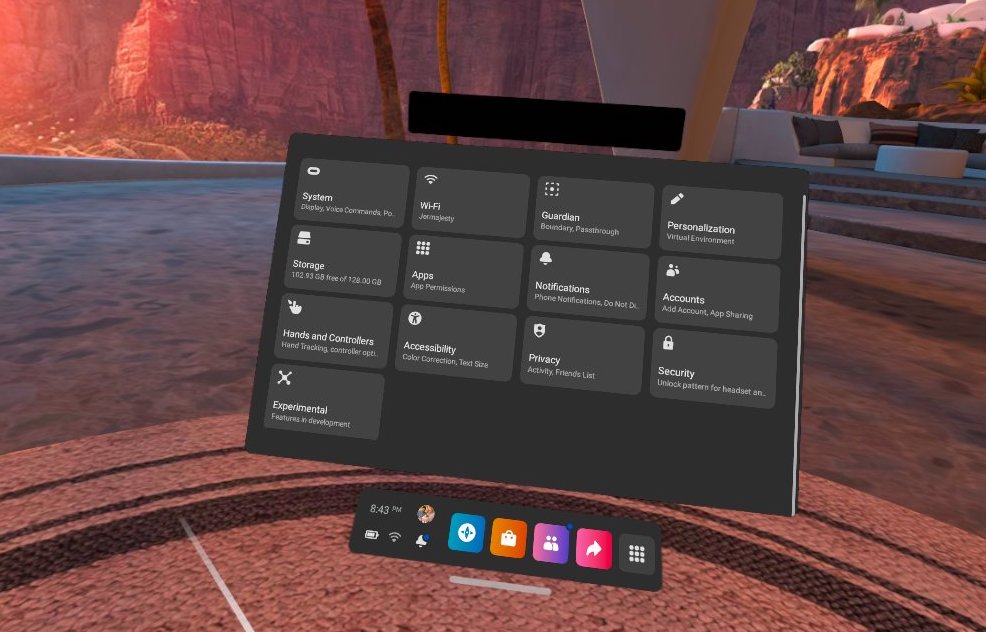
6. Select the Experimental box.
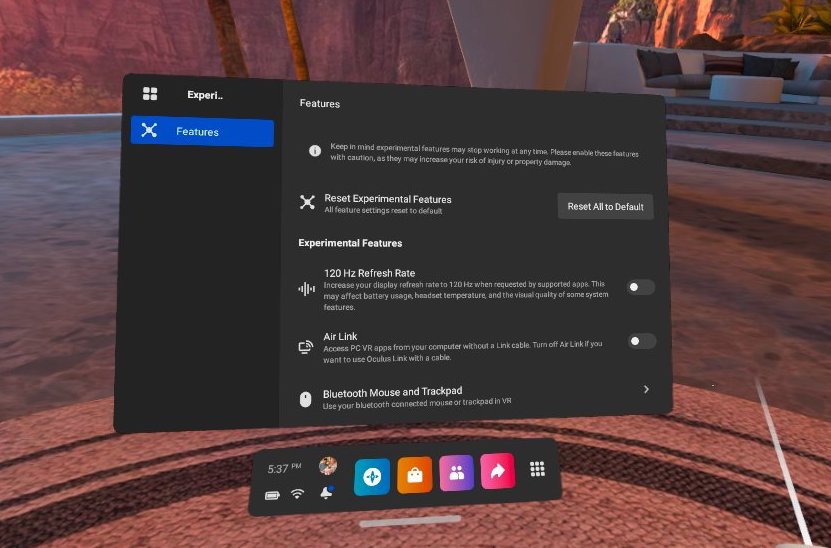
7. Look for Air Link, and toggle it On.
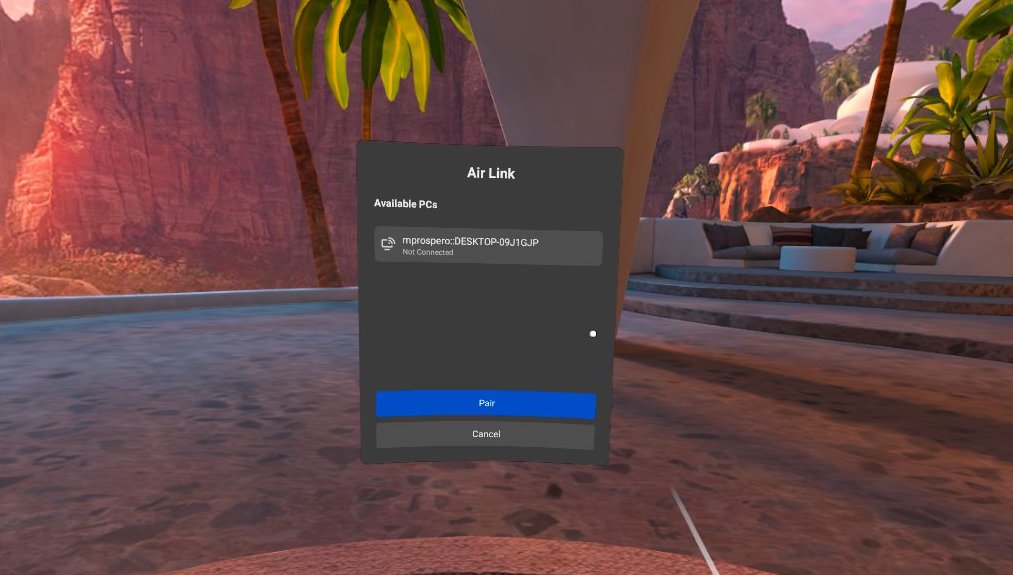
8. Go back to the main Settings window, and select the Air Link box. A window will appear showing all PCs on your network with Air Link available. Select your PC.
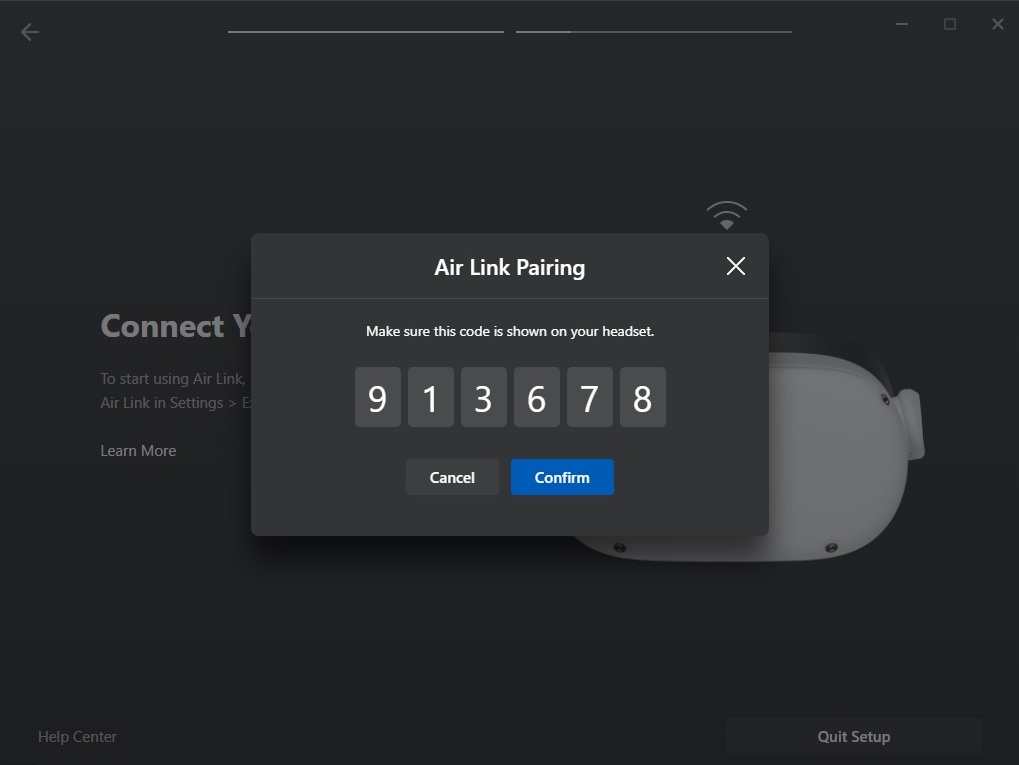
10. A pairing code will appear in your Oculus Quest 2. Take off the headset and make sure it matches the code that appears on your PC’s screen.
11. Put the headset back on, and complete the pairing process.
You should be now connected. From here, you can mirror your PC’s display onto the Oculus Quest 2, which will let you play any VR-compatible games, such as Microsoft Flight Simulator, Half-Life: Alyx, and Star Wars: Squadrons.
In this mode, you can also control your PC through the headset and its controllers; you can launch apps, open windows — anything you could do with your PC’s keyboard and mouse, though typing is a bit trickier.
If you want others to see what you’re playing, check out our guide on how to cast the Oculus Quest 2 to a TV. We also have guides on the best Oculus Quest 2 accessories, as well as the best Oculus Quest 2 games.
For all the latest Technology News Click Here
For the latest news and updates, follow us on Google News.
