How to Access Your iPhone if You Forget Your Passcode
There are ways to unlock your iPhone even without the right passcode, but you’ll need a PC with iTunes or a Mac with Finder.
You’ve forgotten the passcode for your iPhone and can’t sign into your device. Uh-oh, now what?
Even if you do remember the correct passcode after several failed passcode attempts, you may not be able to easily unlock your phone. Apple offers ways to access your iPhone without the passcode, but you’ll have to put it into recovery mode. That means the phone gets wiped clean to remove everything, including your current passcode. From there, you’ll need a recent backup if you want to restore your iPhone to its previous state.
With that in mind, you should create and maintain a regular backup of your iPhone in case your device is ever lost or wiped, so you can restore all your apps, settings and data to the same phone or a new one. You can back up an iPhone to iCloud or to your computer; I recommend that you periodically back it up to both locations to be on the safe side.
SEE: 6 Best VPNs for iPhone in 2023 (TechRepublic)
Your iPhone passcode attempts don’t work
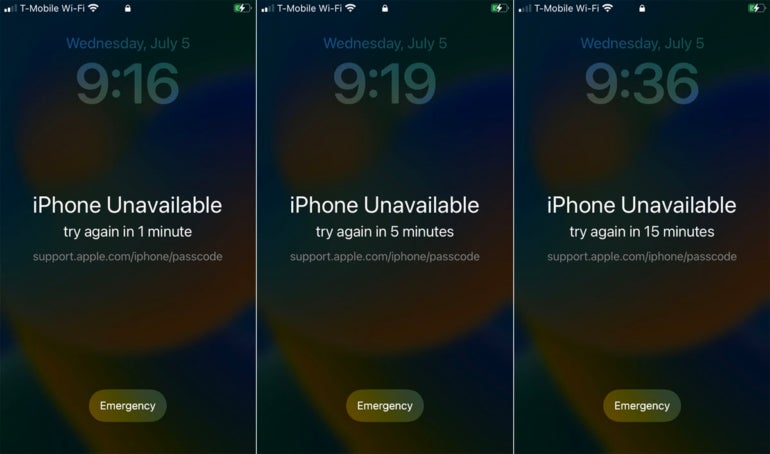
Let’s say you’re trying to unlock or access your phone. For some reason, Face ID or Touch ID isn’t working, assuming you have set up either unlock method. You’ve entered what you think is the right passcode. After a few failed attempts, you’re told that the iPhone is unavailable and that you should try again in one minute. You keep at it, but with each incorrect guess, your iPhone becomes unavailable for longer, asking you to try again (Figure A).
Figure A
Use iTunes or Finder to access your iPhone without a passcode
Rather than keep playing this game, you can unlock your iPhone without a passcode if it keeps being rejected. For this step, you’ll need to use iTunes on a Windows PC or a Mac with a pre-Catalina OS, or Finder on a Mac with macOS Catalina or later.
Connect your iPhone to your PC via a USB or Lightning cable and then turn off your phone. You’ll need to power up your iPhone again, but this time in recovery mode. Open iTunes or Finder.
The buttons you press to start the phone in recovery mode vary based on your iPhone model. On an iPhone 8 or later and on an iPhone SE (2nd or 3rd generation), press and quickly release the Volume Up button and then the Volume Down button. Then press and hold the Side button until the recovery mode screen appears.
On an iPhone 7 or iPhone 7 Plus, press and hold the Side button and Volume Down button until the recovery mode screen appears. And on an iPhone 6s and earlier, press and hold the Side button and Home button until the recovery mode screen appears.
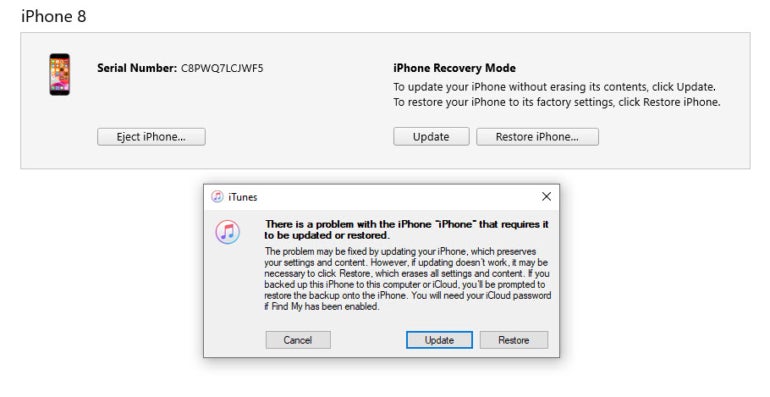
As the recovery screen pops up on your iPhone, you’ll see a message in iTunes or Finder telling you there is a problem with your phone that requires it be updated or restored. Click Restore (Figure B).
Figure B
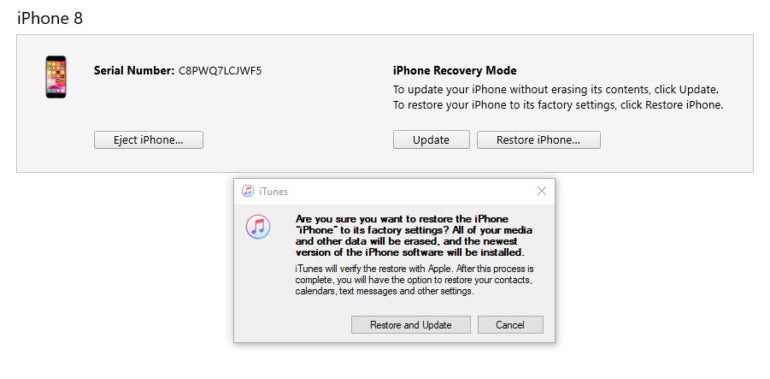
The next message asks if you’re sure you want to reset your iPhone to its factory settings. Click Restore and Update. (Figure C).
Figure C
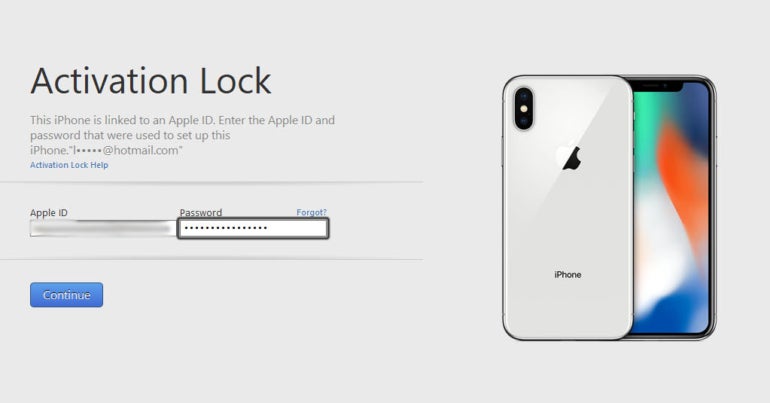
Allow the restore process to run. If Activation Lock is enabled, at some point you’ll be asked to enter your Apple ID and password; this is a feature that automatically kicks in when you turn on the Find My iPhone feature. At the iTunes screen or iPhone screen, type your ID and password and click Continue (Figure D).
Figure D
If all goes well, you should see a message that your phone was unlocked. Click Continue (Figure E).
Figure E
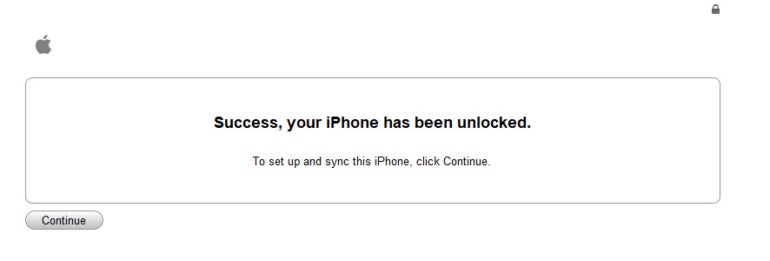
You can set up your iPhone as a new device or restore its data from the latest backup. If you have a recent iTunes or Finder backup on your computer, choose the restore option and then select the backup you wish to use. Follow the steps to restore your phone (Figure F).
Figure F
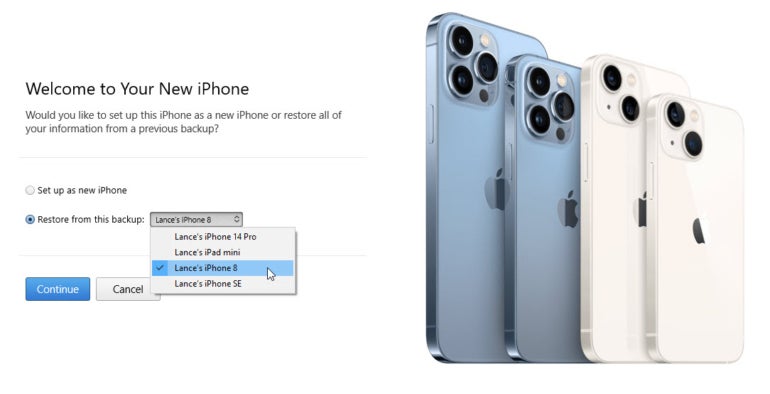
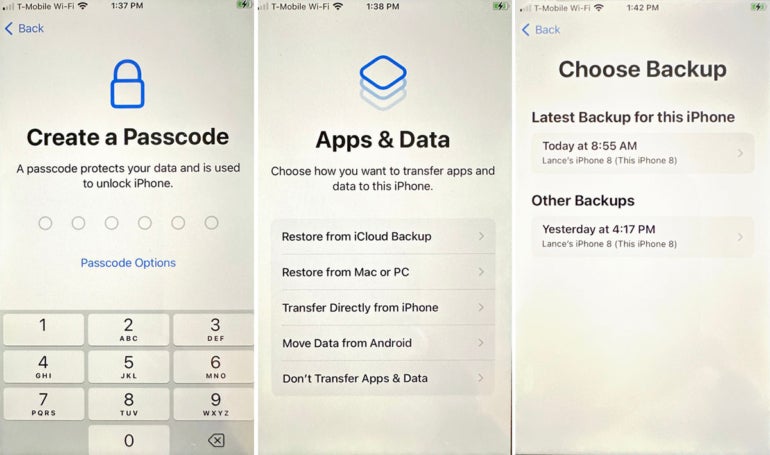
If you don’t have a backup stored in iTunes or Finder but do have one in iCloud, choose the option to set up your device as a new iPhone. You should eventually be asked to create a new passcode.
At some point, an Apps & Data screen will appear with several choices. Select the first one for Restore from iCloud Backup and sign in with your account. Choose the iCloud backup you wish to use. Tap Continue and then wait for the backup to be restored. When done, your iPhone will automatically restart. Sign in with the new passcode, and you’ll be able to use your phone again (Figure G).
Figure G
For all the latest Technology News Click Here
For the latest news and updates, follow us on Google News.
