How to take screenshots in Windows 11
Knowing how to take a screenshot in Windows 11 is a useful skill to have because it lets you instantly grab a picture of anything you’re looking at on your PC and save it to your hard drive.
You can capture a screenshot of your whole desktop or just a specific section of it, which is a great way to share pictures and information with everyone from tech support to your friends on Discord.
To help you quickly dial in your screen-shotting skills, we’ve put together this illustrated guide to show you how to screenshot in Windows 11.
How to screenshot in Windows 11
Before we begin, note that this guide is specifically for folks using Windows 11. If you’re using Windows 10, our guide to how to screenshot on Windows 10 has more specific tips for you — though the method outlined below should work on Windows 10 as well!
1. Open Snipping Tool

(Image: © Future)
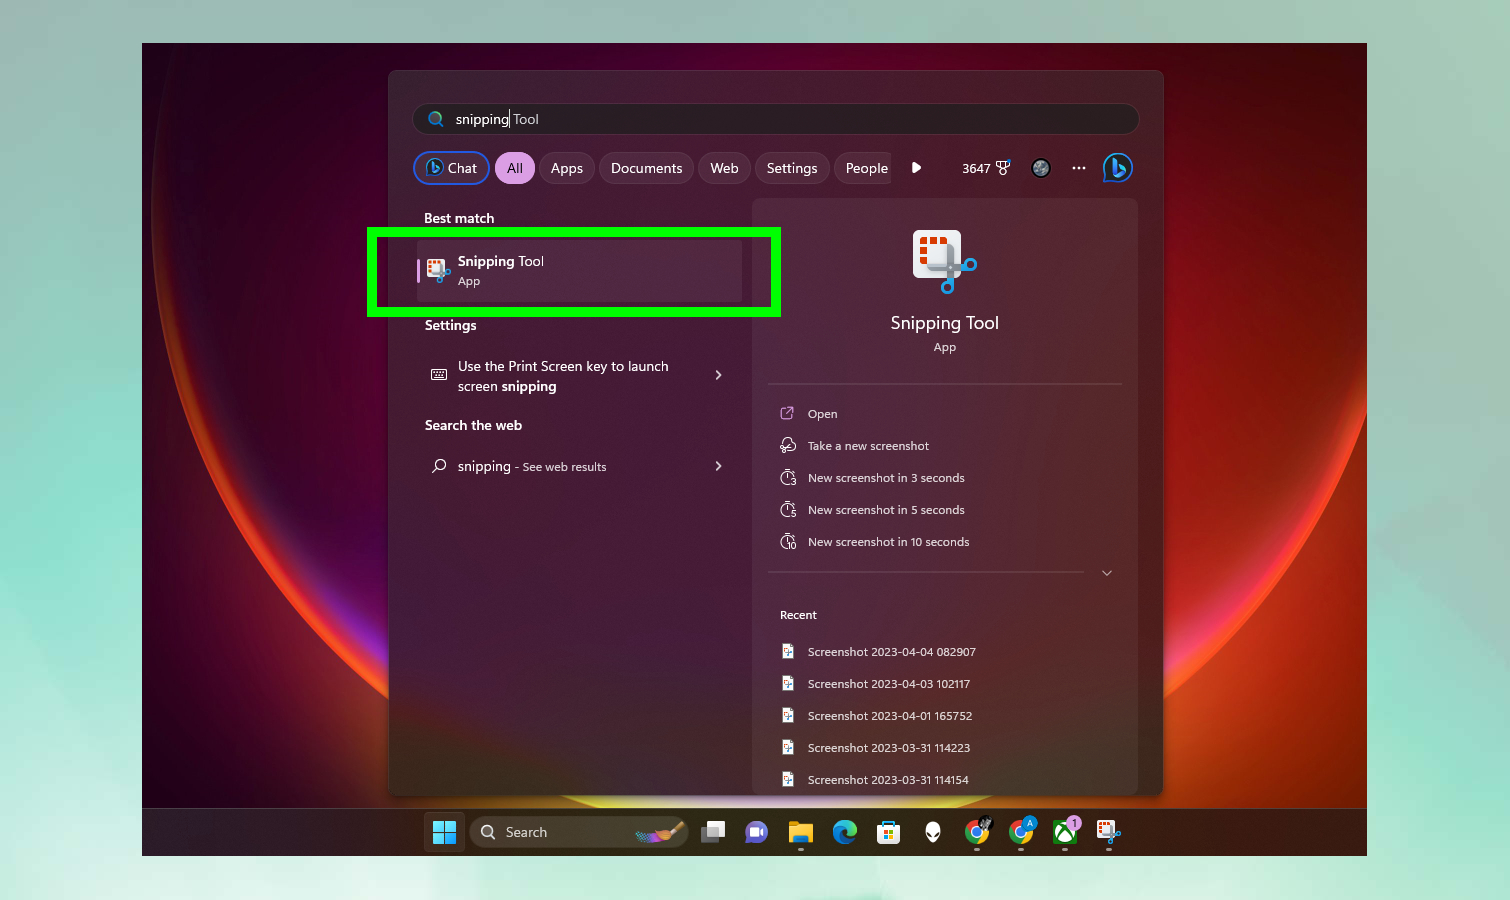
Open the Snipping Tool to quickly get to grips with a tool you can use to capture screenshots in all sorts of ways. The quickest way to find it is to Press the Start button and type snipping tool, then press Enter when it’s highlighted in the Start menu search results.
You can also click the icon or navigate to it by clicking the “All Apps” button in the Start menu and scrolling down to the “S” section.
2. Click New to take a new screenshot

(Image: © Future)
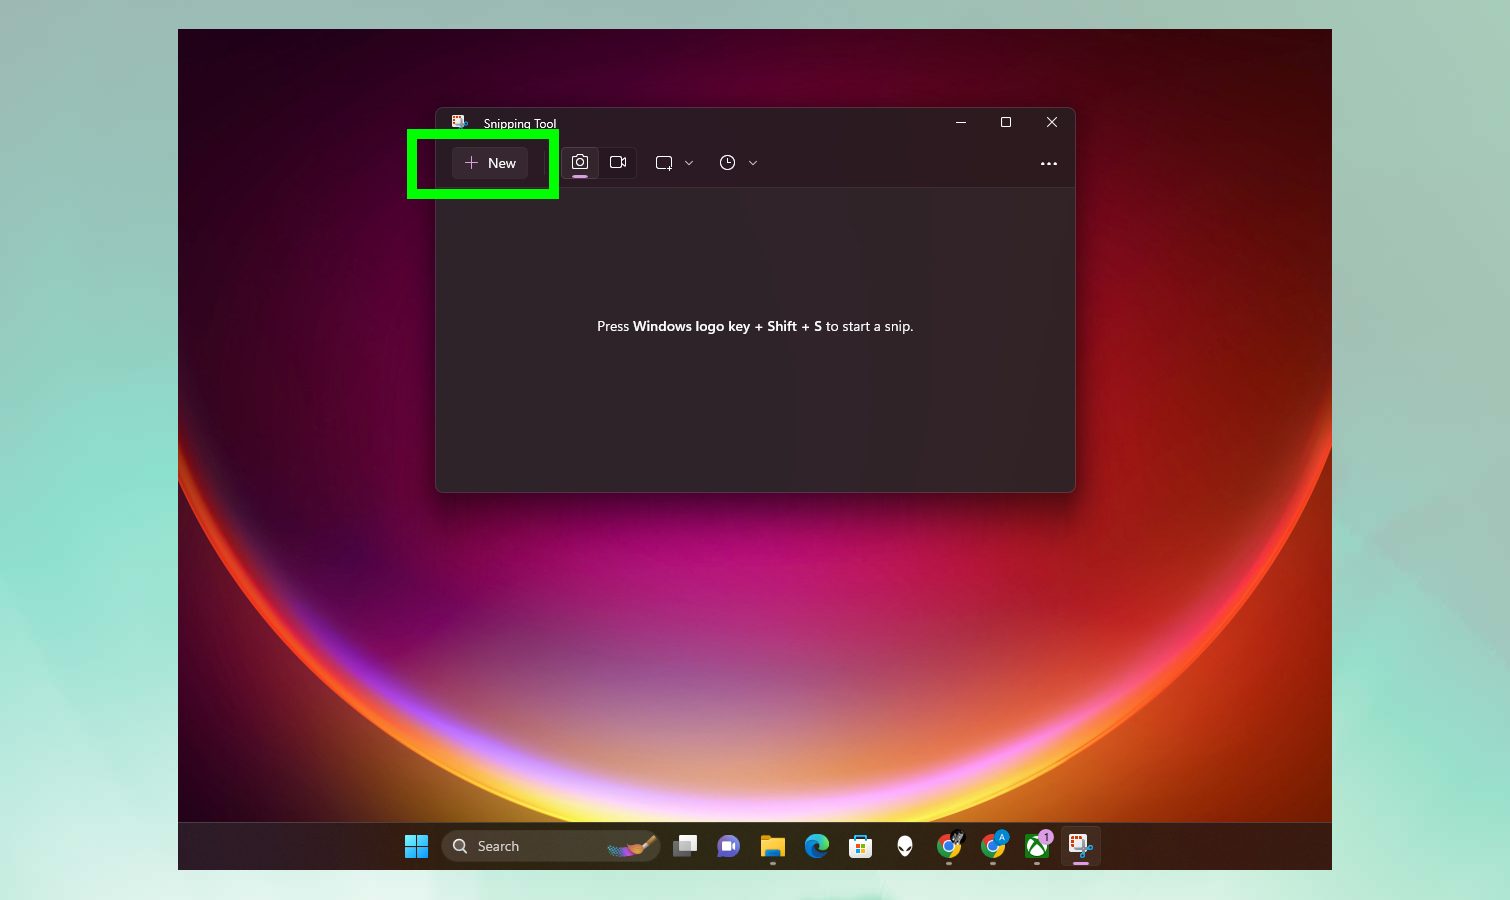
Now that you’ve opened the Windows 11 Snipping Tool, you can click the button that reads + New to start a new screenshot. By default your screen will darken and a small menu will extend down from the top edge of your display with four symbols denoting different kinds of screenshots, as well as a big X button you can hit to back out.
Before we move on to actually taking a screenshot using this tool, stop and look at all the options the Snipping Tool gives you for recording your desktop. You can switch between capturing screenshots or video of your Windows 11 desktop by changing the toggle between camera and video. You can also set a timer on your screenshot, so it starts 3 – 10 seconds after you click “New.” This gives you time to stage things. Lastly, you can configure Snipping Tool settings by clicking the three-dot menu in the top-right corner.
3. Pick the parameters of your screenshot

(Image: © Future)
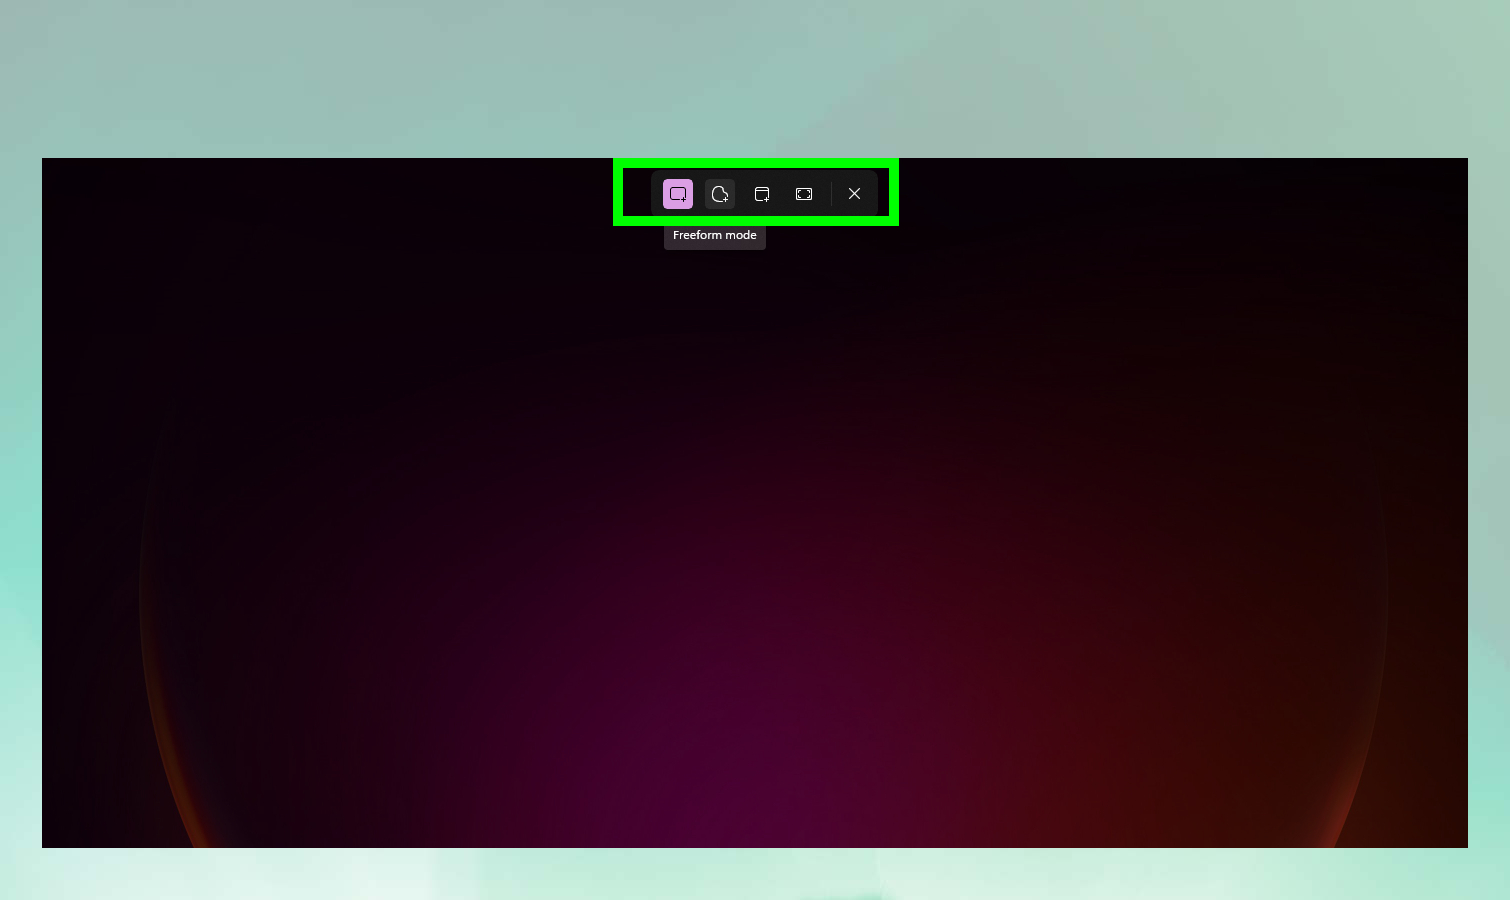
Once you’ve clicked New and started a screenshot, you can change the parameters of your screenshot with the menu at the top of the screen. By default you should start out capturing a rectangular screenshot (that is, you can drag an adjustable rectangle across the screen and capture a screenshot of whatever’s within), a freeform screenshot you draw yourself, a screenshot of a specific window or a screenshot of the entire screen.
These options are all useful in their own way, but in general you’ll likely want to stick with either rectangular screenshots (for snapping pictures of specific things) and full-screen screenshots (when you just want a record of everything you’re looking at).
Pro Tip: You can skip what came before and instantly launch this Screenshot Tool at any time by pressing the Windows key + Shift + S.
4. Edit it in Snipping Tool

(Image: © Future)
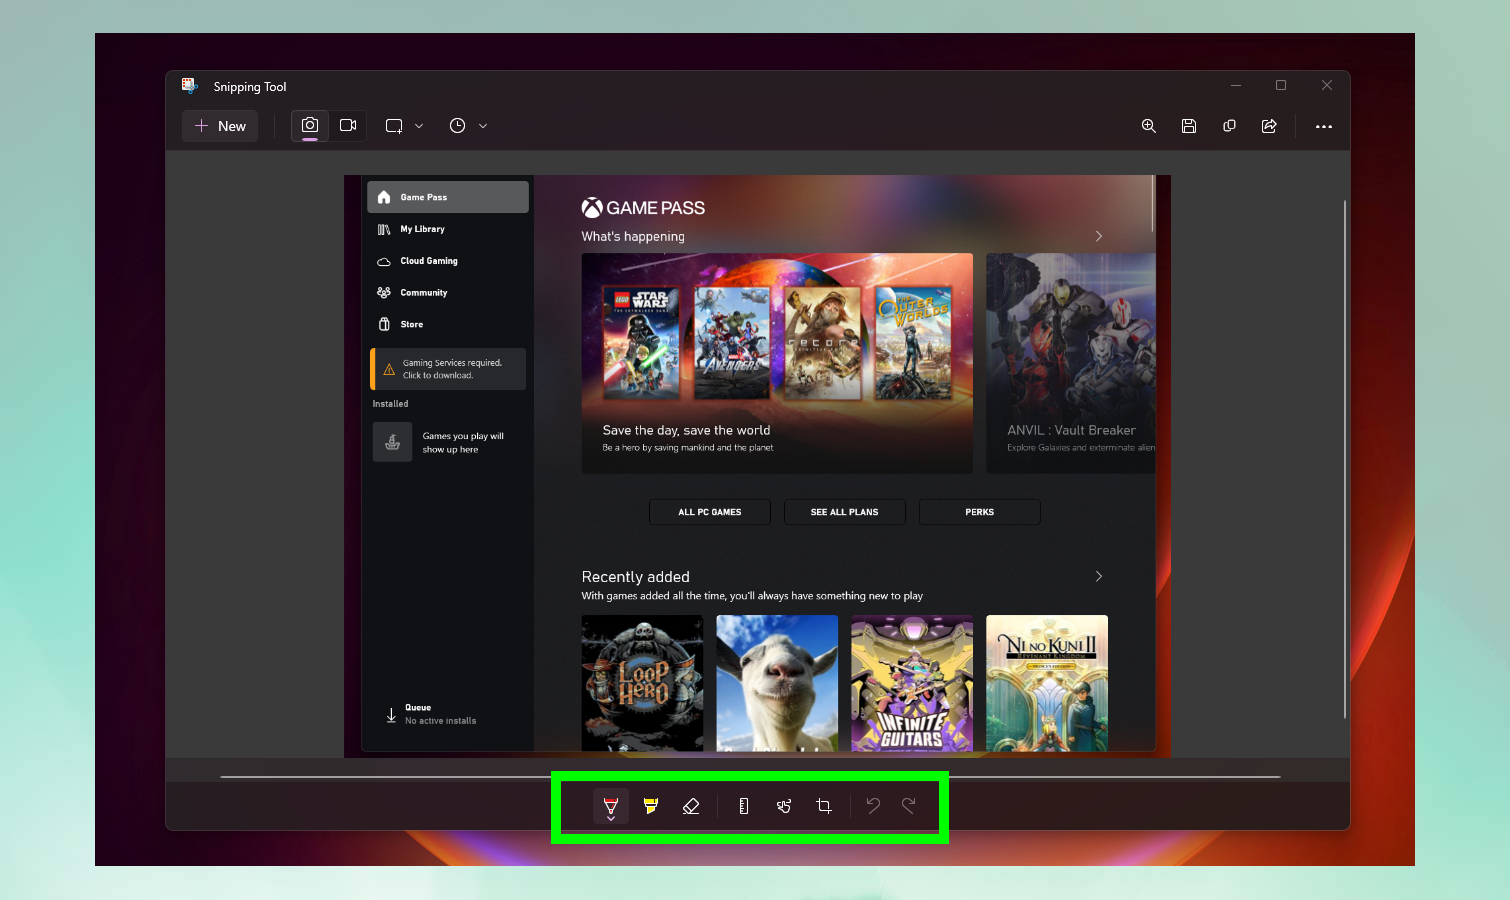
Once you’ve captured a screenshot you will see a notification pop up that your screenshot has been saved. If Snipping Tool doesn’t move it to the top of your screen automatically, clicking on Snipping Tool should show you the screenshot you just captured.
You can now use Snipping Tool’s built-in editing tools to mark up your screenshot by drawing lines, highlighting things, cropping it or (if you happen to have a touch device) writing notes on it. To save your screenshot, make sure to click the floppy disk icon in the top-right corner!
There you go, now you’re well-equipped to snap and share screenshots and videos of your Windows 11 desktop with anyone you like.
For more Windows 11 tips, be sure to read our article on how to move the taskbar in Windows 11. Also, check out how to get iMessages on Windows 11 via Phone Link for iPhone, and how to enable Windows 11’s built-in camera privacy warning.
More from Tom’s Guide
For all the latest Technology News Click Here
For the latest news and updates, follow us on Google News.
